Add Company Contact Details, Upload Logo, and Set Welcome Banner
The Company Details page under the SETTINGS menu of the ISA web portal allows the administrator to add contact information, upload a logo, and set a welcome banner.
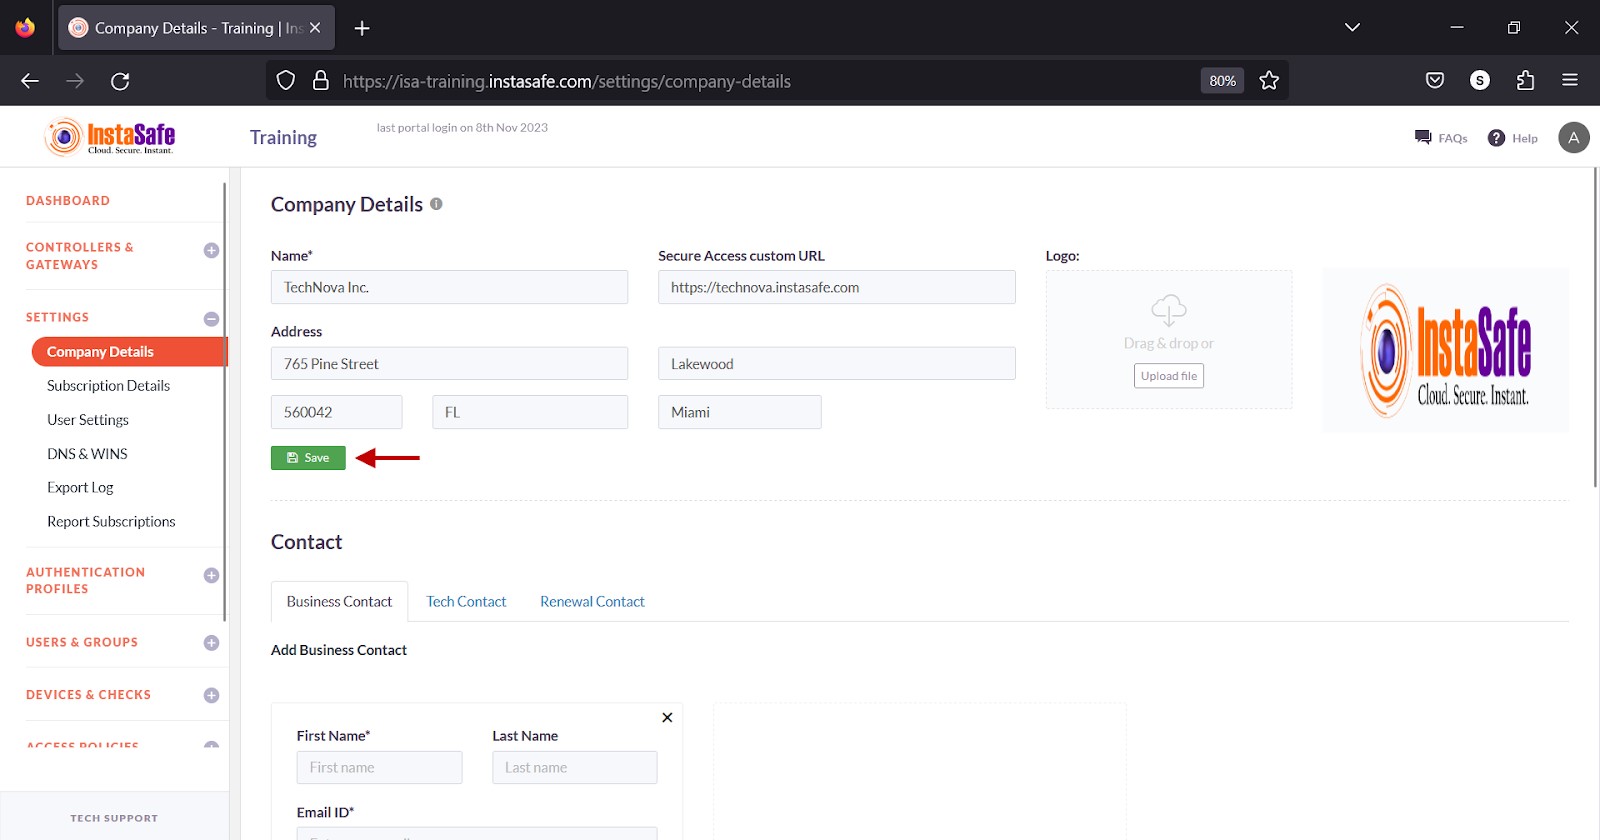
Add Company Details
- Navigate to the Company Details page.
- Under Company Details, enter the following information:
- Name – Enter the name of your company
- Secure Access URL – Enter the URL assigned by InstaSafe
- Address – Enter the corporate address of your company.
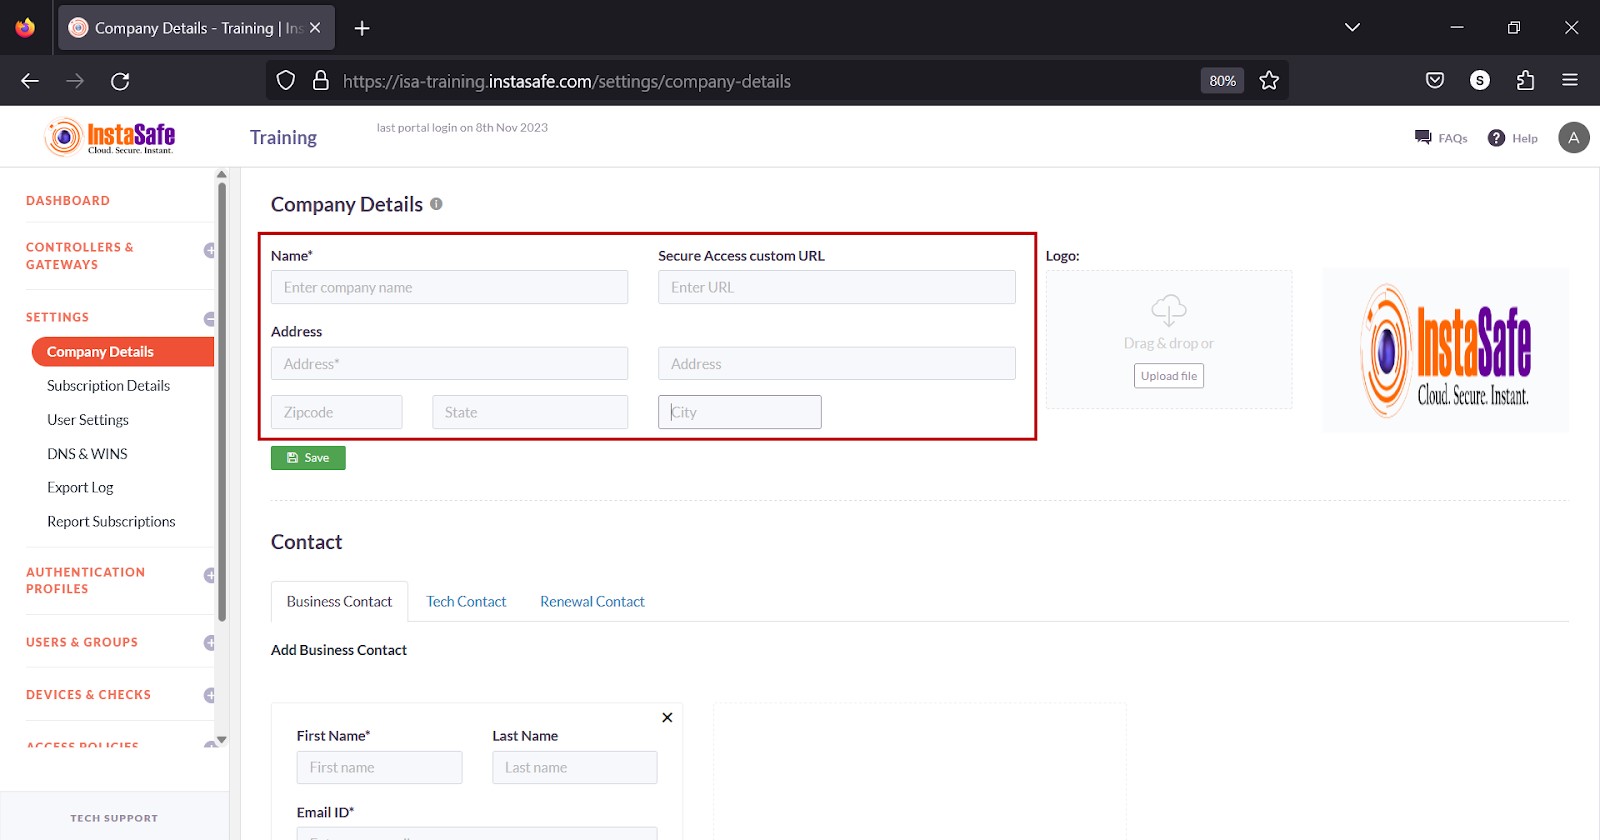
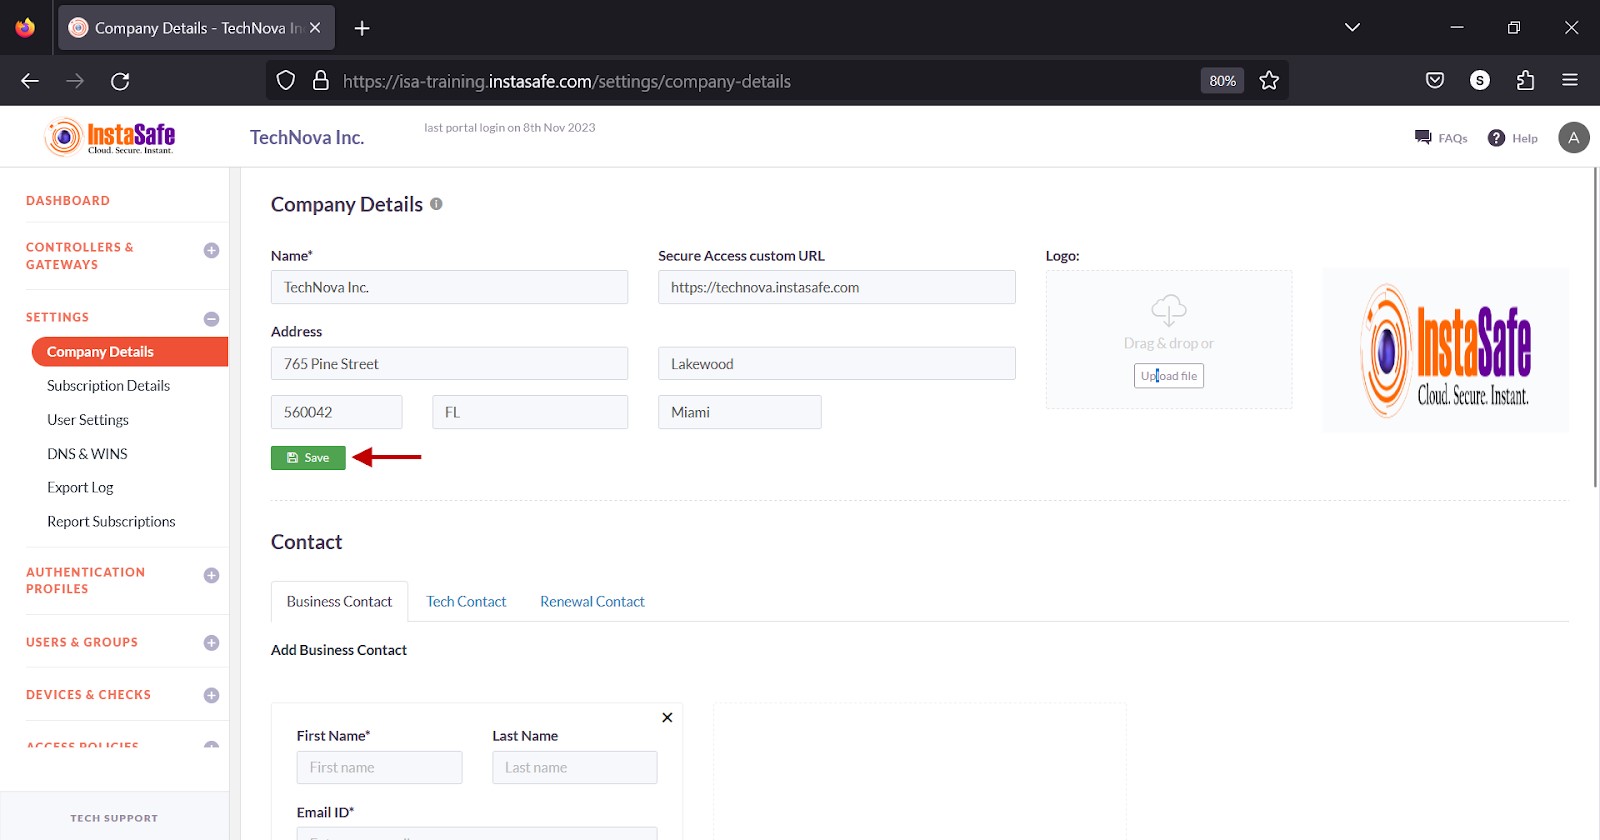
- Click Save to save the information.
Upload Company Logo
The Company Details fields must be filled before uploading the logo.
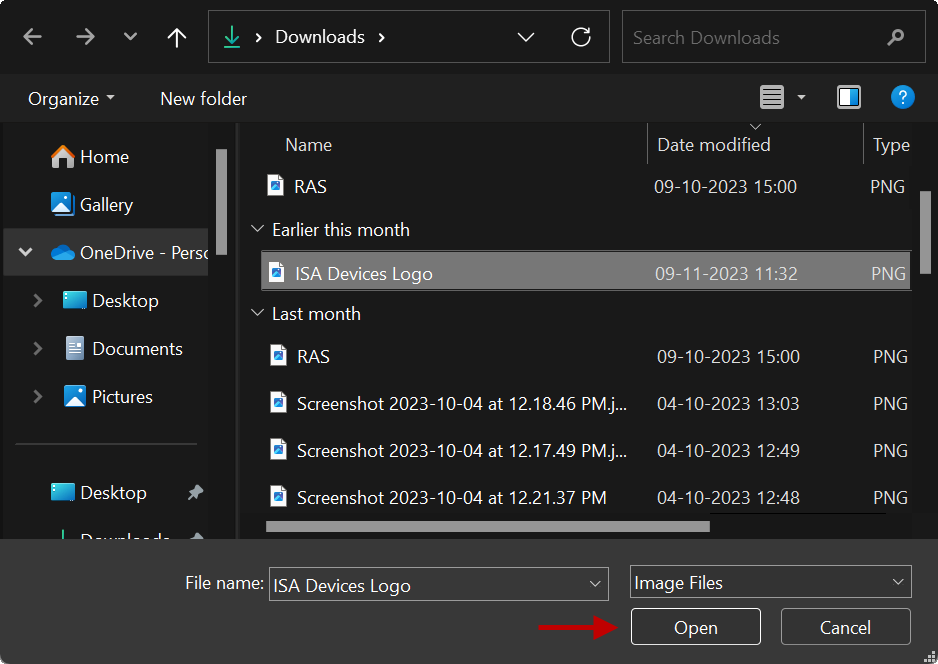
- Click Upload File under Logo. The file format must be JPEG or PNG.
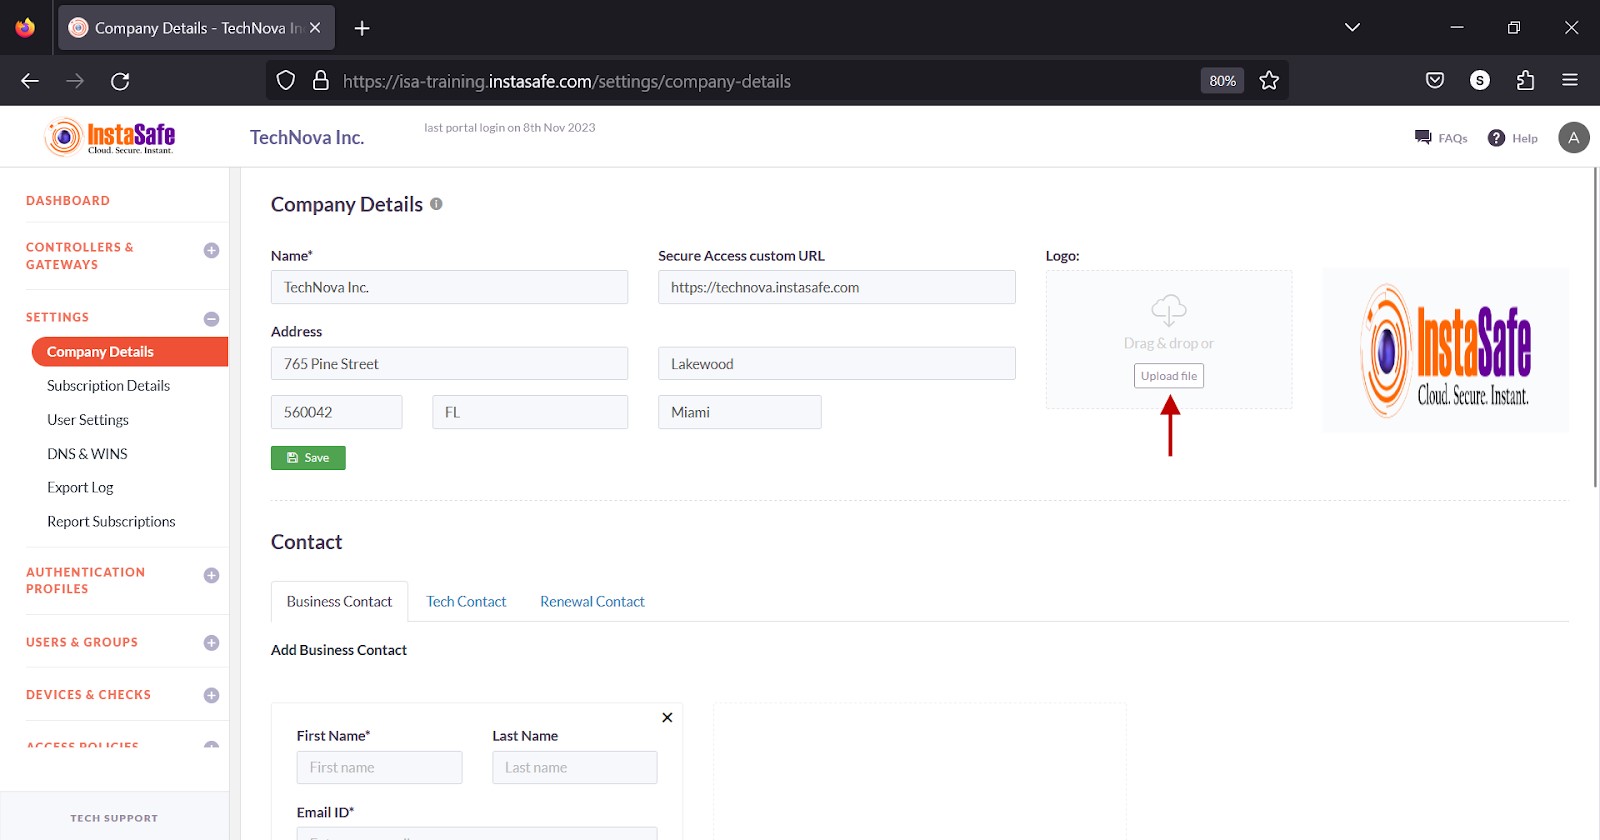
- Select the image file of the logo.
- Click Save.
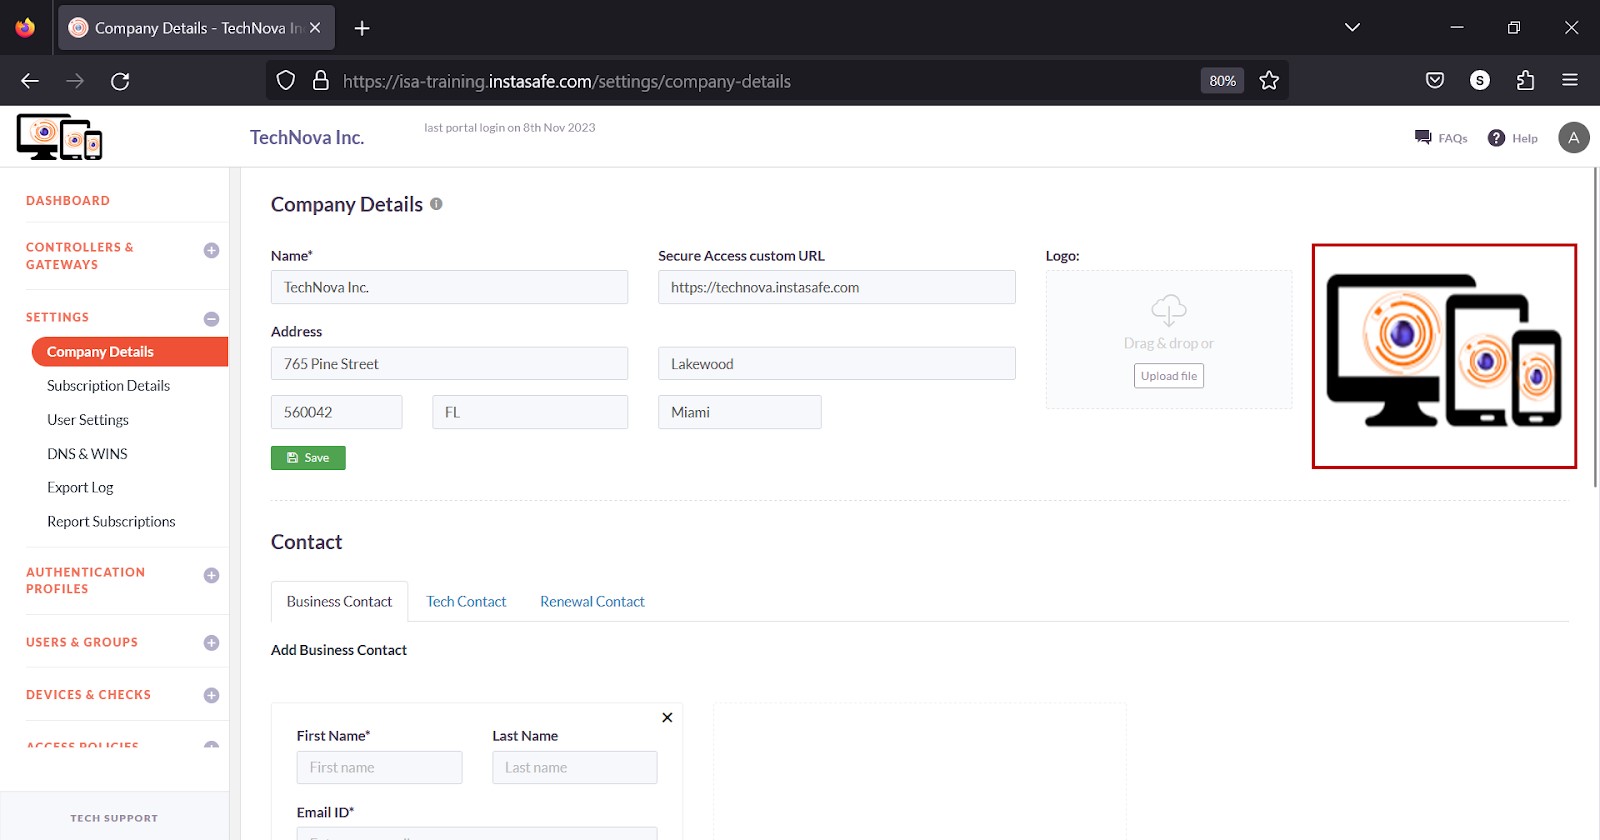
- When the upload is complete, the new image is displayed on the far right.
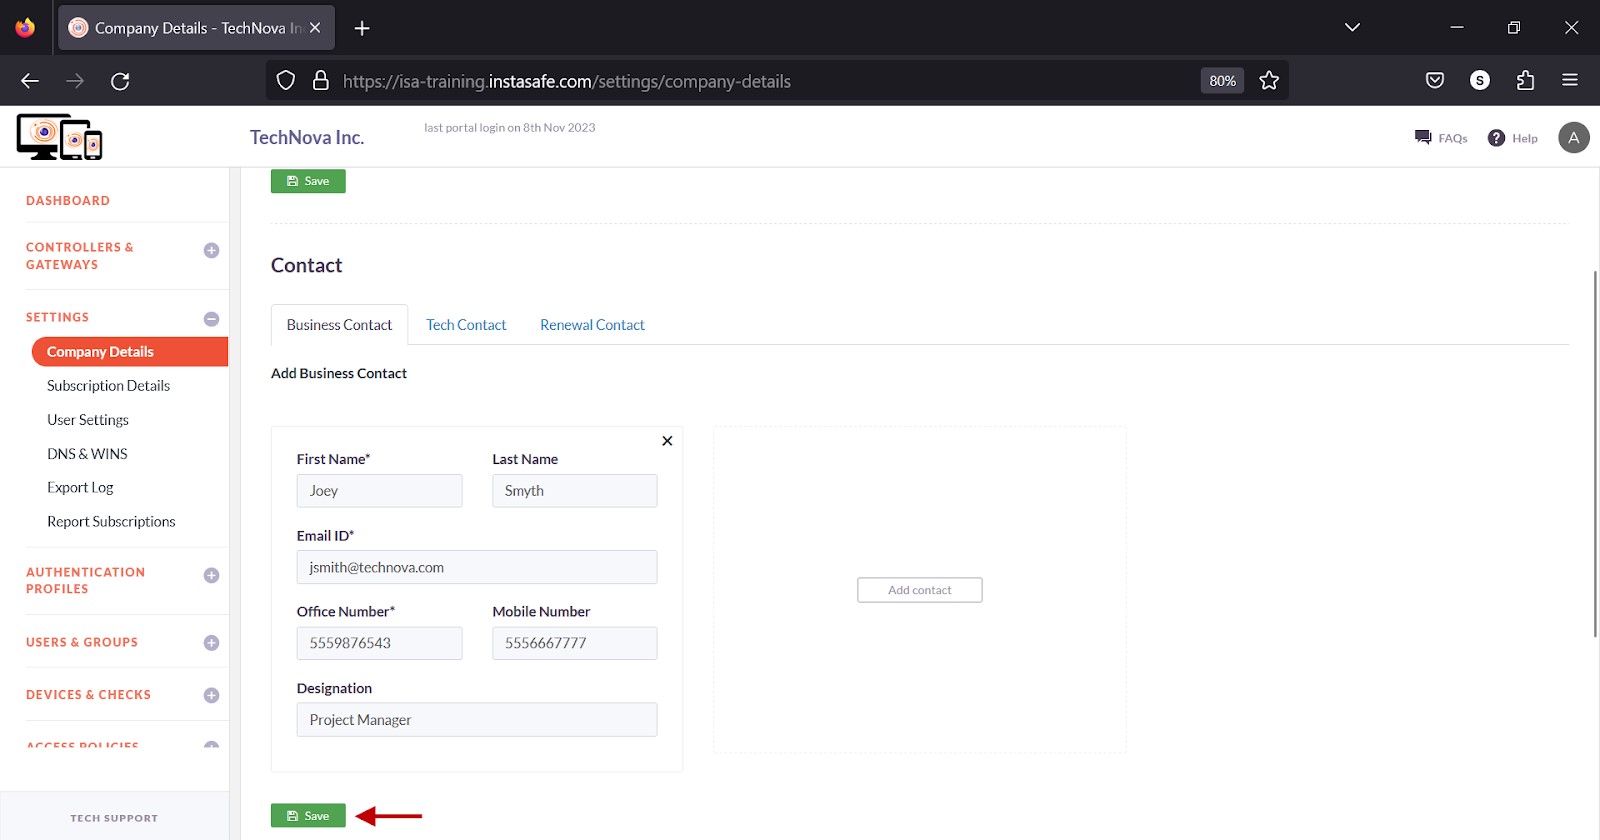
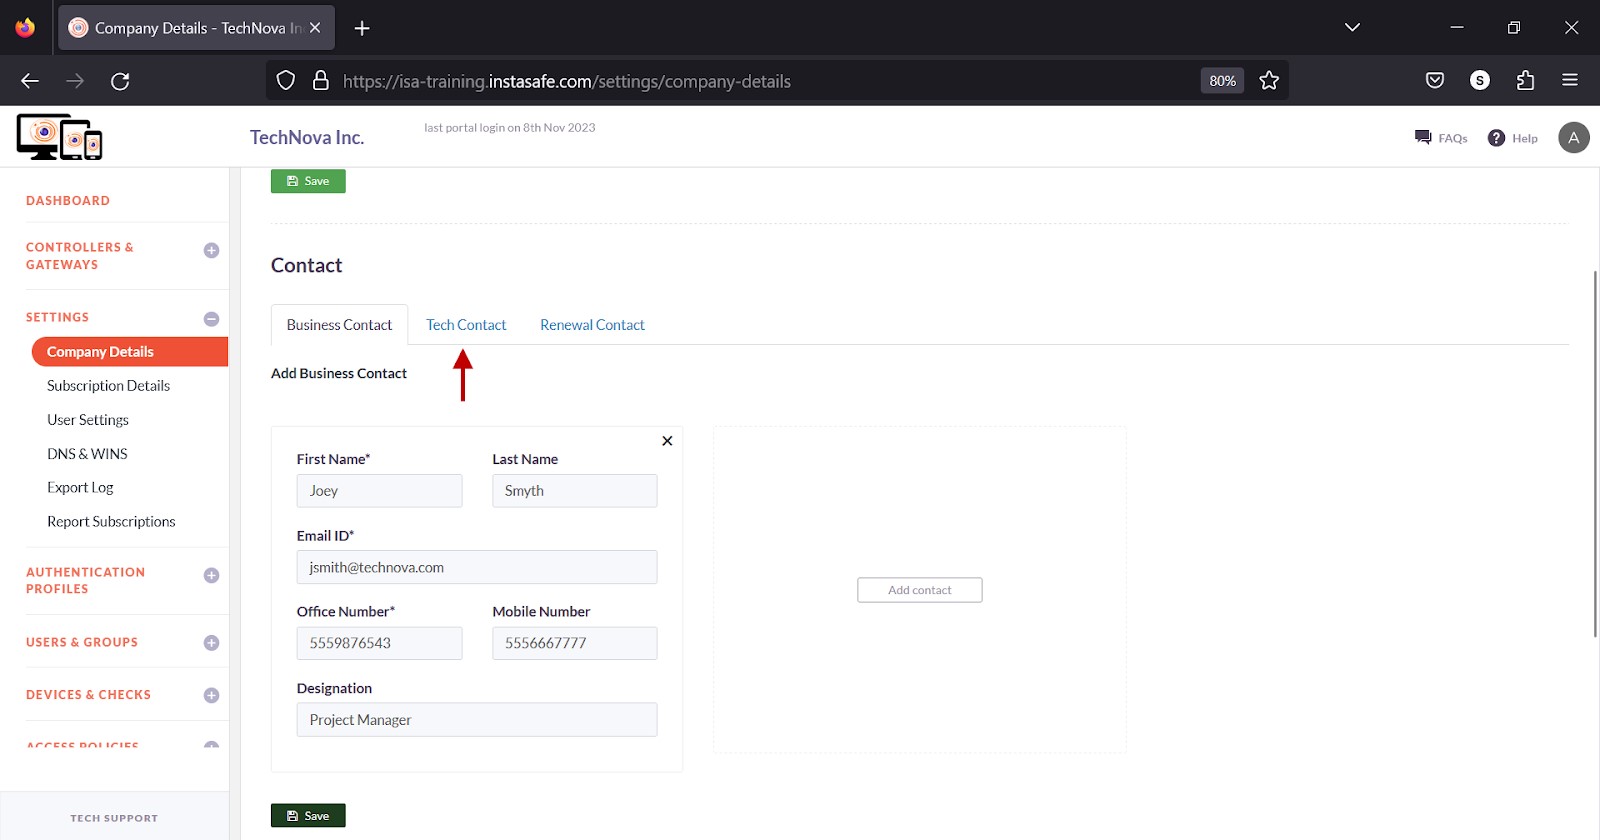
Add Business Contact
On the Business Contact tab under Contact, enter the name, address, and telephone numbers of the primary business contact of your company.
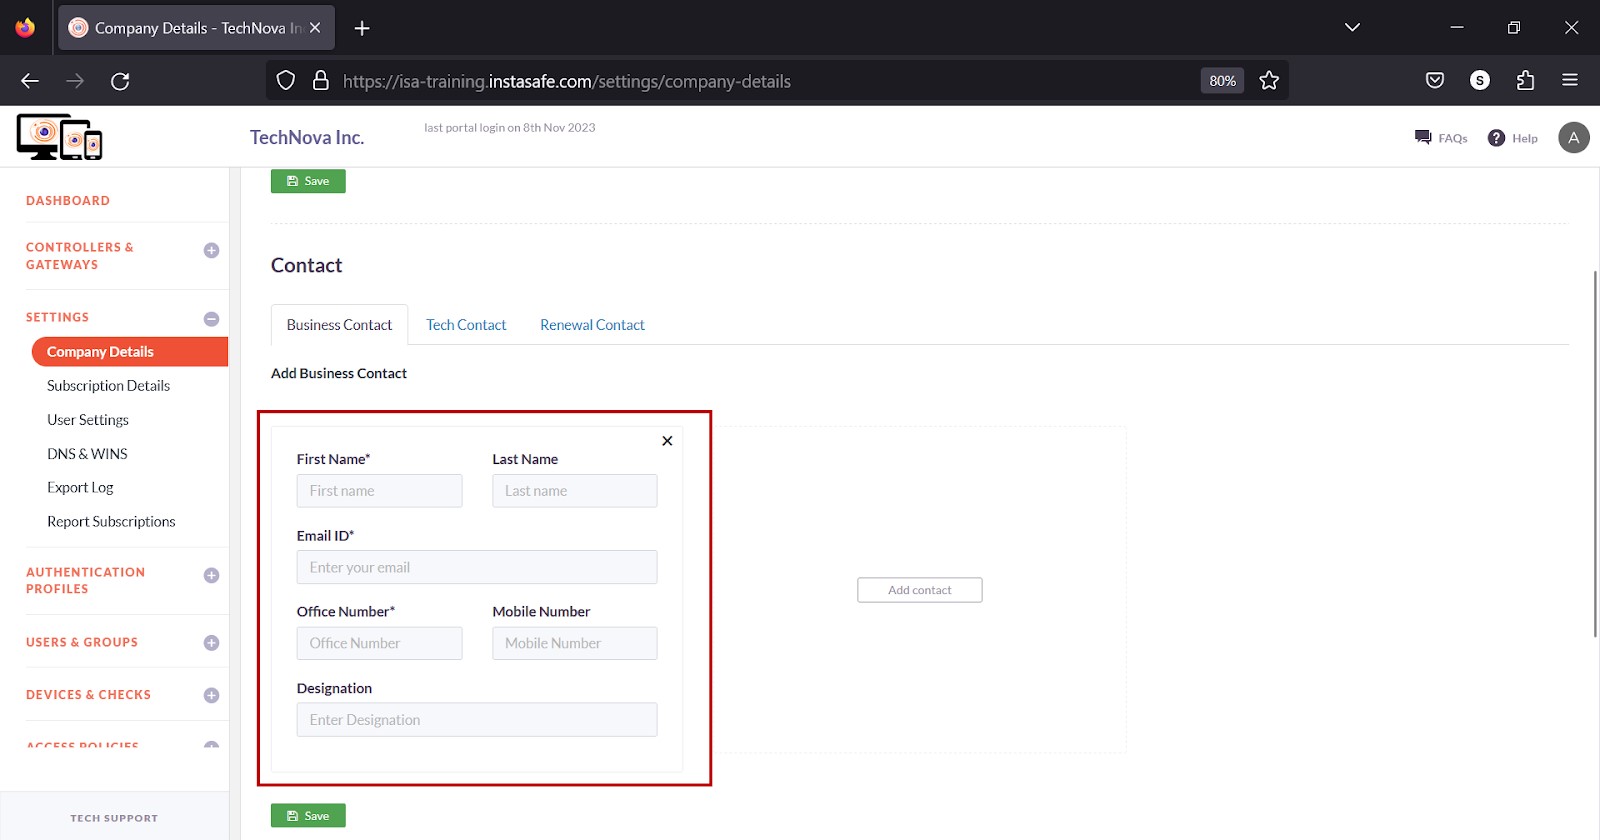
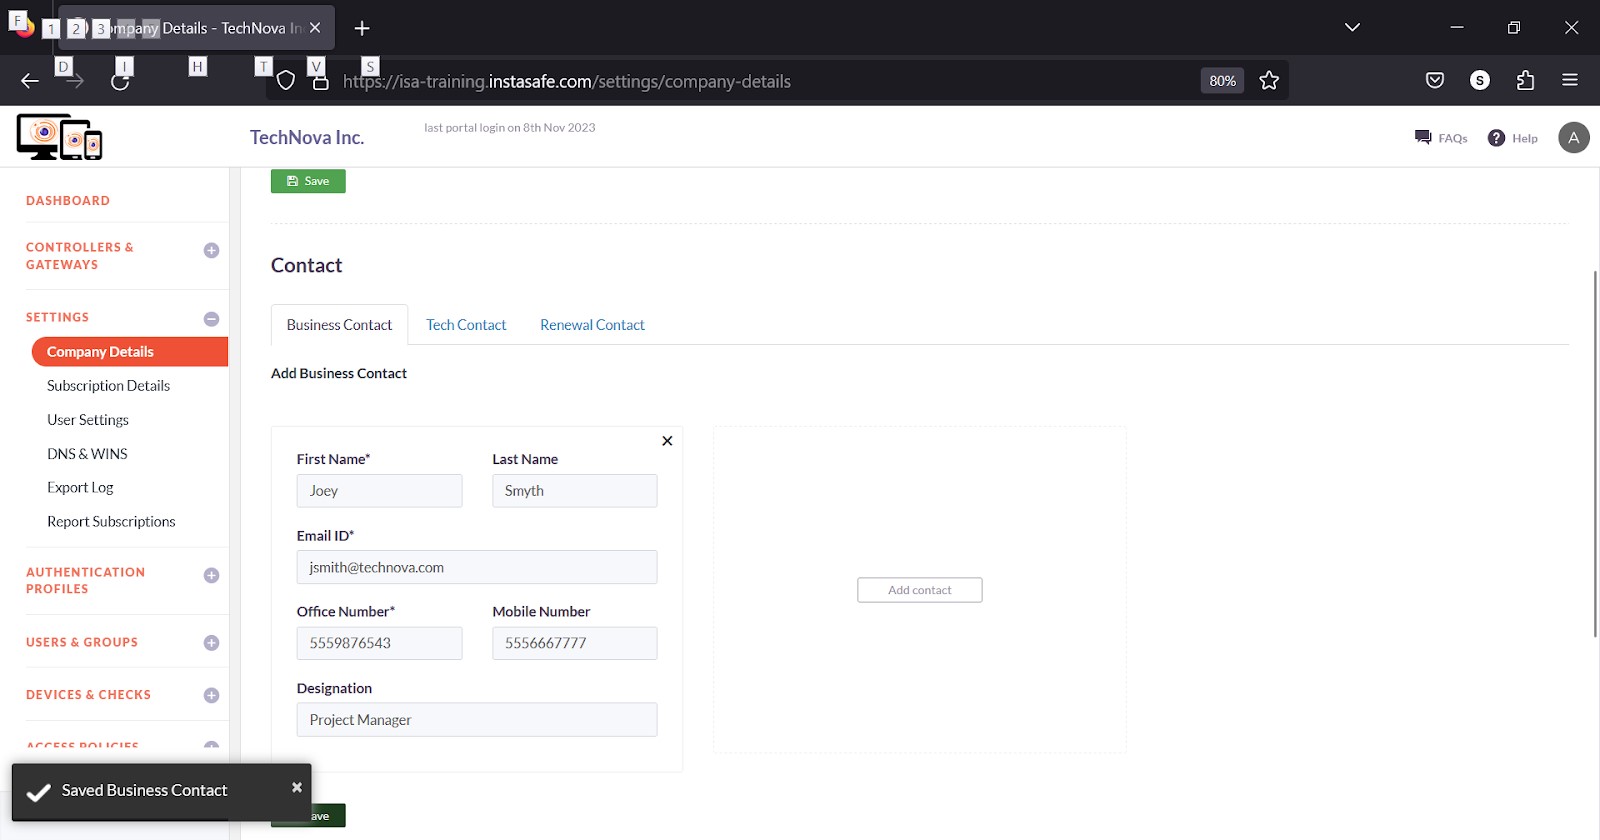
- Click Save
- The Saved Business Contact message is displayed on the bottom left of the page.
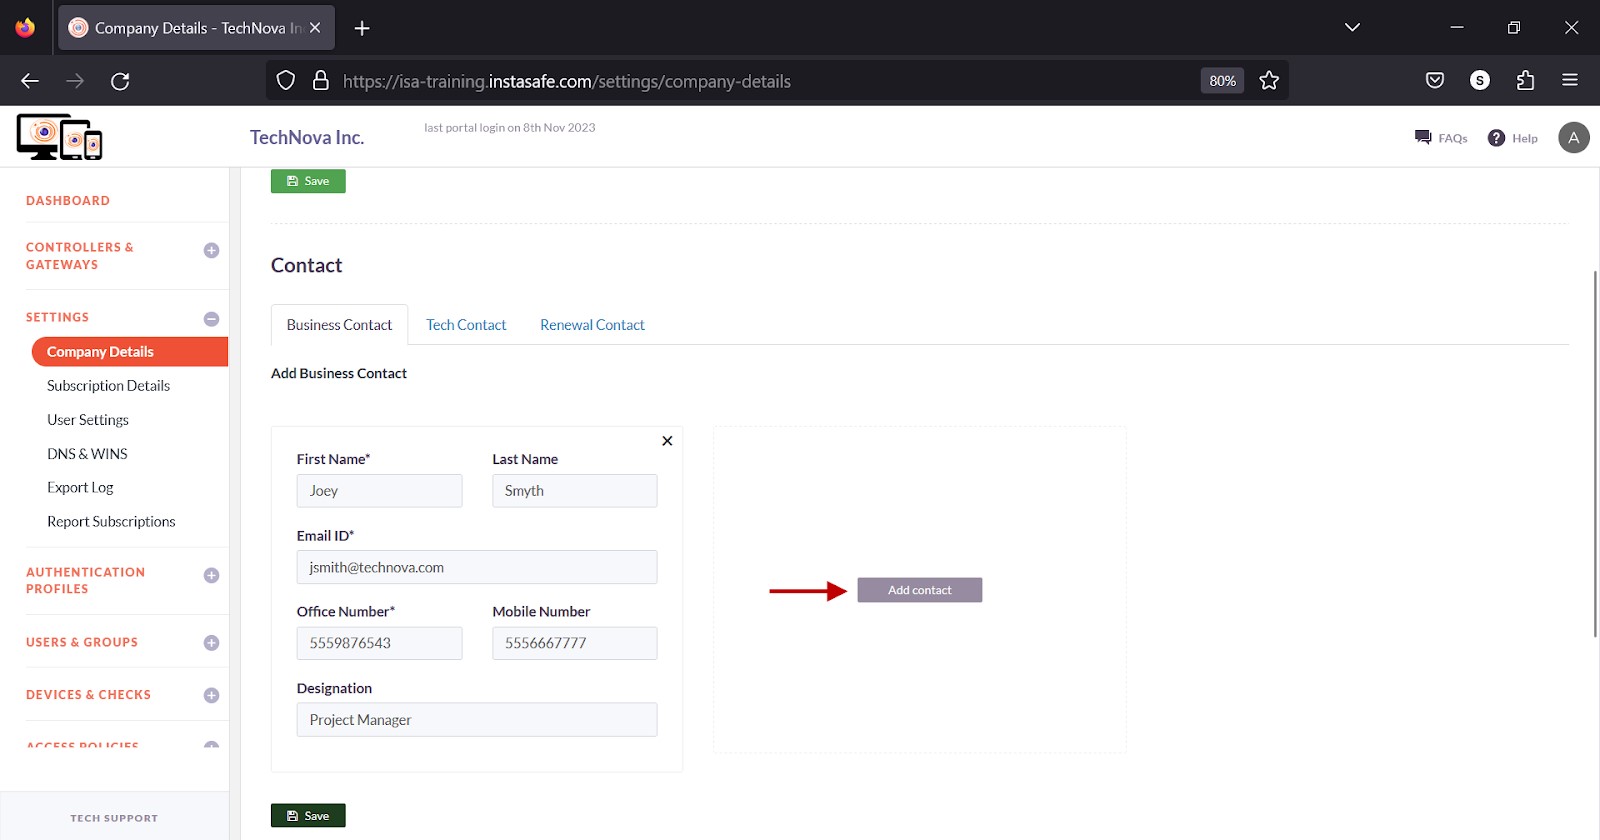
Optionally, click Add Contact on the right to add additional business contacts. A maximum of three business contacts can be added under this tab.
Add Tech Contact
- Click the Tech Contact tab under Contact.
- Enter the name, address, and telephone numbers of the person to be contacted for technical purposes.

- Click Save.
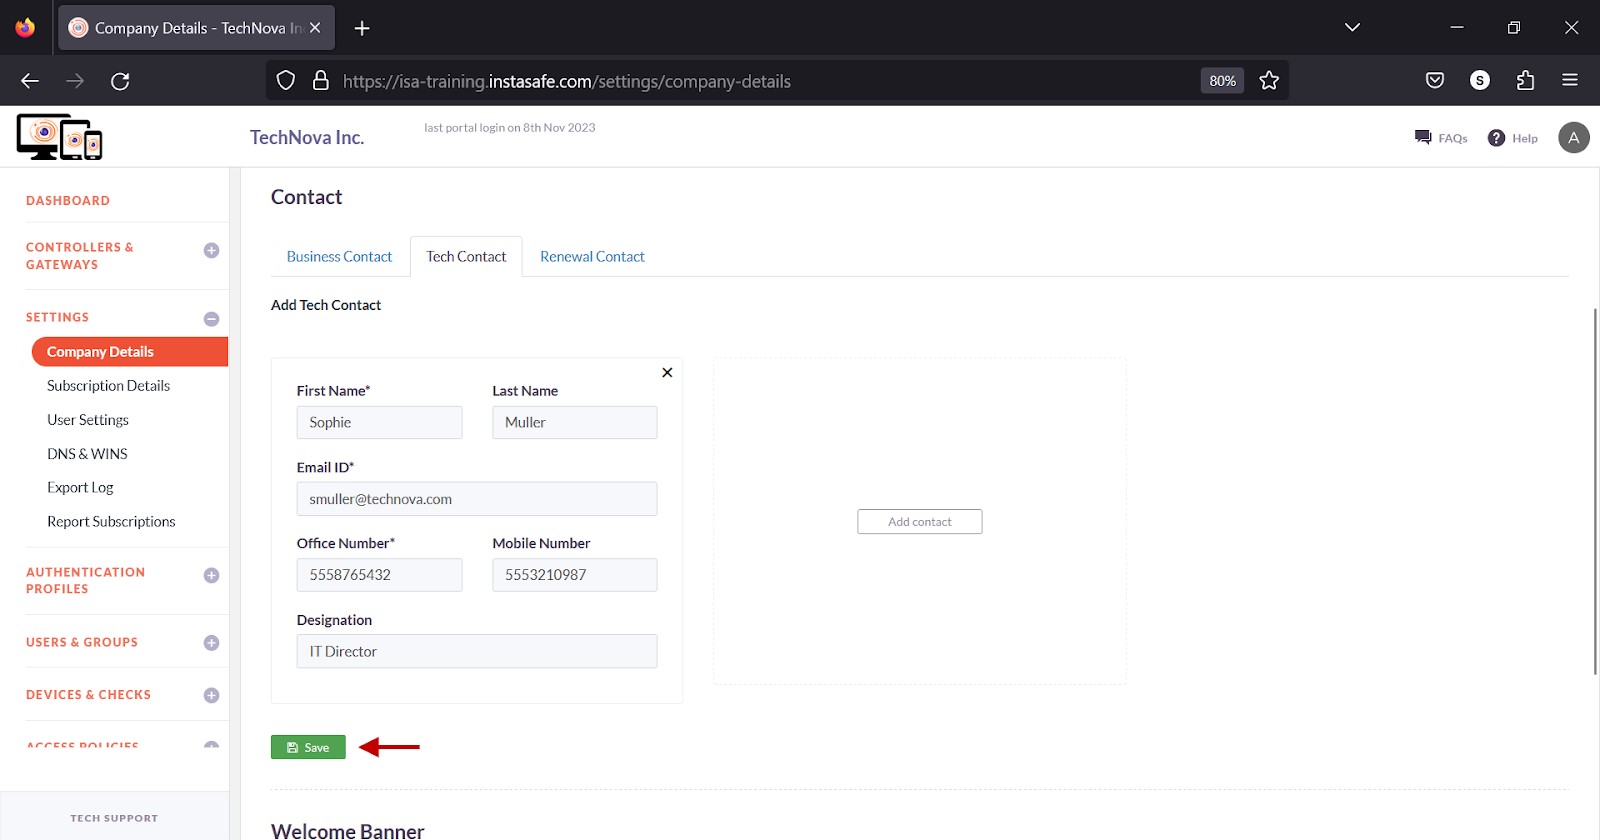
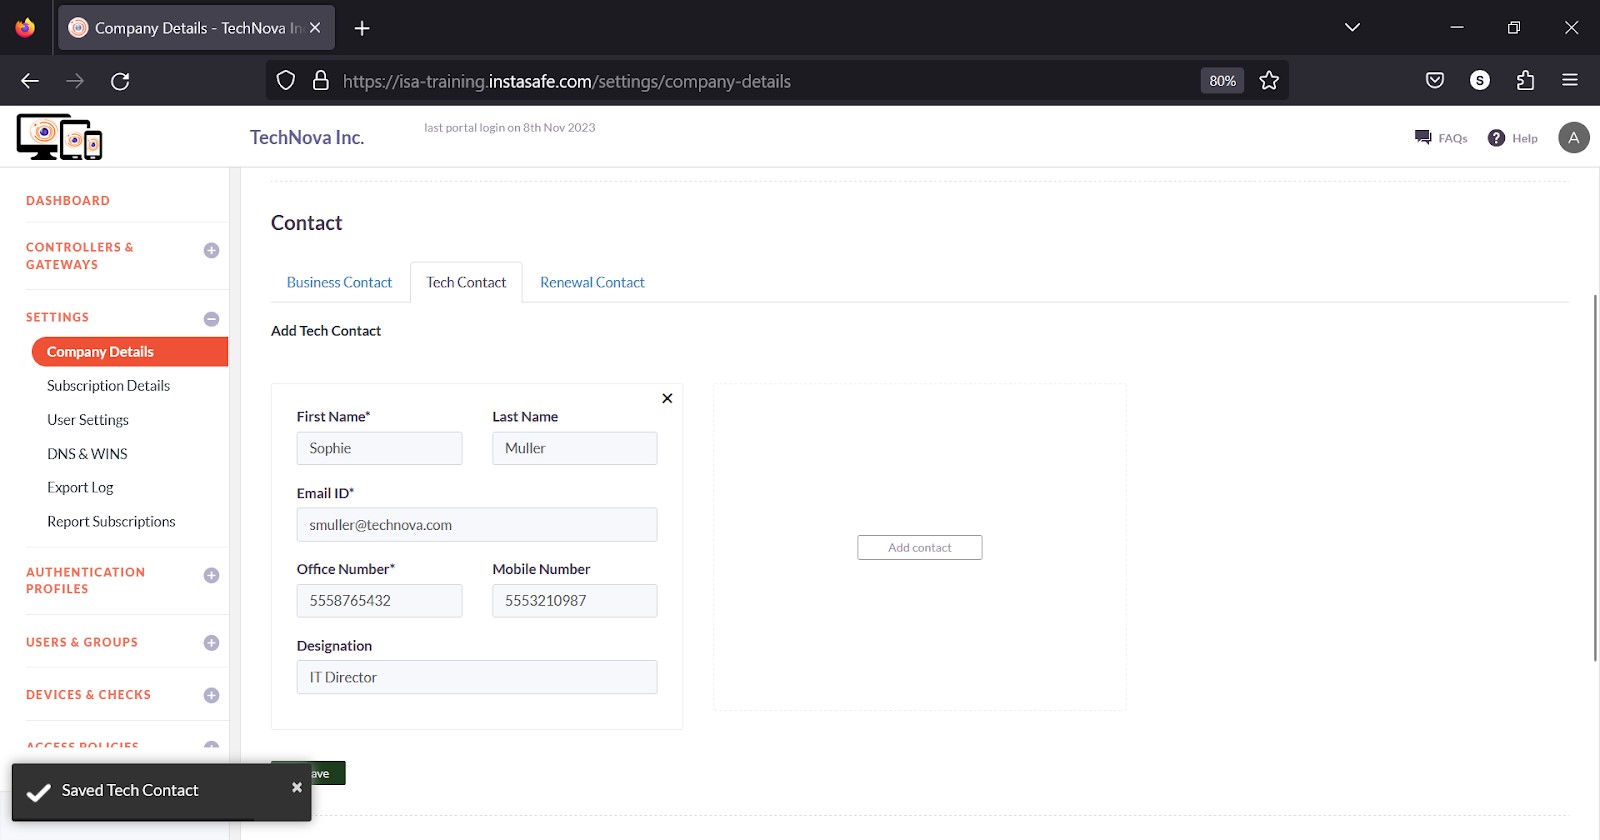
- The Saved Tech Contact message is displayed on the bottom left of the page.
- Optionally, click Add Contact on the right to add additional technical contacts. A maximum of three technical contacts can be added under this tab.

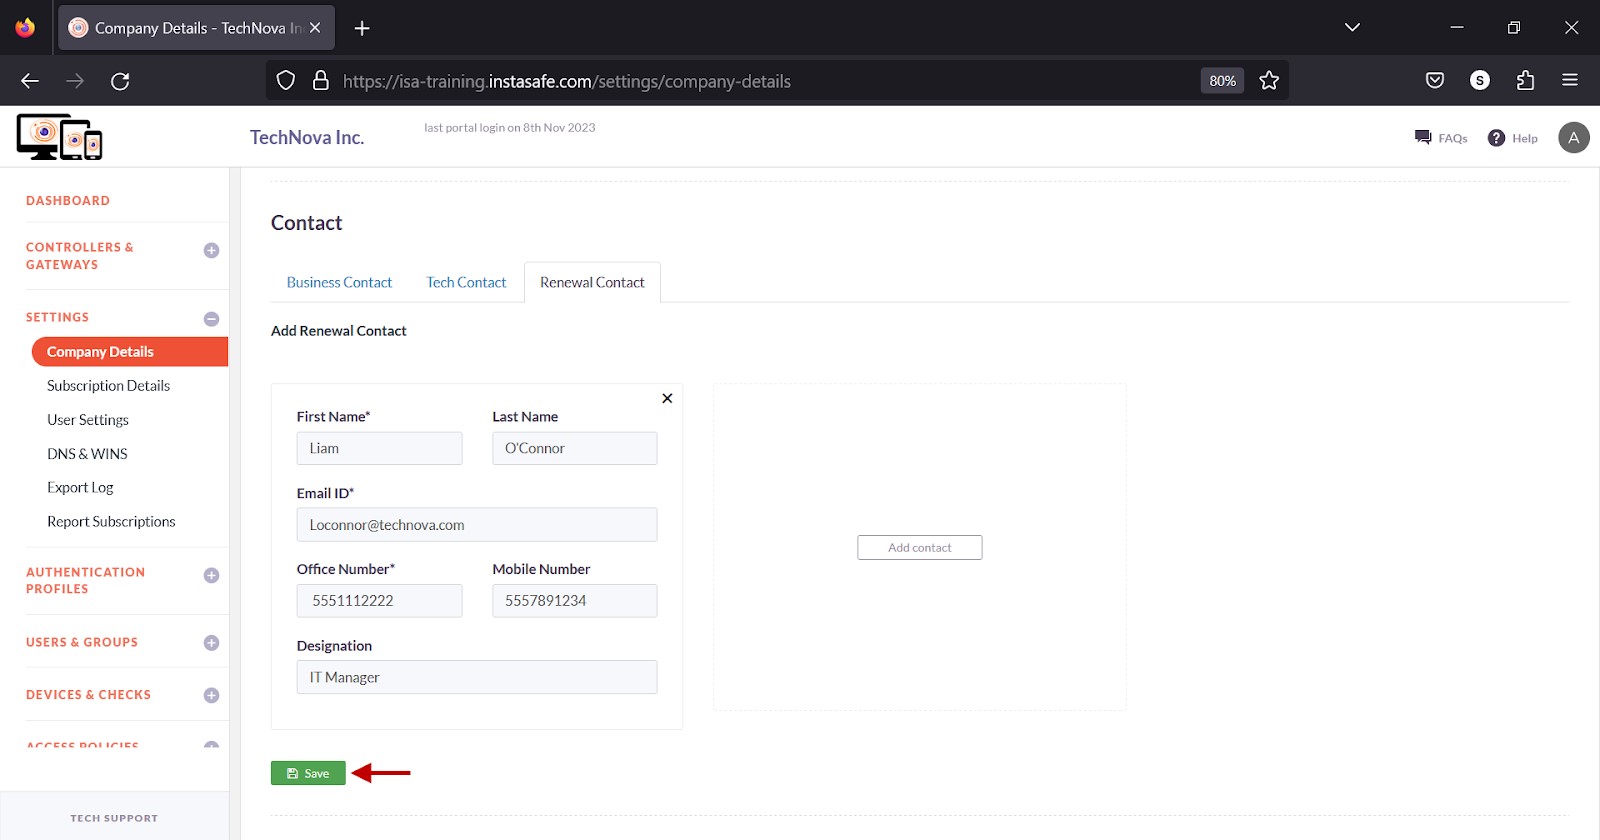
Add Renewal Contact
- Click the Renewal Contact tab under Contact.

- Enter the name, address, and telephone numbers of the person to be contacted for license renewal.
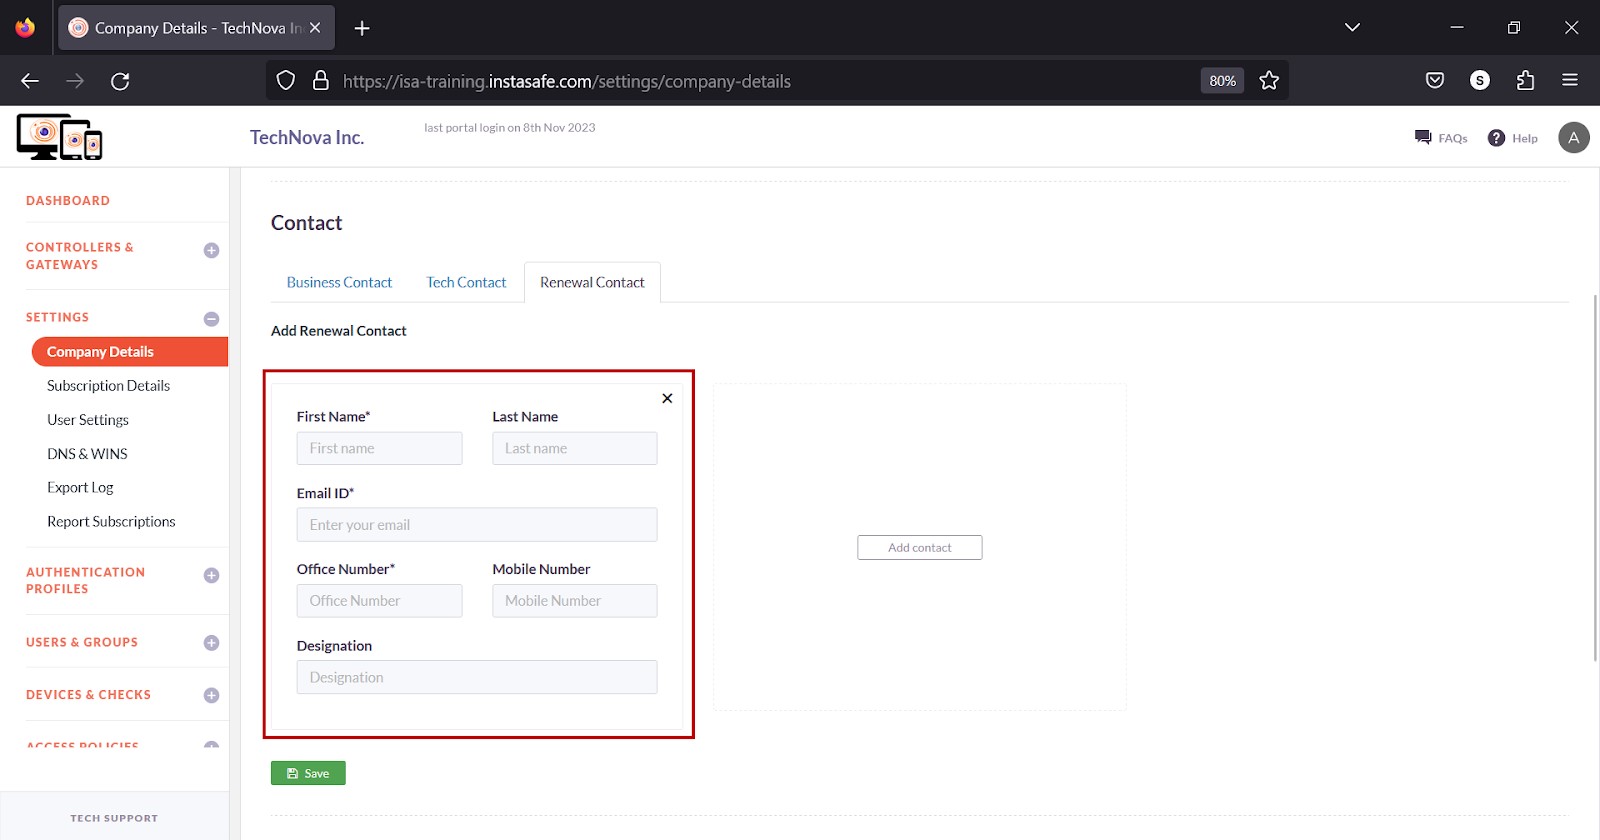
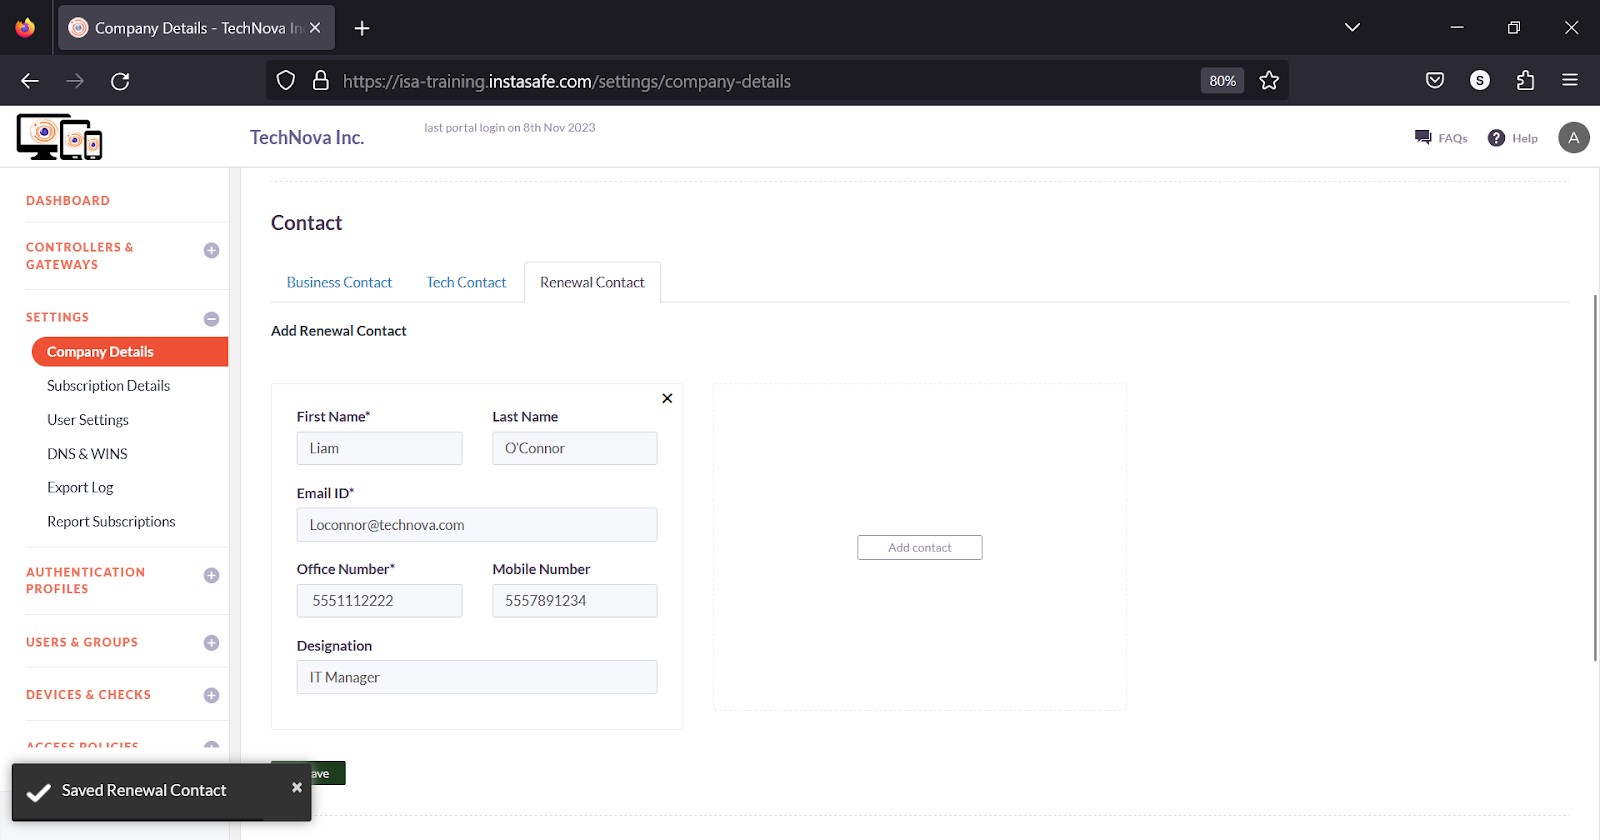
- Click Save.
The Saved Renewal Contact message is displayed on the bottom left of the page.
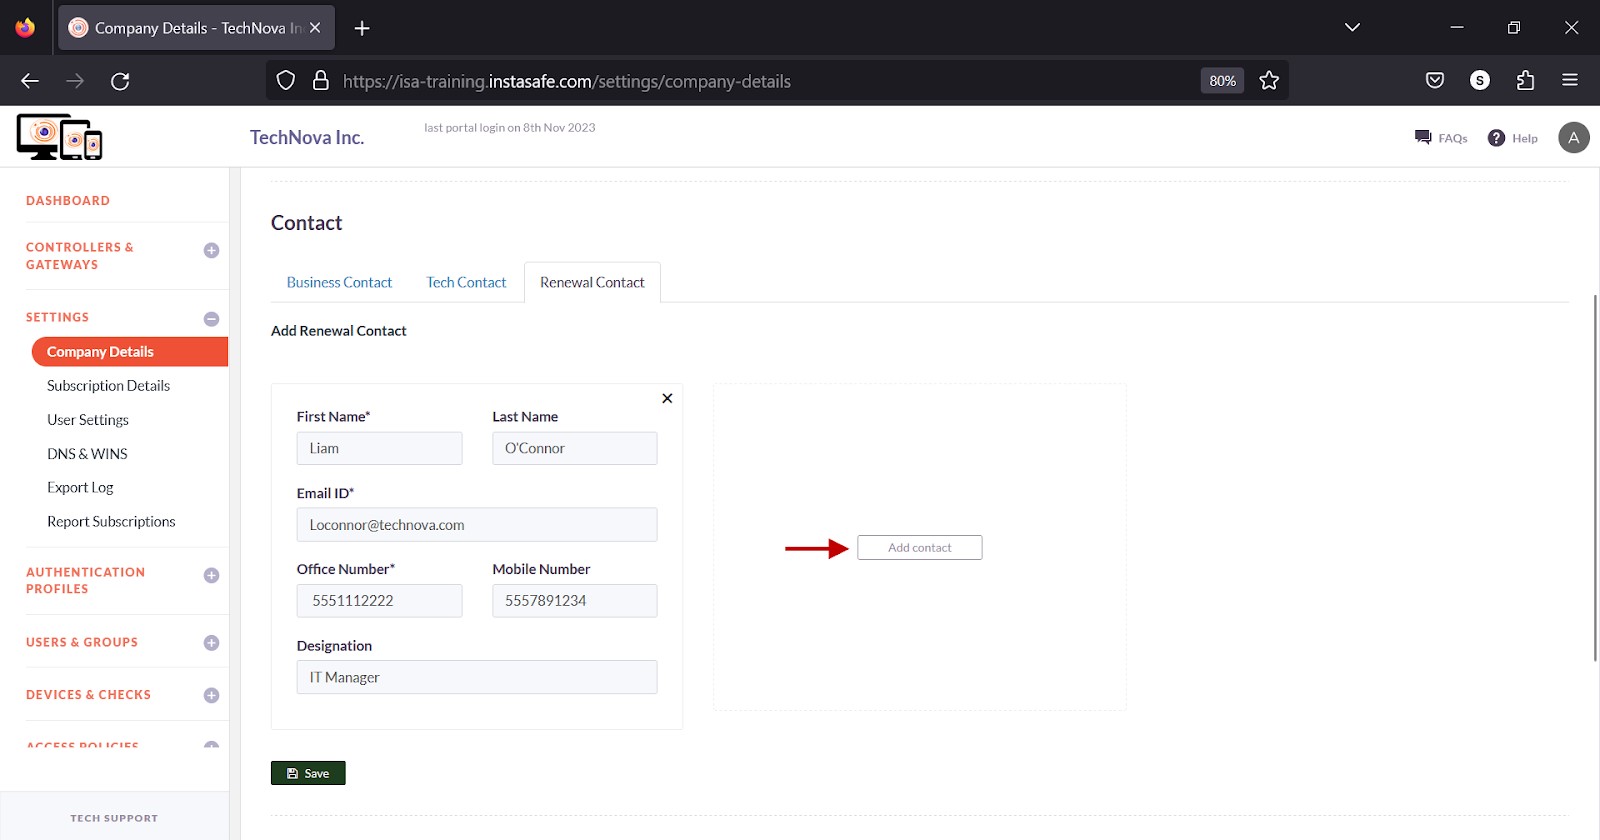
- Optionally, click Add Contact on the right to add additional such contacts. A maximum of three contacts can be added under this tab.
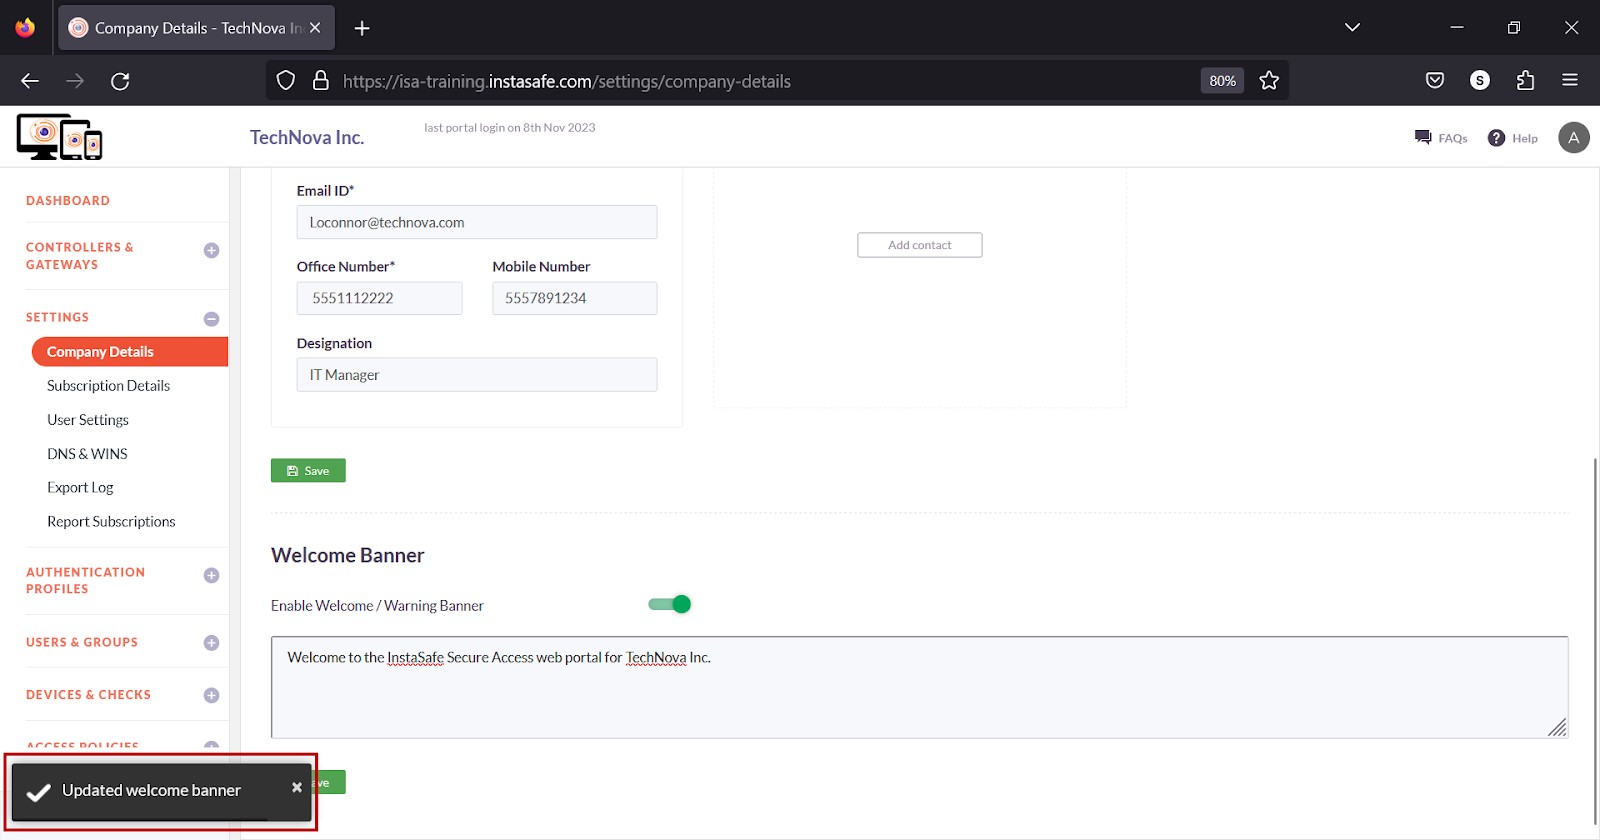
Add Welcome Banner
- Turn on the toggle under Welcome Banner.
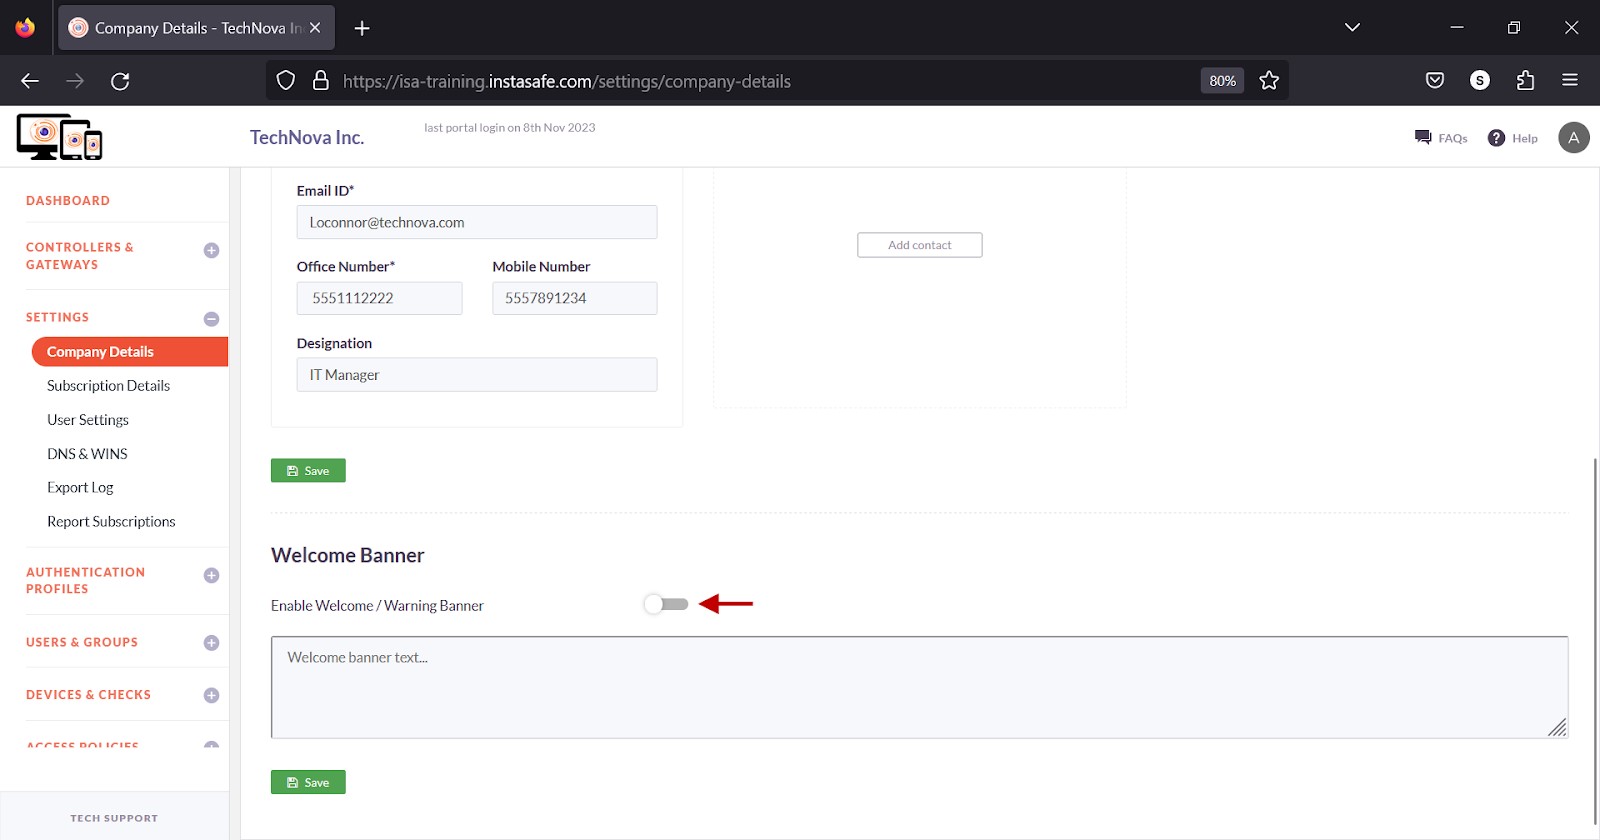
- Enter the text that should be displayed when users log into the ISA web portal.
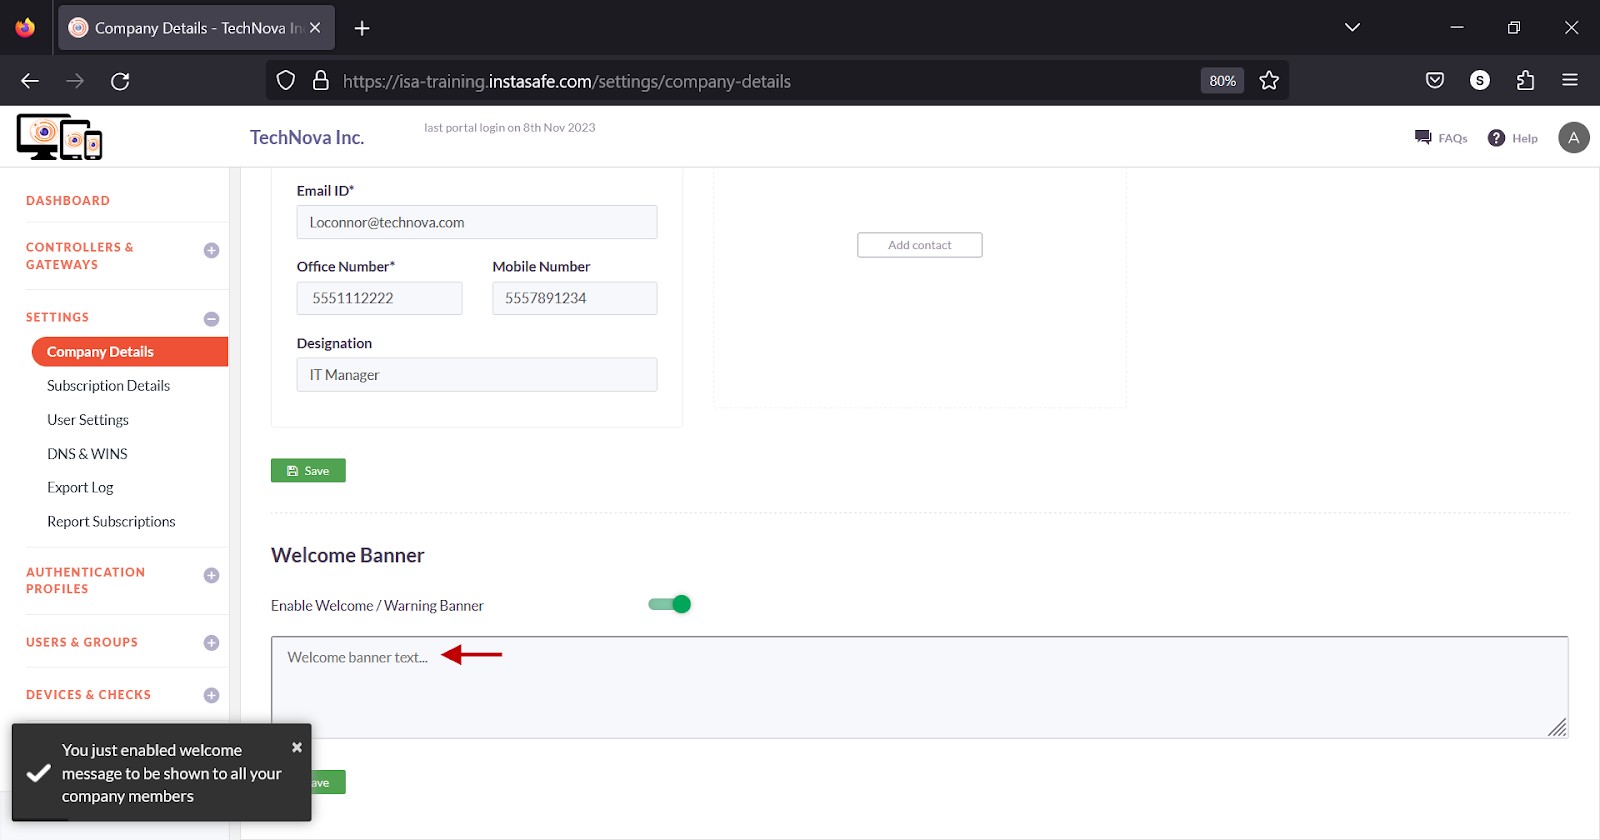
- Click Save.
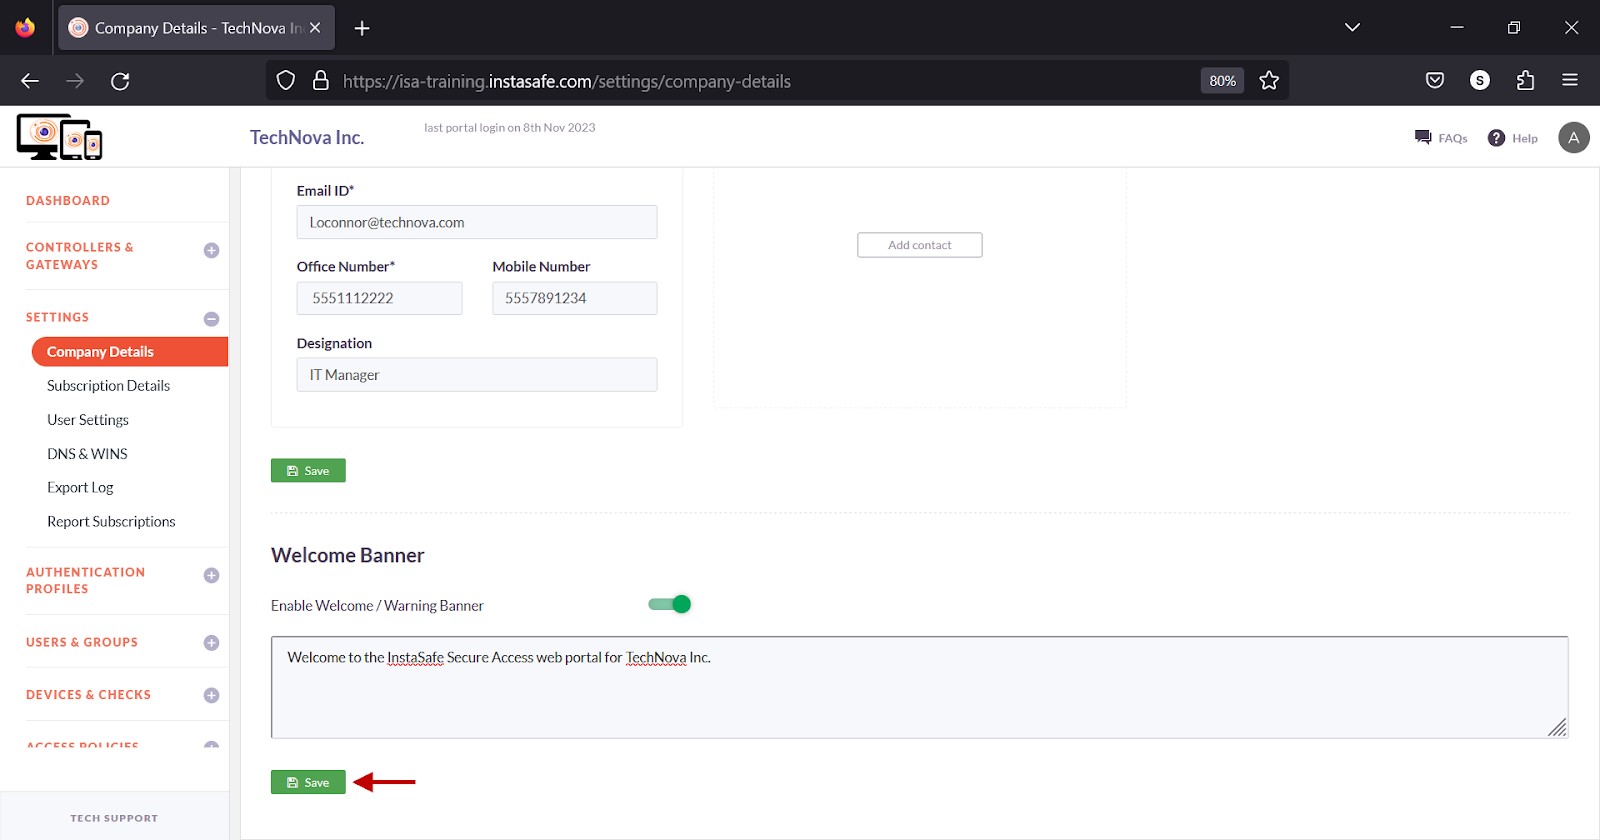
The Updated welcome banner message is displayed on the bottom left of the page.
Subscription Details & Reminders
The Subscription Details page under the SETTINGS menu allows the ISA web portal administrator to view the number of user and gateway licenses and their expiration dates. The administrator can set a reminder to remind the administrator by email before a license expires.
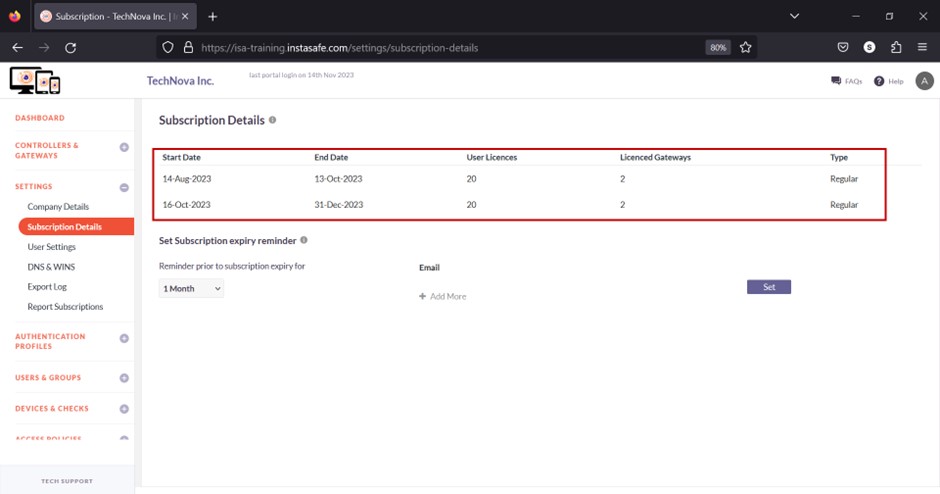
Subscription Details
The following information is listed under this section:
- Start Date – The beginning date of the subscription.
- End Date – The expiry date of the subscription.
- User Licences – The number of user licenses. This number dictates the number of users that can be managed on the Users page under the USERS & GROUPS menu.
- Licenced Gateways – The number of gateway licenses. This number dictates the number of gateways that can be added on the Gateways page under CONTROLLERS & GATEWAYS.
- Type – There are two types of licenses, Trial and Regular.
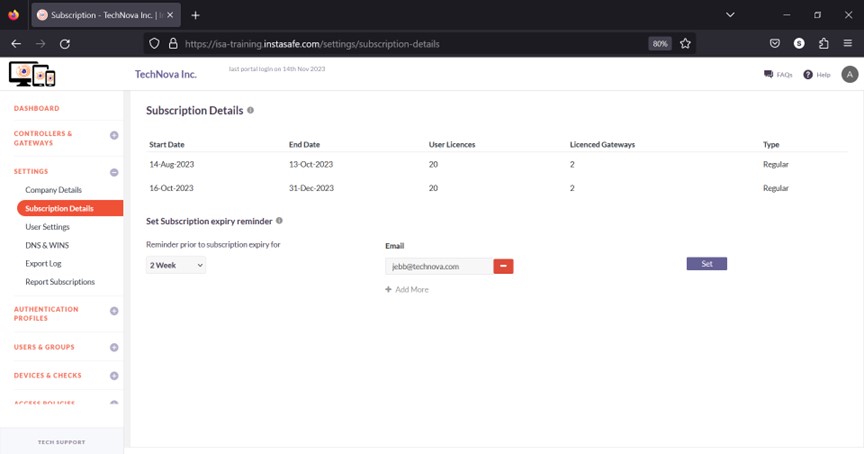
Set Subscription expiry reminder
- On this section, click the drop-down under Reminder prior to subscription expiry.
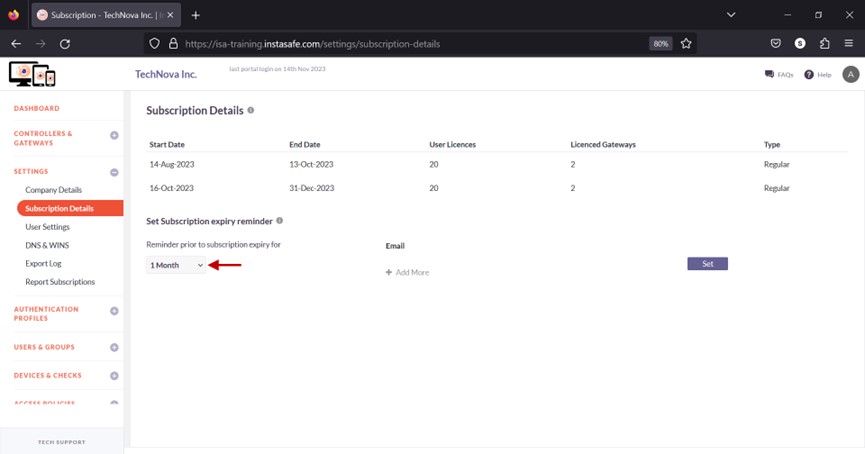
- Select the date before expiration for an email to be sent. The options are Month, 1 Week, and 2 Week.

- Click Add More under Email.
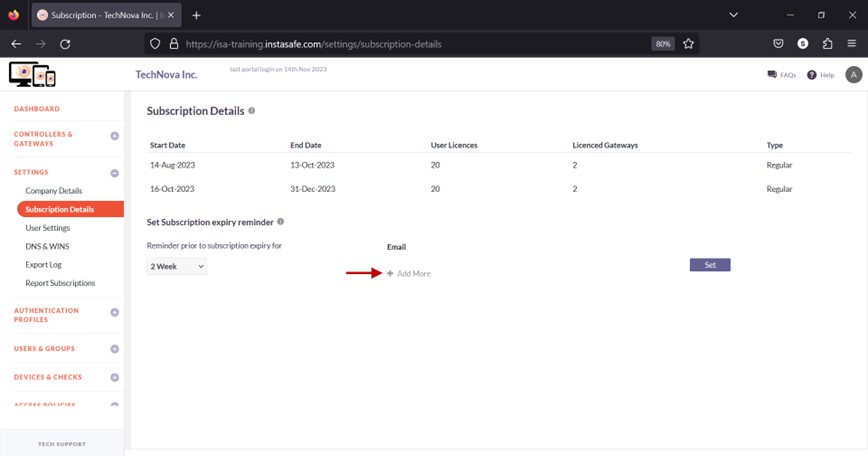
- Enter the email address.

- Click Set to save.
Conclusion
The Subscription Details page allows the administrator to view user and gateway licenses and set a reminder to notify by email before the expiration of licenses.
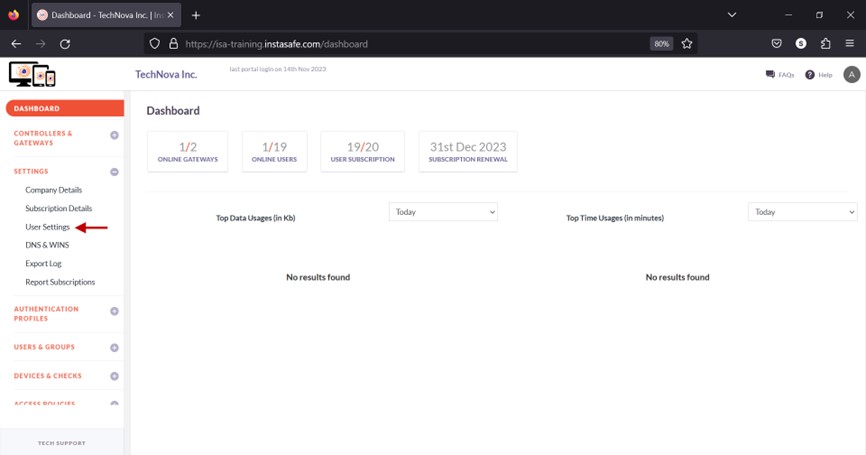
User Settings
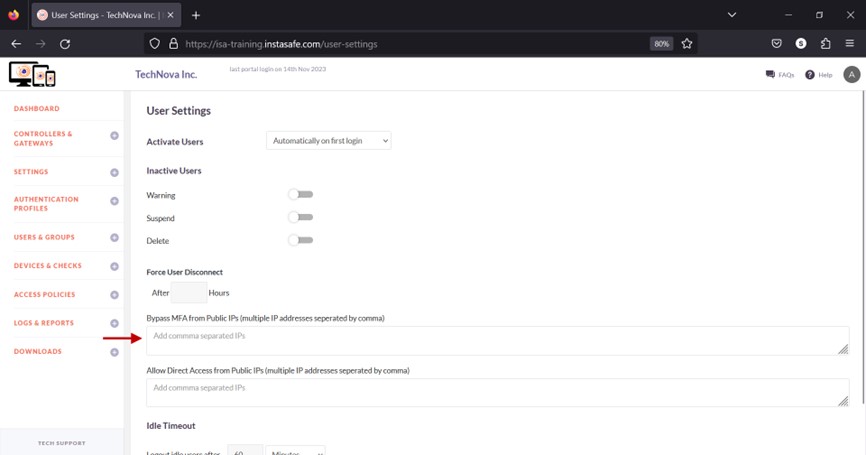
The User Settings page under the Settings menu allows the ISA web portal administrator to set global parameters to InstaSafe Secure Access (ISA) users. The options configured here will affect users on the USERS & GROUPS > Users page.
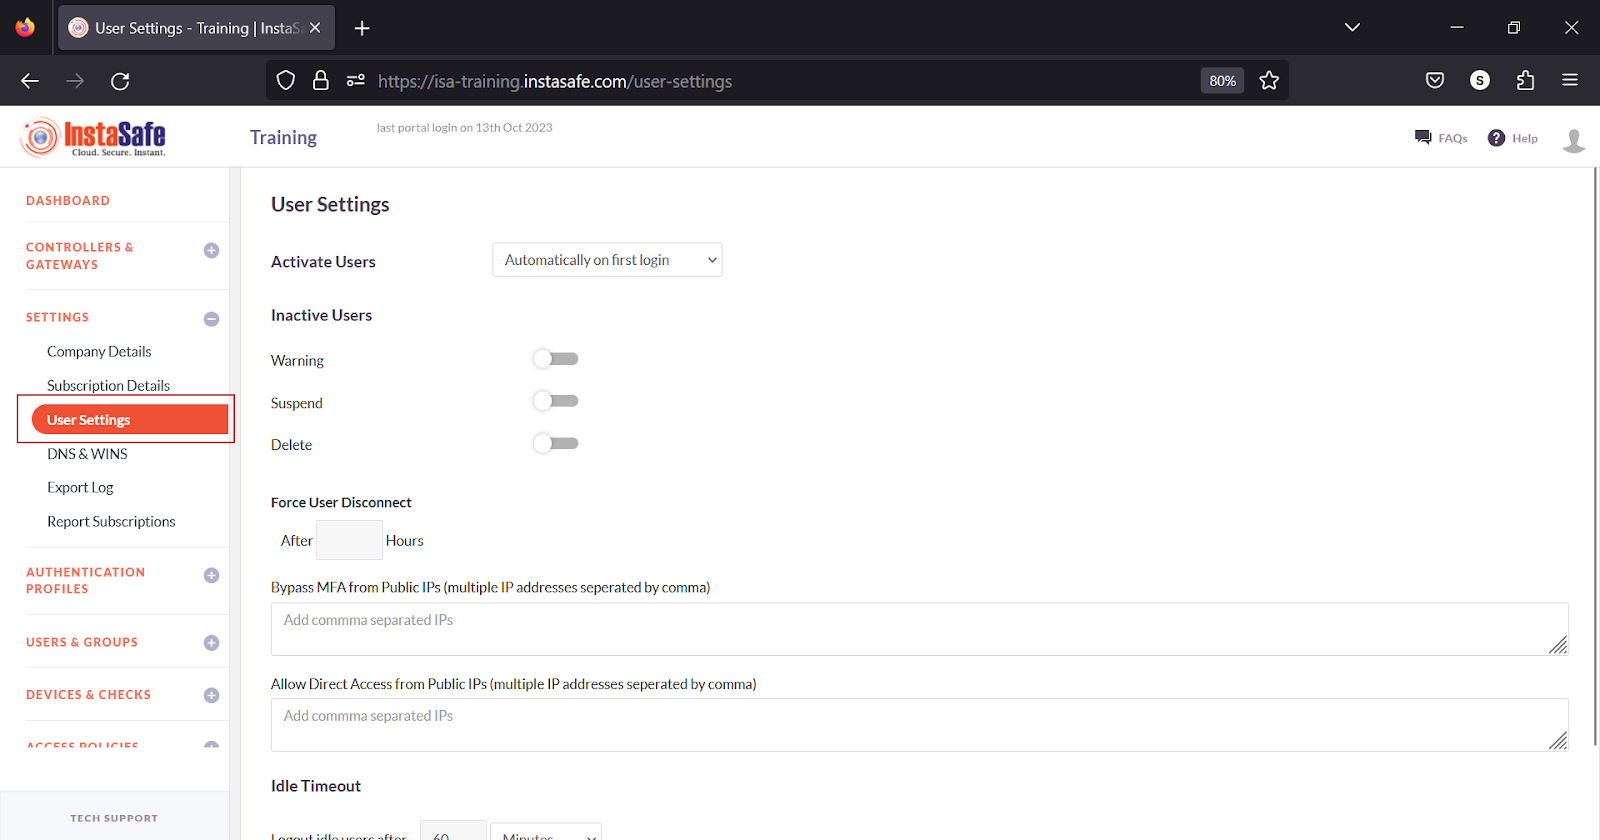
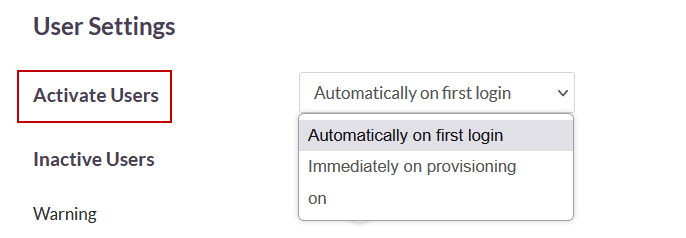
Activate Users - There are three options here.
-
Automatically on first login - Select this option to activate and set the status of the users to "Active" after the users log in successfully to the web portal for the first time or after completion of authentication while connecting using the ISA User Agent.
-
Immediately on provisioning - Select this option to activate and set the status of the users to "Active" immediately after adding users to the ISA web portal or importing users from Active Directory or LDAP.
-
On - Select this option to activate the status of the users on a specific date and time. On selecting this option, the option to set the date and time is displayed to the right.
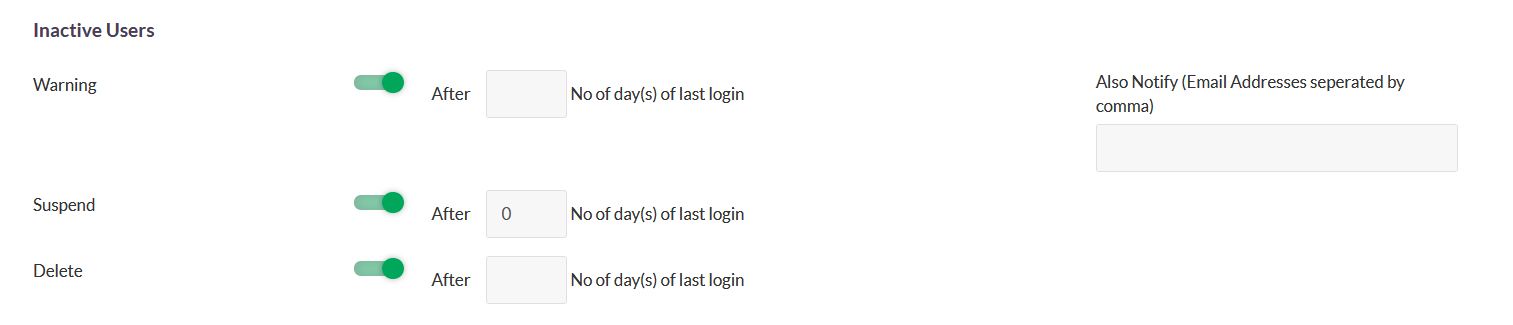
Inactive users - These options allow the administrator to define the action to be taken on inactive users. There are three options available:
-
Warning - Enable this option to specify the number of days since the users' last login before setting the status of the users to "Warning". On the Also Notify field, set the email addresses, separated by commas, to send an email to the addresses specified.
-
Suspend - Enable this option to specify the number of days since the users' last login before setting the status of the users to "Suspended".
-
Delete - Enabling this option allows the administrator to specify the number of days since users' last login before deleting the users.
Force User Disconnect - Set the number of hours before disconnecting all users.
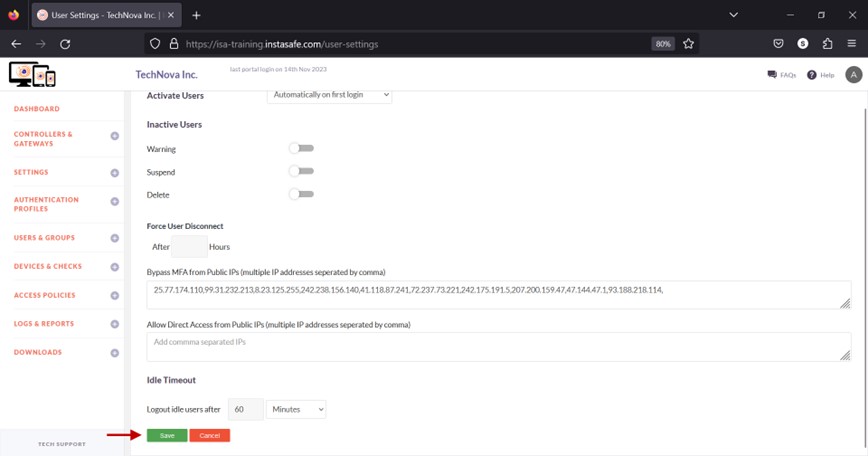
Bypass MFA from Public IPs (multiple IP addresses separated by comma) - This option will bypass the IP addresses entered in the field from Multi-Factor Authentication.
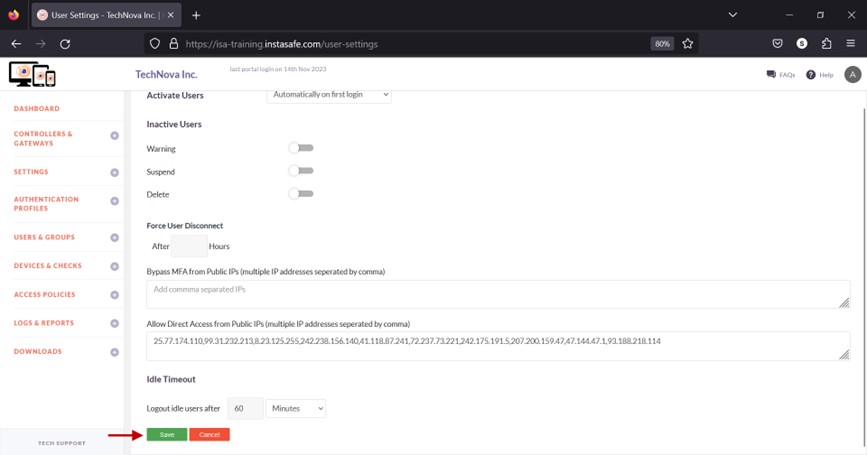
Allow Direct Access from Public IPs (multiple IP addresses separated by comma) - IP addresses entered in this field prevents users access to corporate resources through the secure tunnel established by the ISA User Agent, forcing the user to access the resource directly.
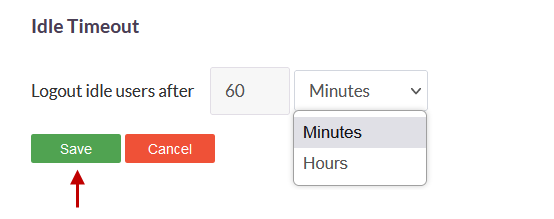
Idle Timeout - Specify the number of minutes or hours before idle login sessions are logged out.
- On the Logout idle users after option, set the number of minutes or hours. Click the drop-down to select Minutes or Hours. The minimum time is 60 minutes or 1 hour.
- This is applicable to users connecting using the ISA User Agent and not applicable to users or administrators logged into the web portal.
Save – Click Save to save the configuration on this page.
Bypass MFA by IP
The Bypass MFA from Public IPs option on the User Settings page allows the ISA web portal administrator to exclude users from Two-Factor or Multi-Factor Authentication (2FA or MFA) by public IP addresses. The IP addresses configured under this option are not prompted for 2FA or MFA.
- Navigate to the User Settings page under the SETTINGS menu.

- In the text box under Bypass MFA from Public IPs (multiple IP addresses separated by comma), enter the public IP addresses of the users to be excluded from MFA. Multiple IP addresses can be entered separated by commas.
- Click Save.
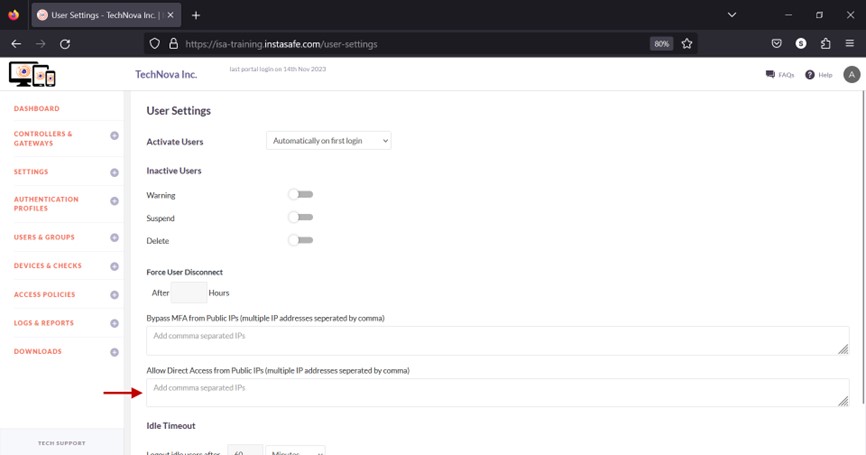
Allow Direct Access
When users are on company premises, they can directly access corporate resources through the corporate network, either wired or using corporate Wi-Fi. However, in specific scenarios, such as in Always-On mode, the ISA User Agent may remain connected to the ISA Controller even when the user is on company premises. In these cases, corporate resources are accessed through the secure tunnel instead of directly via the corporate network. In such instances, enabling the 'Allow Direct Access from Public IPs' option prevents access to corporate resources through the secure tunnel established by the ISA User Agent, forcing the user to access the resource directly.
- Navigate to the User Settings page under the SETTINGS menu.
- In the text box under Allow Direct Access from Public IPs (multiple IP addresses separated by comma), enter the public IP addresses of the users who require direct access. Multiple IP addresses can be entered separated by commas.
- Click Save.
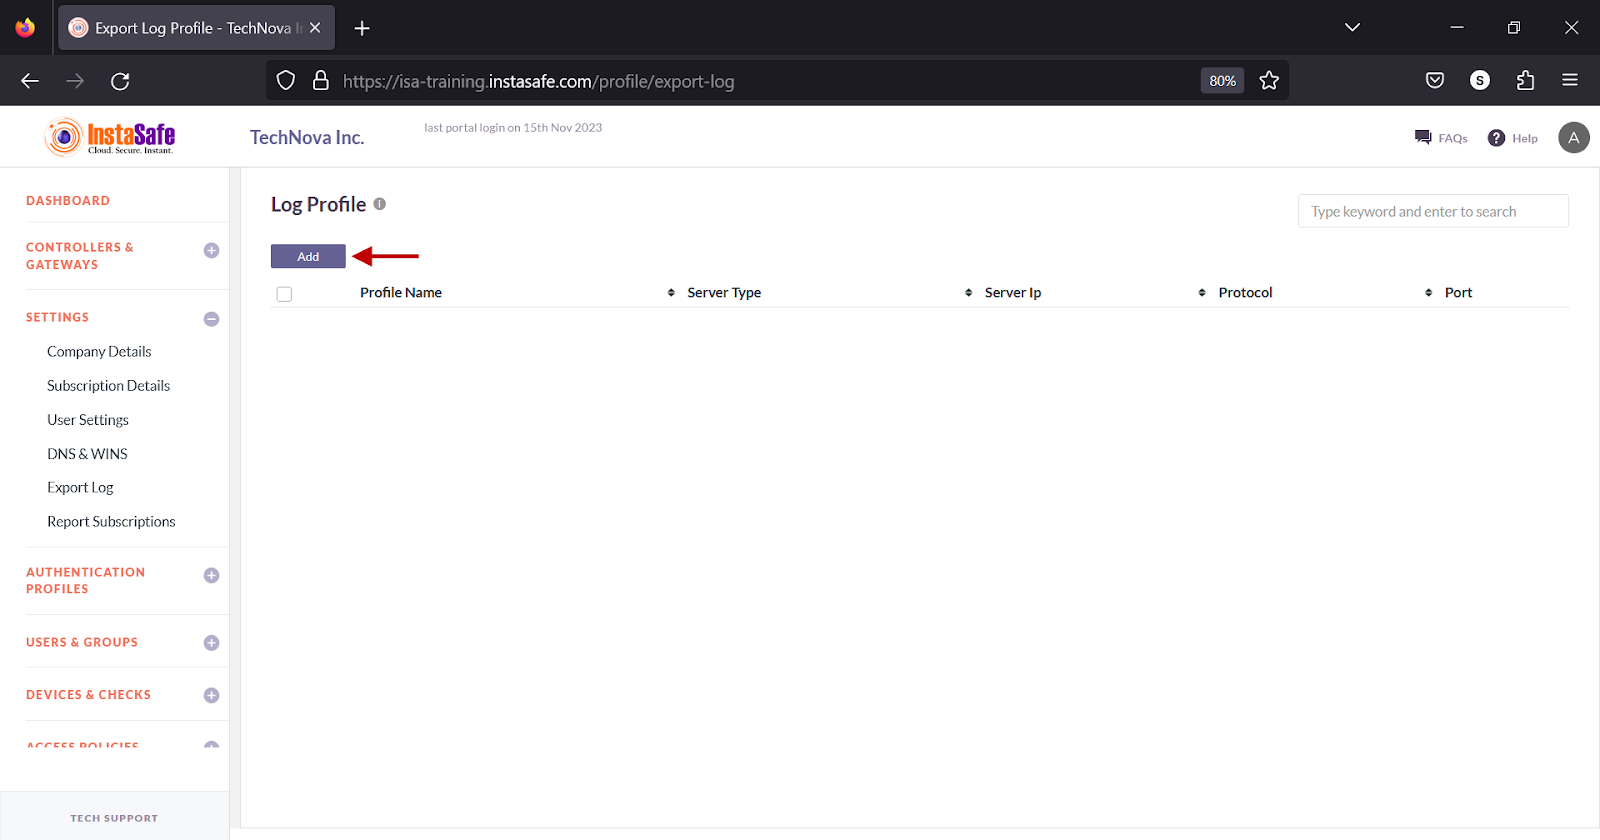
Configure Export Log
The Settings > Export Log page allows the ISA web portal administrator to add log profiles to export logs from the ISA web portal to external log management solutions or email. The following predefined log server formats are available:
| Name of Log Manager | Protocol (default) | Port Number |
|---|---|---|
| QRadar | TCP | 22 |
| ArcSight | TCP & UDP | TCP 515 or 8515 & UDP 514 or 8514 |
| Splunk | TCP or UDP | 8088 |
| Syslog | TCP | 514 |
| SCP | TCP | 22 |
| SFTP | TCP | 22 |
| NA | NA |
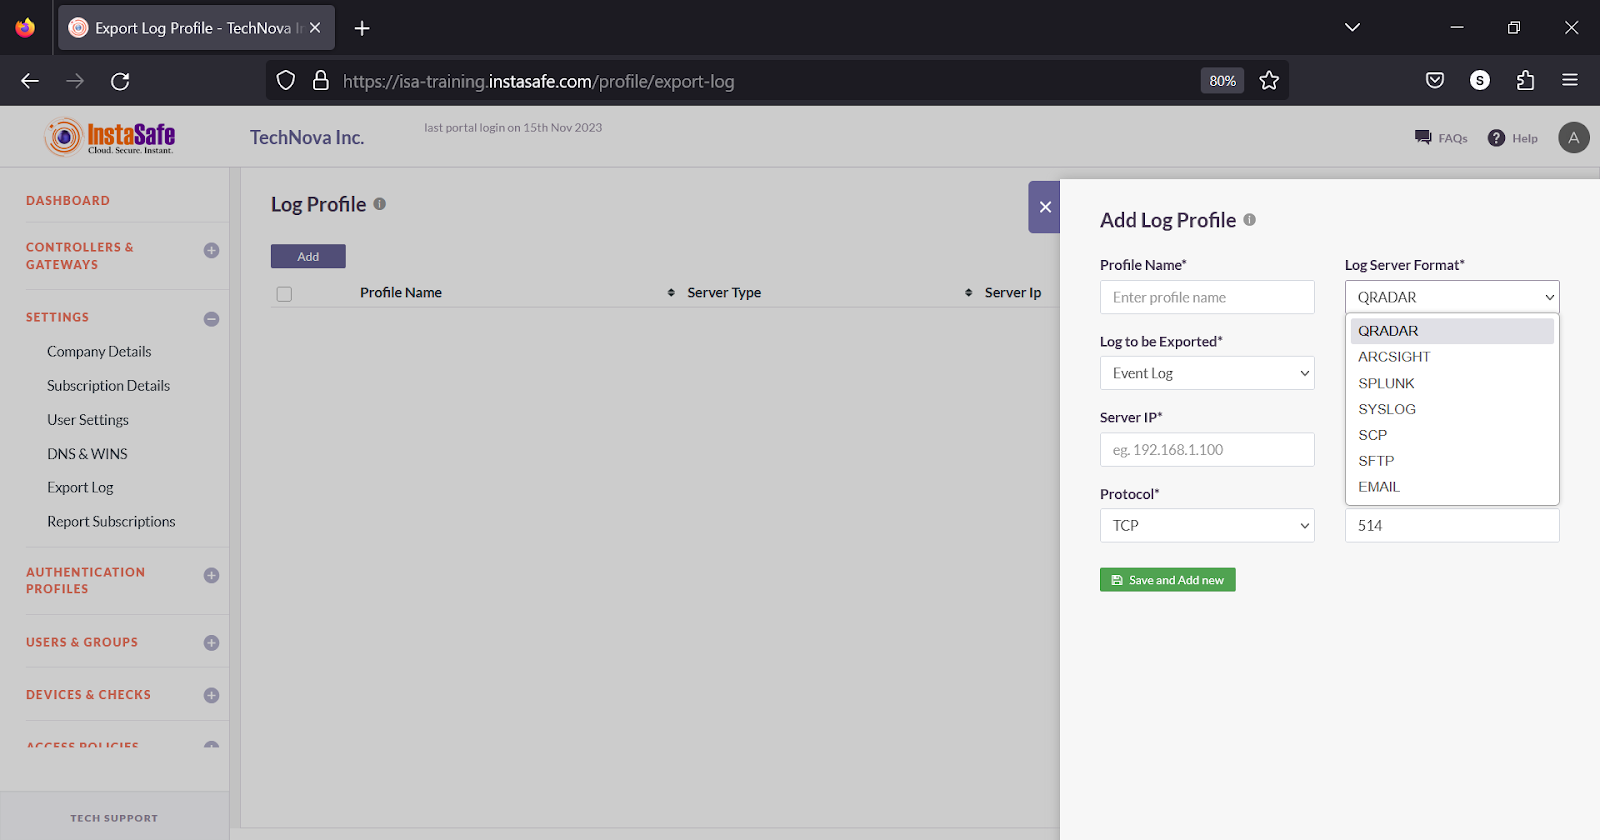
1.On the Export Log page, click Add.
2.In the Log Profile window, under Profile Name, enter a name for the profile. The maximum number of characters allowed in the field is 50.
3.Click the Log Server Format drop-down to select the log server.
4.Click the Log to be Exported drop-down and select Event Log or Session Log, or App Access Log.
5.Click the Timezone drop-down and select either Asia/Calcutta or UTC.
6.In the Server IP field, enter the IP address of the log server.
7.In the Backup Server IP field, enter the IP address of the backup log server.
8.Click the Protocol drop-down, select TCP or UDP
9.In the Port field, enter the port number the server is listening on.
10.If SCP or SFTP is selected under Log Server Format, in the User Name field, enter the username of the user configured on the server.
11.If SCP or SFTP is selected under Log Server Format, in the Remote Path field enter the path the log file must be saved.
12.If Email is selected under Log Server Format, enter one or more email addresses to send the log files to.
13.Click Save and Add new.
Sorting the Log Profiles
You can sort the list by Email, Reports, Schedule, or Email CC. Click the up/down arrow alongside the headers.
Search Log Profiles
You can search the list by name by entering it in the search box.
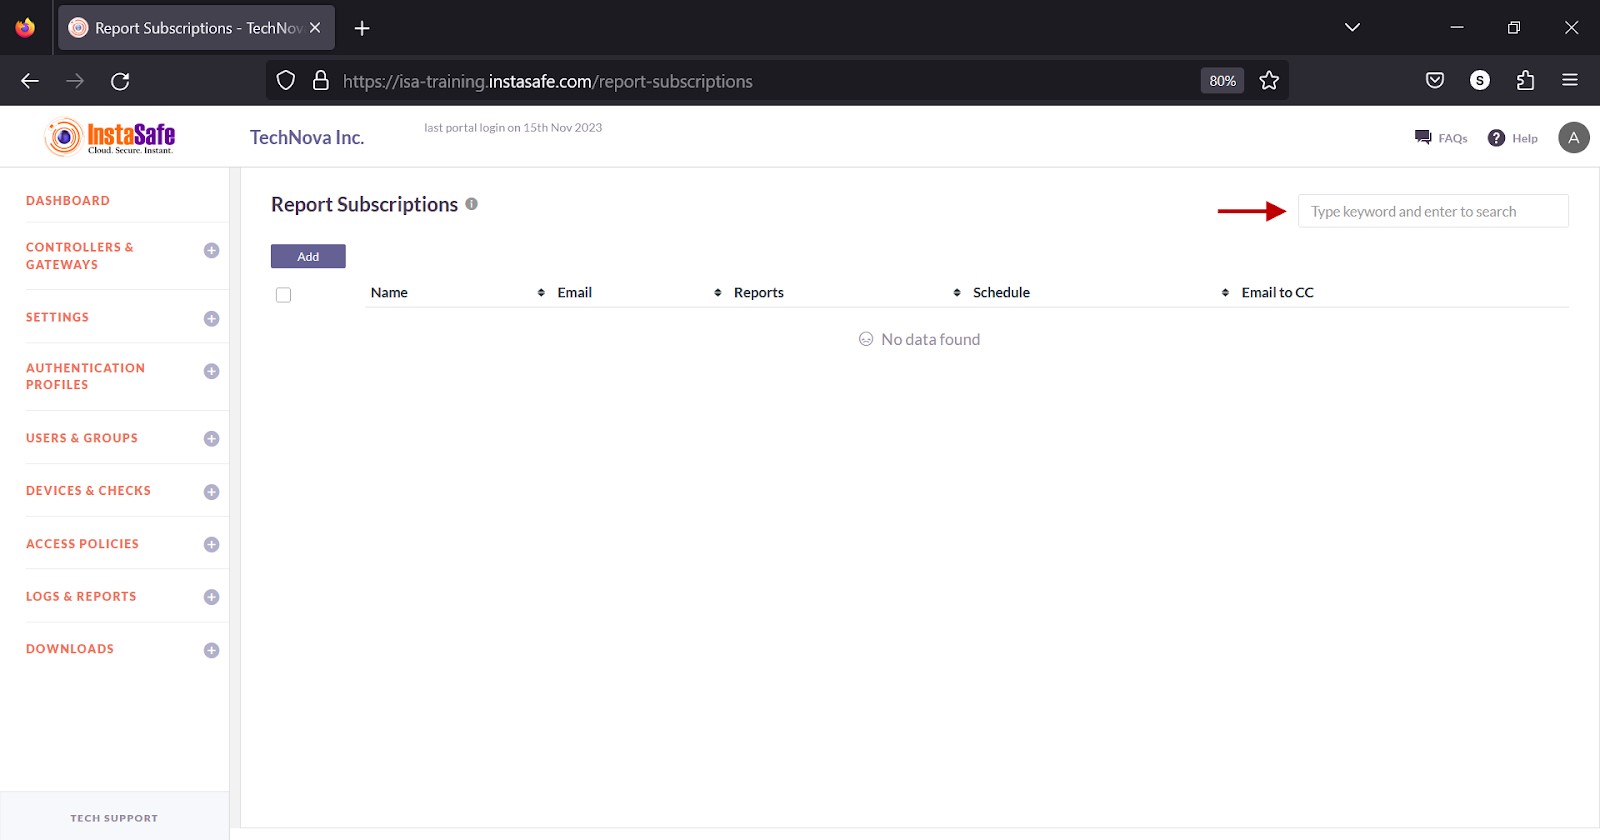
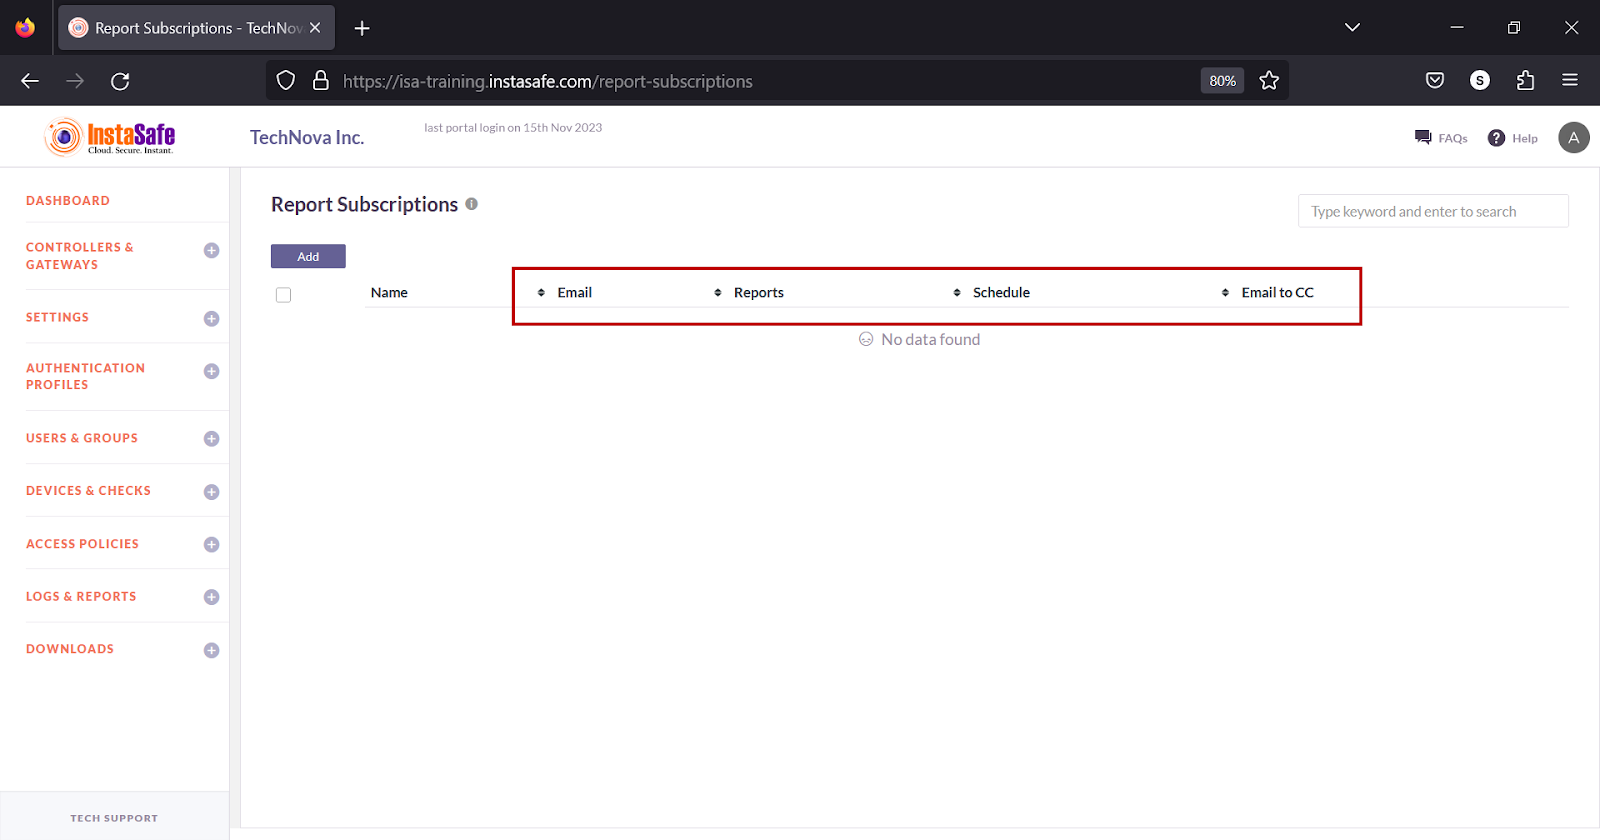
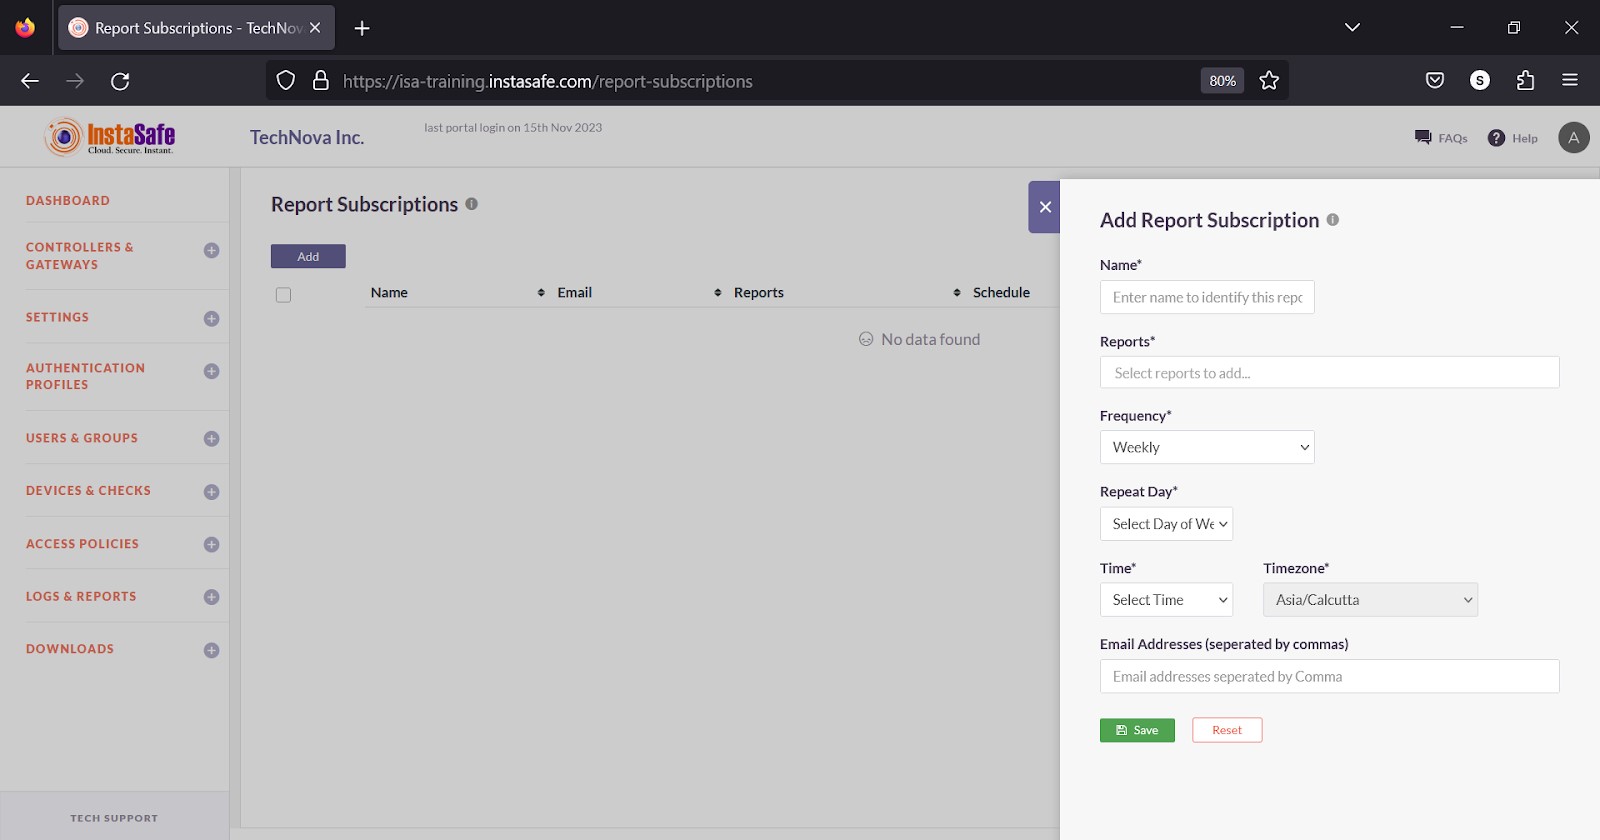
Configure Report Subscriptions
The Settings > Report Subscriptions page allows the ISA web portal administrator to add profiles to send periodic reports by email to various recipients. The following reports can be added to the profile:
| Live Users | Event Log | Access Policies |
| Live Gateways | User Last Login Report | Controllers |
| Data Usage | User Report | Auth Profile Report |
| Time Usage | Gateways | Auth Profile Group Report |
| Login Failures | User Group | Device Checks |
| Session Log | Devices | Device Updates |
| Portal Access Log | Application Services | Authenticator Devices |
| Application Access Log | Application Groups | Advance User CSV |
- On the Report Subscriptions page, click Add.

- In the Add Report Subscriptions window, enter the following information:
Name – Enter a name for the report
Reports – Click the drop-down and select one or more reports.
Frequency – Select Once, Daily, Weekly, or Monthly from the drop-down.
Repeat Day – Select day of the week from the drop-down.
Time – Select a time from the drop-down.
Timezone – This is predefined as Asia/Calcutta.
Email Addresses (separated by commas) – Enter one or more email addresses to send the report to.
- Click Save and Add new.
Sorting the Subscription Profiles
You can sort the list by Email, Reports, Schedule, or Email CC. Click the up/down arrow alongside the headers.
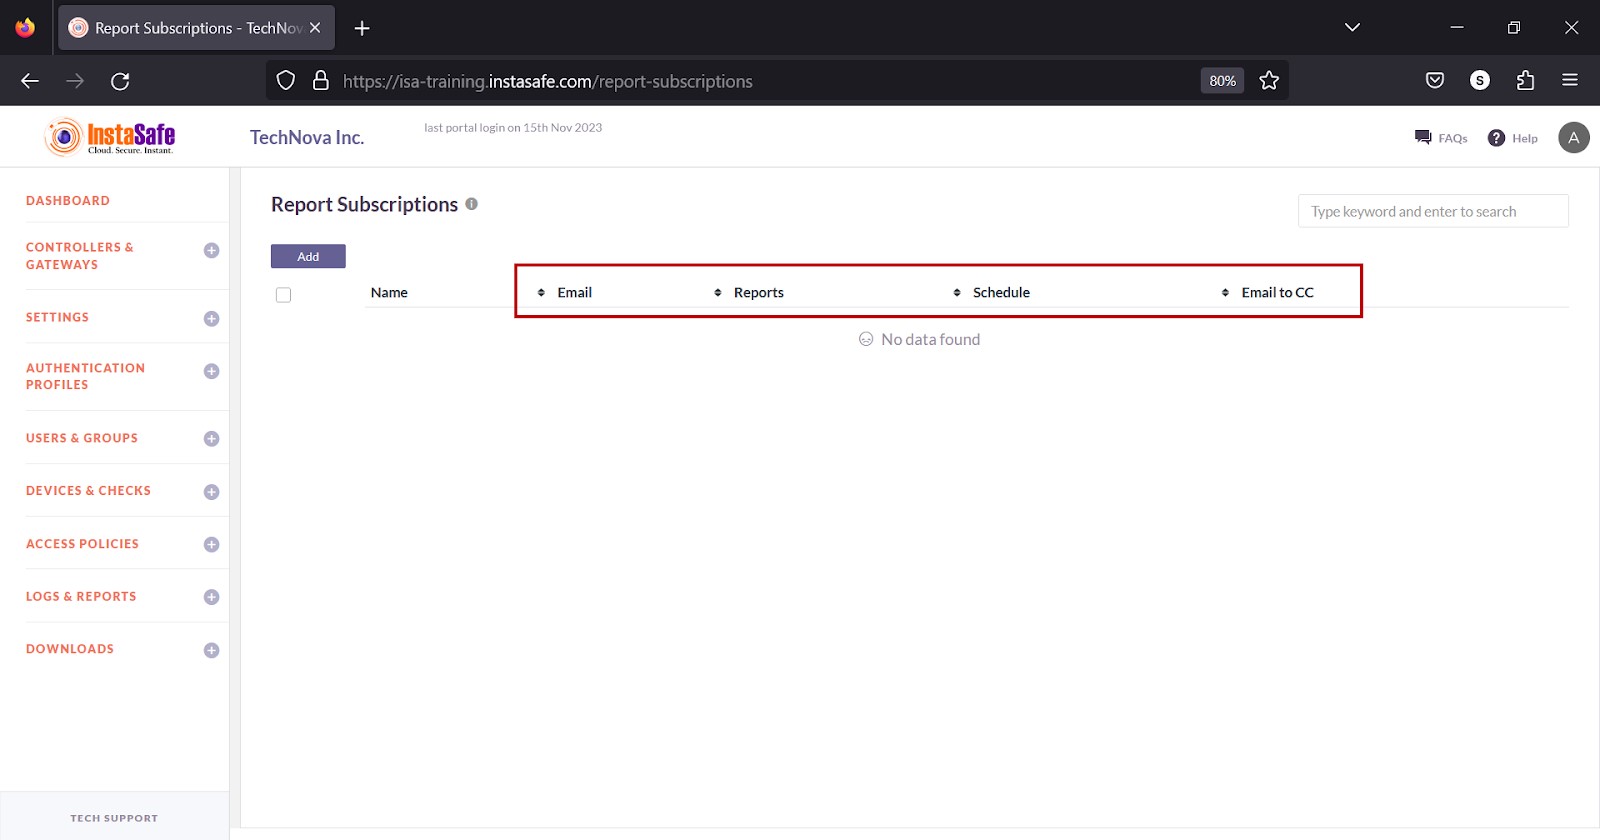
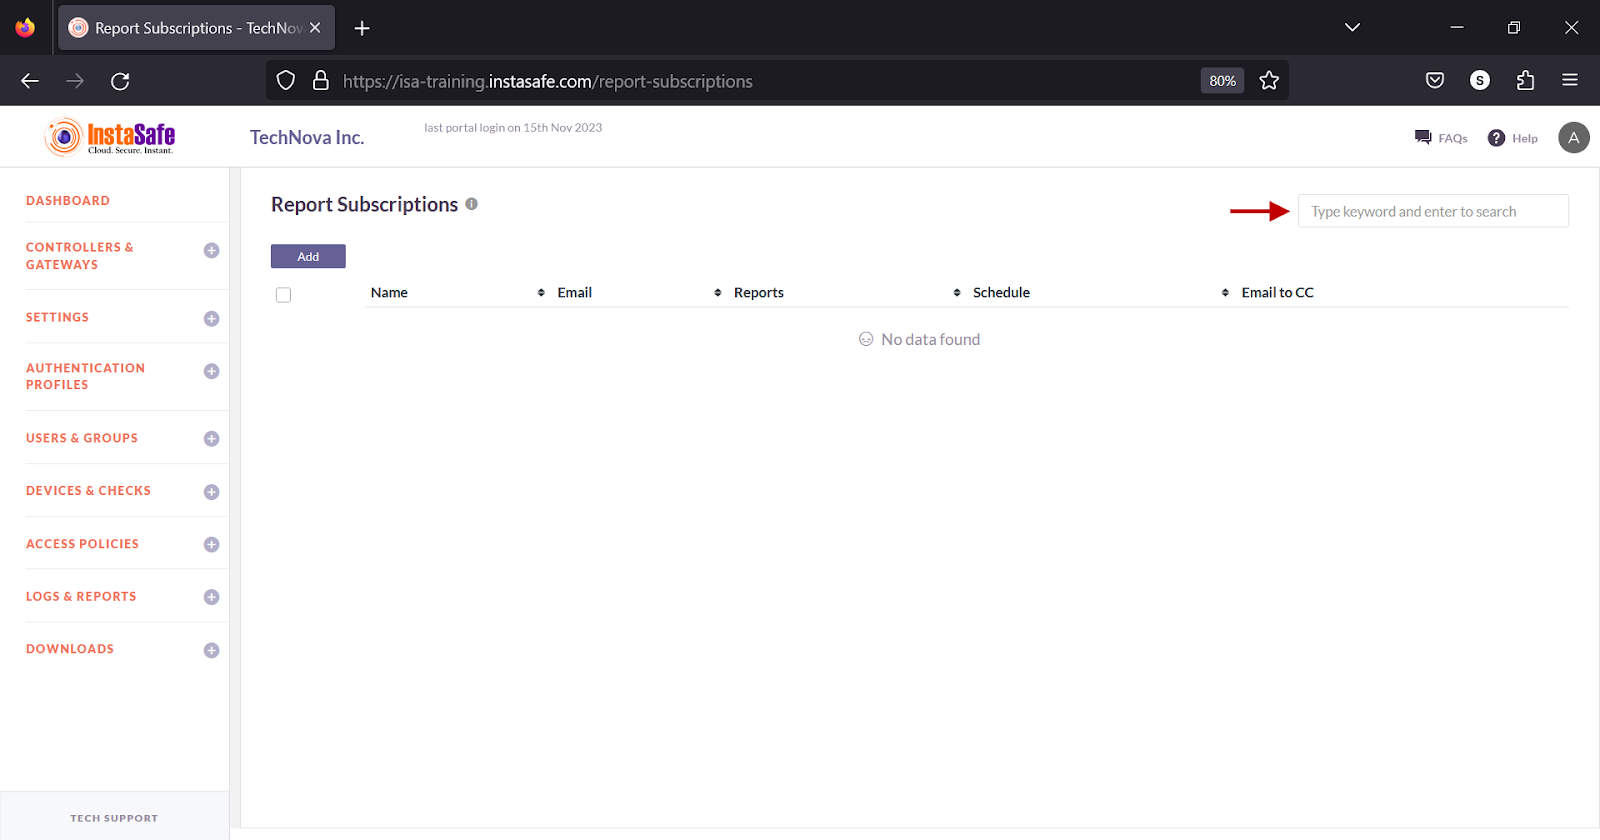
Search Log Profiles
You can search the list by name by entering it in the search box.