Gateway Agent
Supported Cloud Platforms
The following cloud platforms are supported for the ISA Gateway deployment:
Amazon Web Service (AWS)
Nutanix Acropolis
Microsoft Azure
Oracle Cloud Infrastructure (OCI)
Google Cloud
Supported Hypervisor Platforms
The following hypervisor platforms are supported for the ISA Gateway deployment:
Oracle Virtual Box
VMware Workstation
VMware Fusion
VMware Workstation Player
Hyper-V
QEMU
Configure Site-to-Site Connectivity
Introduction
InstaSafe Secure Access (ISA) provides site-to-site connectivity with advanced security features and simplified configuration. This article outlines the essential steps and features for configuring ISA site-to-site connectivity.
When is ISA Site-to-Site Connectivity Required?
Interconnecting Corporate Networks: When seamless communication between two corporate networks is required, ISA facilitates secure data exchange with minimal configuration overhead.
Industrial Monitoring and Devices: In industrial settings, where devices at one site need to monitor client devices at another, ISA ensures a secure and efficient connection.
As a Replacement or Backup Solution: ISA site-to-site VPN can be deployed as an alternative to existing IPsec or SSL/TLS VPN setups or as a backup to MPLS VPNs.
Features of ISA Site-to-Site Connection
Shared Outbound Tunnel: Each Gateway establishes a shared outbound tunnel, processing all-encrypted network traffic.
Identity and Trust Establishment: ISA employs certificate verification using ISA’s managed PKI setup, ensuring secure identity and trust between Gateways.
Private IP Addresses: All devices within the ISA setup can securely use private IP addresses, enhancing network privacy.
User Agent Elimination: ISA eliminates the need for User Agents on servers at each site, simplifying deployment.
Bi-directional Access: Facilitates both server-to-server and server-to-end user communication for comprehensive connectivity.
Centralized Monitoring: All logs are accessible through a unified console with robust monitoring, reporting capabilities, and real-time alerts.
Configuration
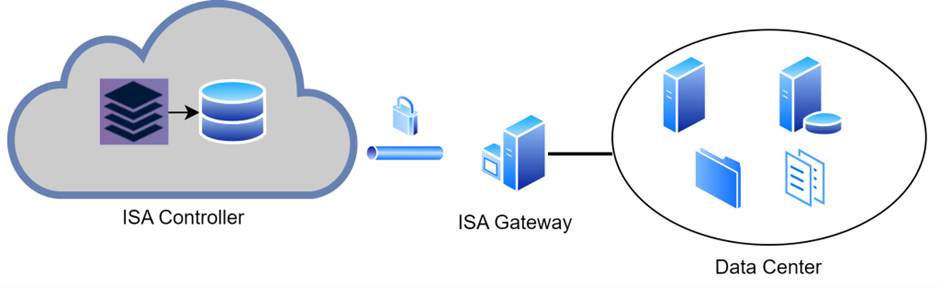
For the purpose of this article, we use the following architecture to configure site-to-site connection between two sites.

Topology
| Site A | Site B | |
|---|---|---|
| Internal network | 172.16.31.0/24 | 192.168.0.0/24 |
| Gateway LAN IP | 172.16.31.101 | 192.168.0.101 |
| Gateway VPN IP | 172.16.199.4 | 172.16.199.5 |
| VPN Network | 172.16.199.0/24 |
Task List
1.Disable NAT on the Gateways at both sites. For more information on disabling NAT on Linux and Windows, refer to the following articles –
2.Since NAT is disabled at the Gateway, the servers must be made aware of the path to take to reach the servers at the other site. To this end, it is necessary to add routes for traffic from the servers to reach the Gateway. The traffic could be initiated by the servers or return traffic. Add the route either in each server or in the routing device between the servers and the Gateway. Keeping with the above topology, the following routes must be added to the Windows routing table at each site:
| Site A | route add 192.168.0.0 mask 255.255.255.0 172.16.199.4 -p |
| Site B | route add 172.16.31.0 mask 255.255.255.0 172.16.199.5 -p |
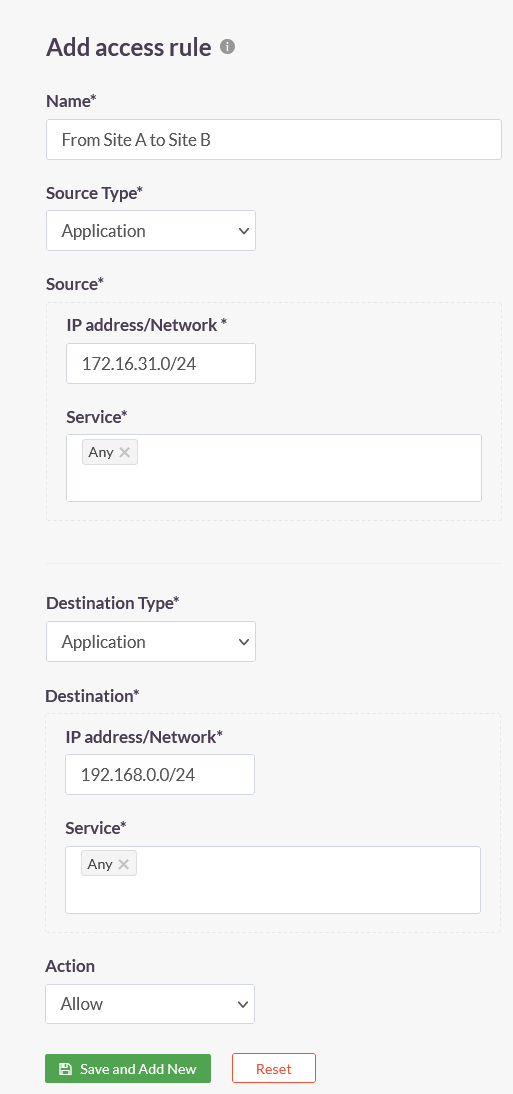
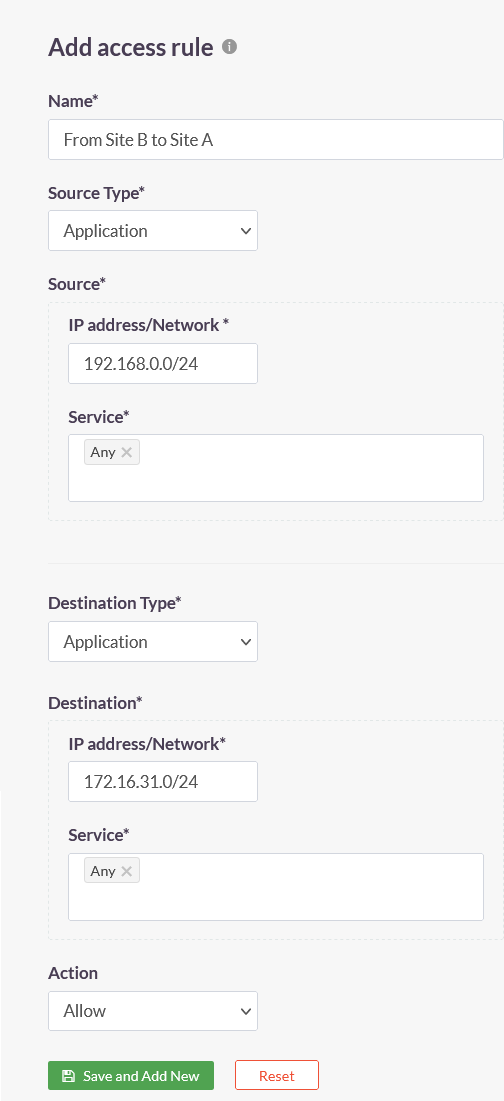
3.Create the following access rules on the ACCESS POLICIES > Access Rules page of the ISA web portal.
| Access Rule 1 | Access Rule 2 |
|---|---|
 |
 |
Conclusion
ISA's site-to-site VPN connectivity is simple to configure without compromising on security. The VPN can replace existing traditional IPsec or SSL/TLS VPNs or be backup for MPLS VPN.
Prerequisites for Gateway Installation
ISA Gateway Agent
InstaSafe Secure Access (ISA) Gateway Agent is a software that acts as the entry and exit point for user access.
Gateways are deployed at the edge of a private network, and are used to connect remote clients or networks to the private network.
It is responsible for encrypting and decrypting data sent over the secure connection, as well as routing the data between the client and the private network.
Gateways use DTLS protocol to establish and secure the connection. It can also be used to connect two separate private networks together, such as in a site-to-site configuration.
Hardware Prerequisites
-
The ISA Gateway must be provisioned on a physical or virtual server at each of the data centres where applications and other services are hosted that are remotely accessed by users.
-
To ensure redundancy, it is recommended to provision a backup Gateway as well. This ensures that unforeseen issues like hardware failure or OS corruption do not lead to downtime.
Software Prerequisites
- Ensure the date and time is set correctly. Refer this article on how to set data and time on Ubuntu.
- Ensure the time zone is set correctly.
- The Ubuntu server must have the latest updates.
- Operating system requirements:
| OS | Ubuntu 20.04 LTS - Ubuntu 22.04 LTS (https://ubuntu.com/download/server) |
| OS Type | 64-bit |
| Memory | 2 GB (minimum) |
| Disk Size | 10 GB (minimum) free space |
| CPU | 1 x Dual Core processor (x64 based AMD) |
Network Prerequisites
- Firewall rules must be updated to allow outgoing connections to the following IP addresses and port numbers.
| Source | Destination | Port | Direction |
|---|---|---|---|
| ISA Gateway IP | 13.234.13.233, 3.6.62.25, 13.234.125.194, 3.6.127.45 | UDP Ports* | Outbound |
| ISA Gateway IP | 35.154.170.140 | TCP 443 | Outbound |
*The IP addresses and port numbers are unique to every deployment and shall be provided by the InstaSafe Tech Team.
Unrestricted Internet access must be provided at the time of installation so that relevant packages and repositories could be downloaded. It is recommended to provide direct Internet access instead of via a proxy.
Configure NAT on Gateway (Windows Server)
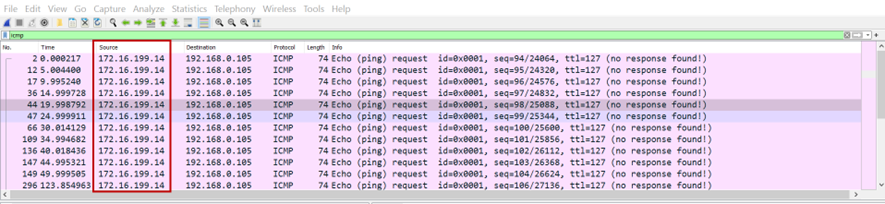
One of the prerequisites for deploying the ISA Gateway Agent in a Windows Server is to add the Routing and Remote Access Server (RRAS) role. The RRAS role allows the administrator to configure network address translation (NAT), among other functions. When NAT is enabled on the Gateway, it translates the source IP address of incoming traffic from the outside to that of the IP address of its physical public facing interface, before forwarding the packet to the destination server or resource. Before NAT is enabled, the source IP address of the incoming traffic forwarded by the Gateway Agent, after decryption, will retain the IP address of the Tap-Windows Adapter V9 virtual interface. The remote corporate resources will be unable to route the return traffic without further routing configuration.
Here is the screen shot of the Wireshark capture done on the physical interface when a remote user tries to ping a corporate resource without NAT enabled on the Gateway. Notice how the source IP address is that of the virtual interface and no replies are received on the interface from the remote resource.
Configuring NAT on the Routing and Remote Access Server
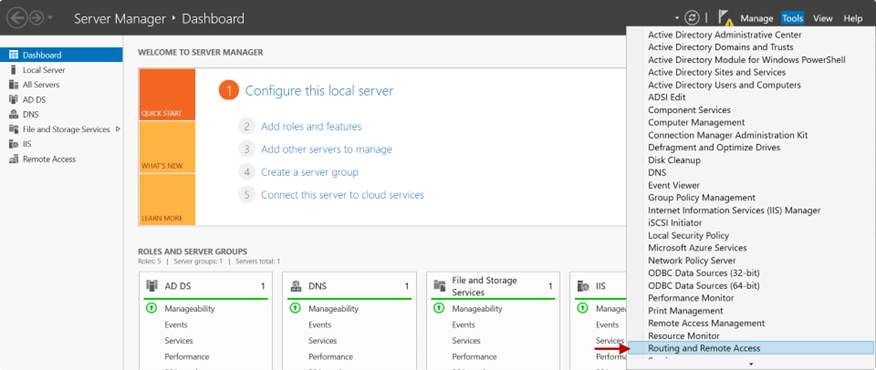
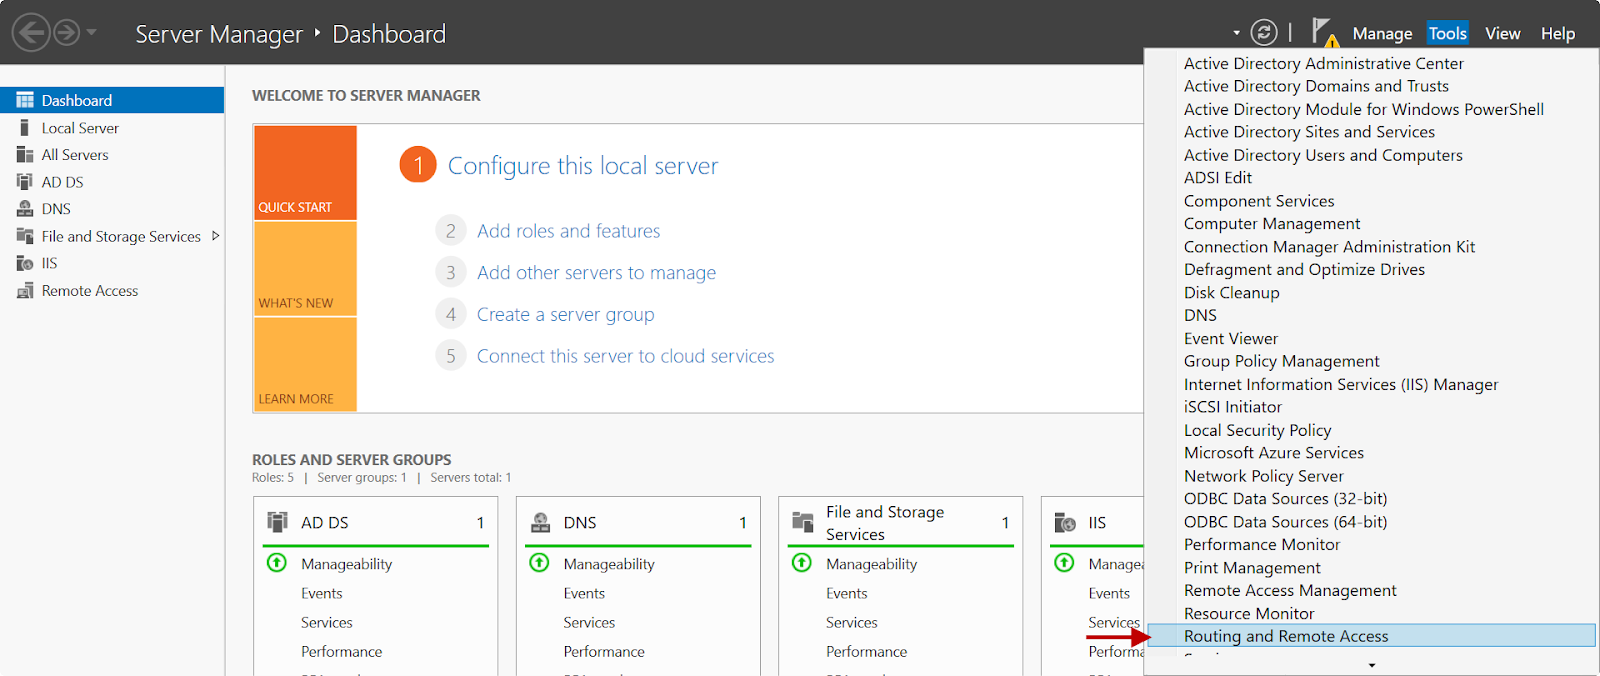
1.On the Server Manager screen, click Tools and select Routing and Remote Access from the drop-down.
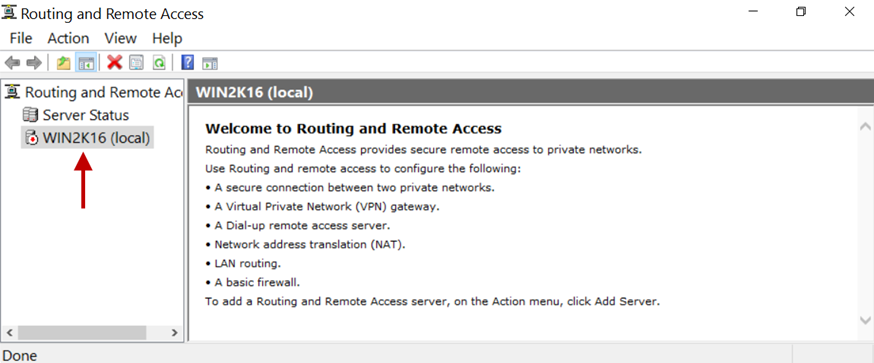
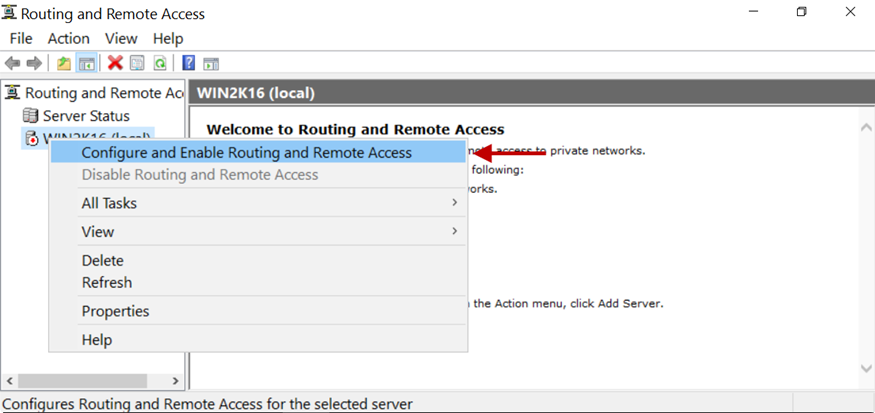
2.Right-click on the server’s name. In this example, Win2k16
3.Click on Configure and Enable Routing and Remote Access.
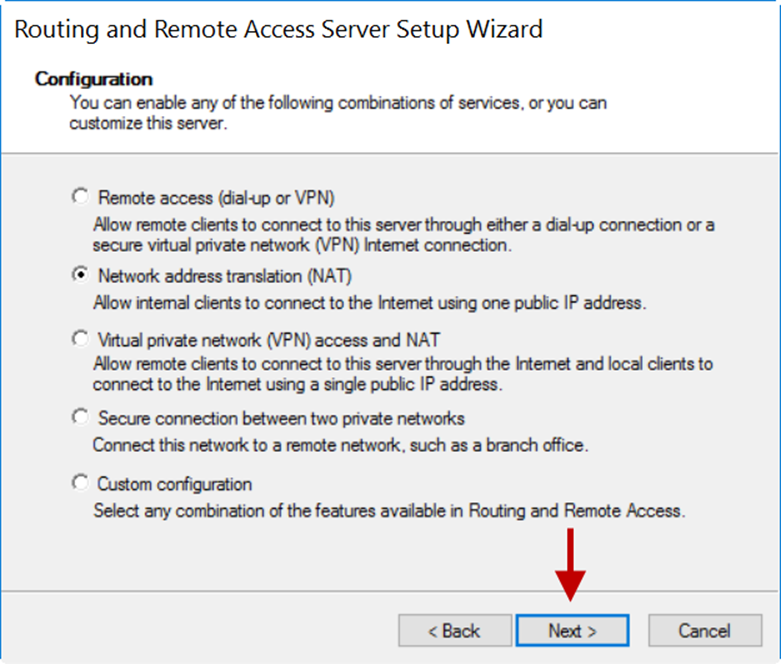
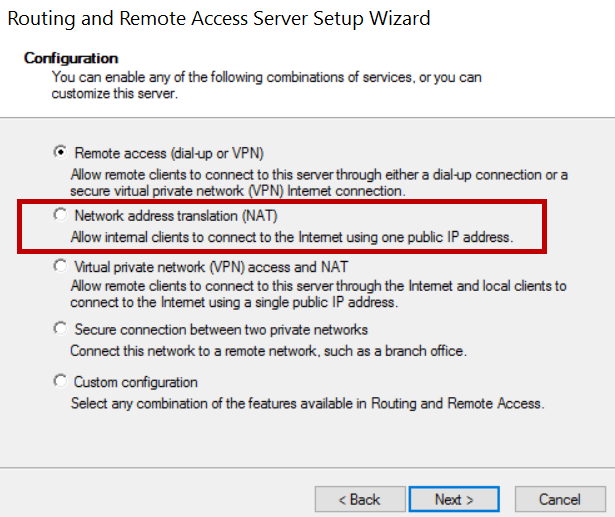
4.In the Configuration window, select the Network address translation (NAT) radio button.
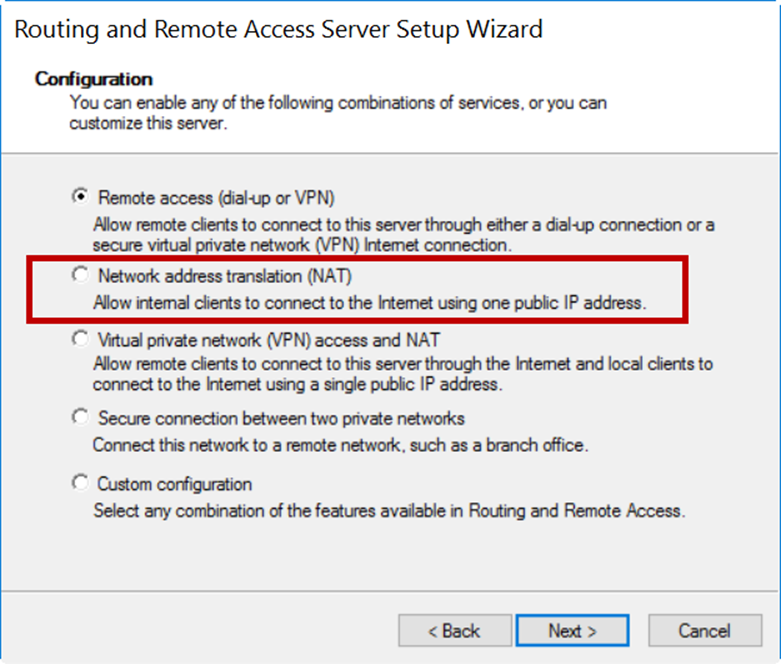
5.Click Next.
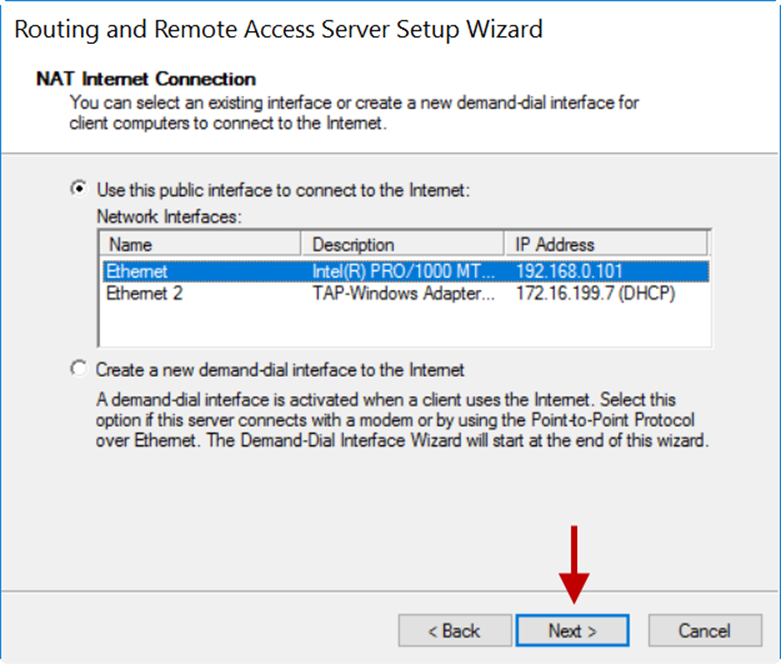
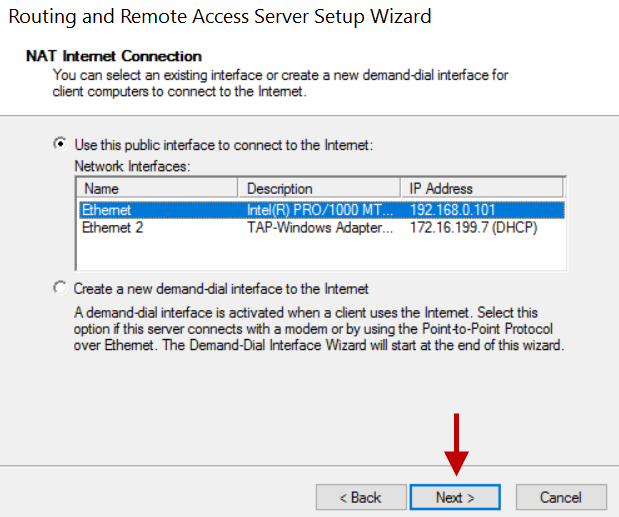
6.On the NAT Internet Connection window, select the public interface. In this example, it is Ethernet with an IP address of 192.168.0.101.
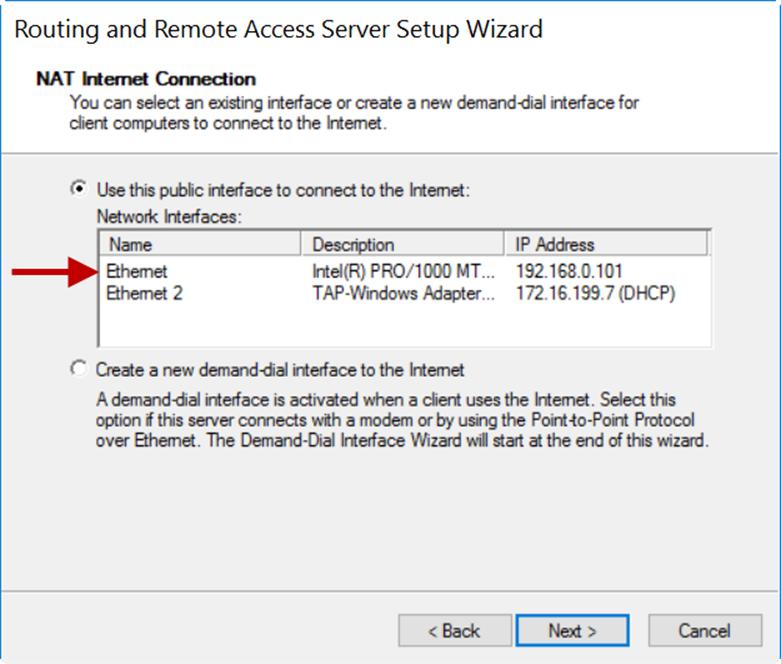
7.Click Next.
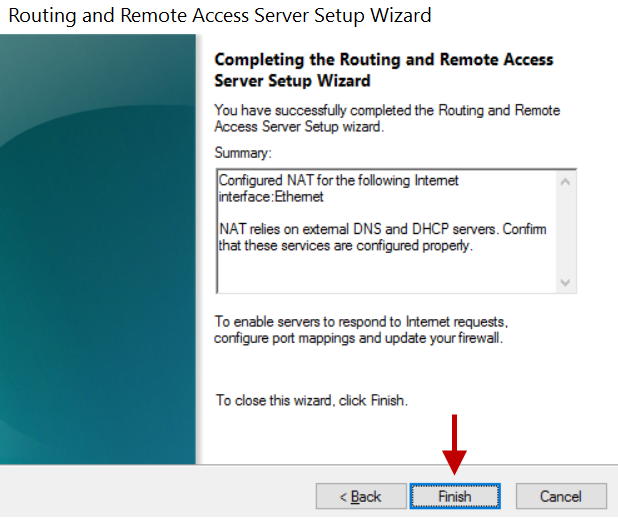
8.On the next window, click Finish.

9.Expand the server’s name and expand IPv4.
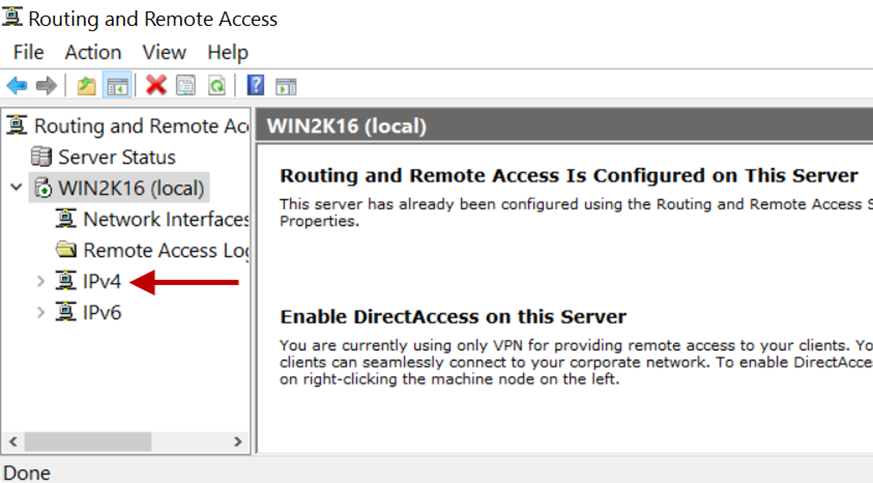
10.Select NAT and right-click the physical interface selected for NAT.
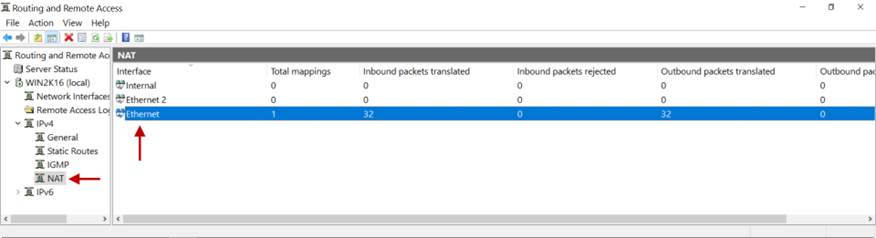
11.Click Show Mappings.
12.On the mapping table, you will see inbound packets translated on the interface selected for NAT.

13.Ping from a remote user to an internal resource will receive replies now. Here is a Wireshark capture. Notice the source IP address is of the physical interface selected for NAT.

Disable/Delete NAT
There are instances when the source IP address must remain unchanged, for example, for VoIP traffic. In such cases, NAT should be disabled. To disable NAT, right-click on the Routing and Remote Access > server name > IPv4 > interface name > NAT and click Delete.

In case you are unable to configure NAT on the Gateway by following these steps, contact your organization's IT Team.
If you are the administrator of the organization's ISA Account and need assistance, contact support@instasafe.com
How to disable NAT on the ISA Gateway (Linux)
When the ISA Gateway is deployed, the ISA Gateway Agent performs network address translation (NAT) to translate the source IP address of incoming traffic from the outside to the IP address of its physical interface, such as eth0, enp0s3, before forwarding the packet to the destination. The agent uses IP Masquerading to perform NAT and is implemented using the following command in the Gateway Agent script:
iptables -t nat -A POSTROUTING -o $intf -j MASQUERADE
The command is executed by running the script during installation of the agent and when the Gateway is restarted. This command will translate the source IP address of traffic coming from the outside, invariably from the ISA Controller, to the IP address of the physical adapter and then is forwarded to the destination, which is invariably a corporate resource.
However, there are instances when the source IP address must remain unchanged, for example, for VoIP traffic. In such cases, NAT should be disabled. To disable NAT, enter the following command:
iptables -t nat -F
This command will forward traffic to its destination without changing the source IP address. Appropriate routes must be configured for the return traffic.
How to install ISA Gateway Agent
ISA Gateway Agent
InstaSafe Secure Access (ISA) Gateway Agent is a software that acts as the entry and exit point for user access. Gateways are deployed at the edge of a private network, and are used to connect remote clients or networks to the private network. It is responsible for encrypting and decrypting data sent over the secure connection, as well as routing the data between the client and the private network. Gateways use DTLS protocol to establish and secure the connection. It can also be used to connect two separate private networks together, such as in a site-to-site configuration.
The ISA Gateway must be provisioned on a physical or virtual server at each of the data centres where applications and other services are hosted that are remotely accessed by users. To ensure redundancy, it is recommended to provision a backup Gateway as well. This ensures that unforeseen issues like hardware failure or OS corruption do not lead to network downtime.
Both the primary and back-up Gateways must be configured with static IP addresses. The IP addresses must be given to the InstaSafe administrator for the purpose of opening the required ports in the controller to accept the connection from the Gateway Agents.
Downloading the Gateway Agent
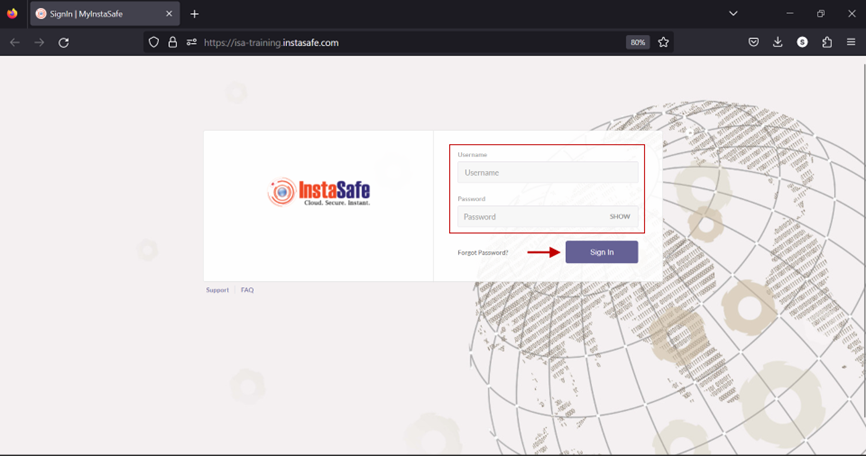
1.Log into the ISA web portal using admin credentials.
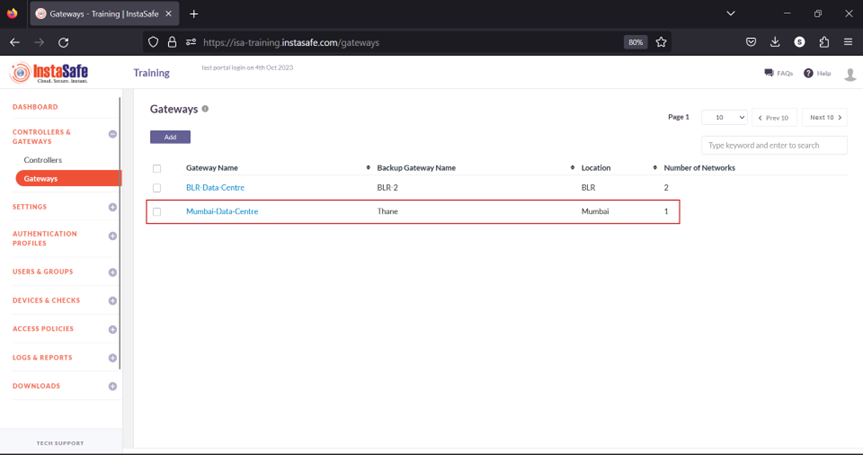
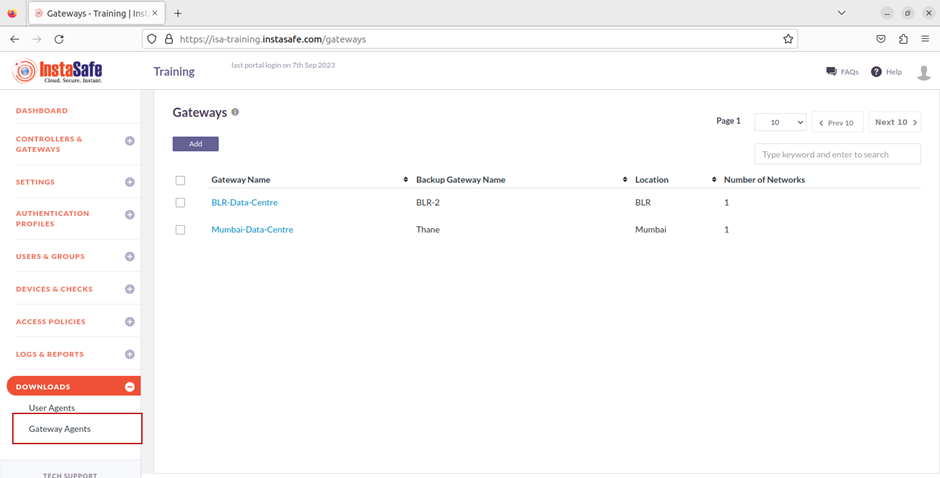
2.On the left-side menu, navigate to the CONTROLLERS & GATEWAYS > Gateways page.

3.Listed here are two Gateways. This KB article will describe the process of installing the Gateway Agent for Mumbai-Data-Centre.
4.Next, on the left-side menu, under Downloads, click on Gateway Agents.

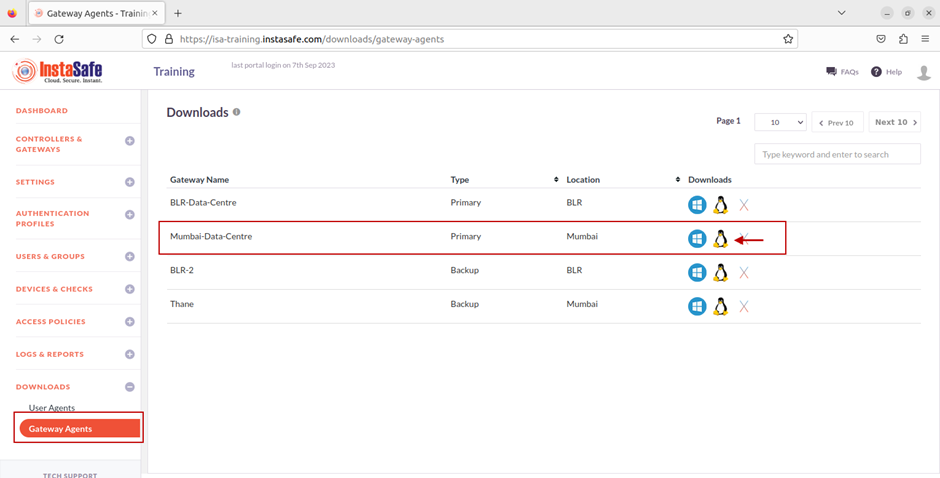
5.Listed here are the Gateway Agents and their respective back-up Gateway Agents. Click on the Microsoft icon to download the Agent software for Mumbai-Data-Centre to the local disk.

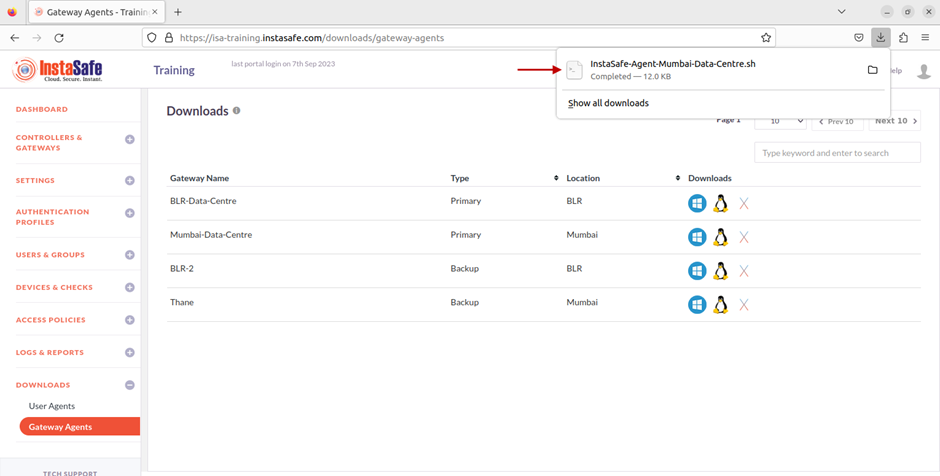
6.The Agent software will be downloaded to the local disk.

Installing the Gateway Agent
1.On the Windows Server, make sure the Routing and Remote Access Service role is enabled.

2.Locate the downloaded file and double-click on the file.

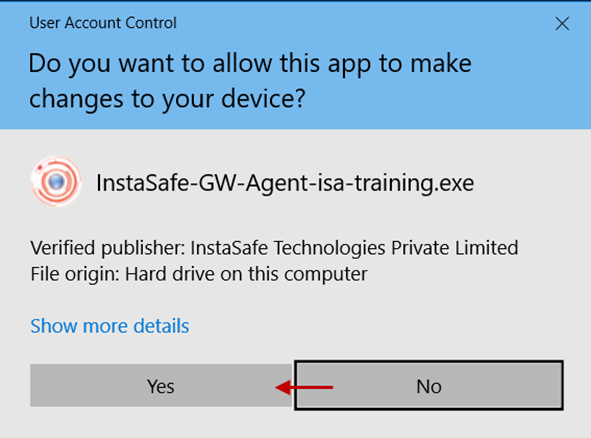
3.If User Access Control is enabled on the server, click Yes on the prompt window.
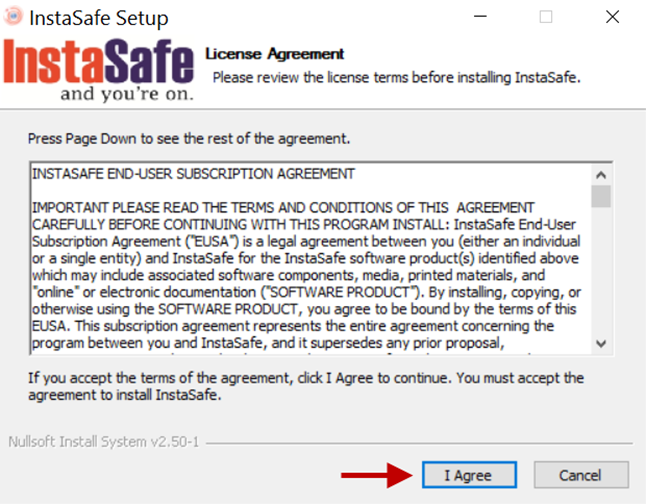
4.On the License Agreement screen, click I Agree.
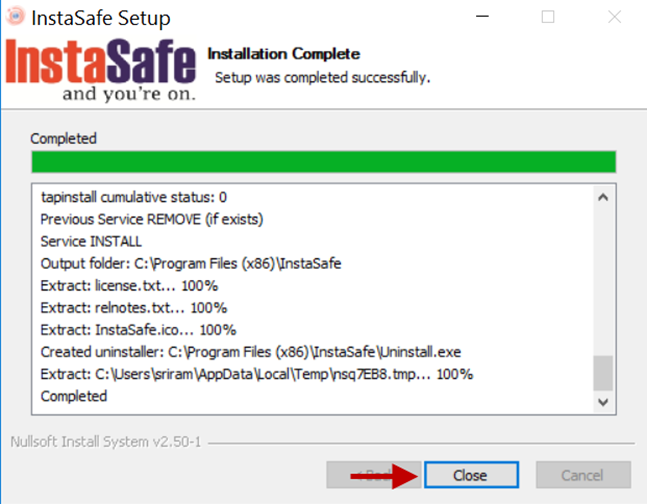
5.Once the installation is completed, click Close.
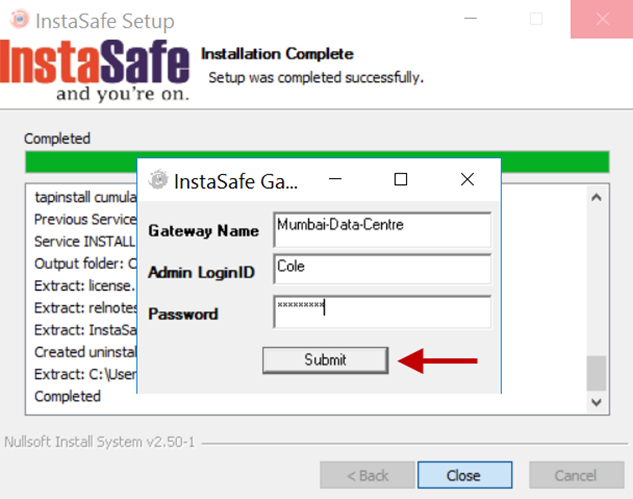
6.On the InstaSafe Gateway Details prompt, enter the following information. All fields are case sensitive. - Gateway Name: Enter the name of the Gateway. - Admin Login ID: Enter the administrator username. - Password: Enter the password of the administrator.

7.Click Submit to submit the information for verification.
8.If the Gateway details are verified as correct, a window with message, Completed InstaSafe Gateway installation on this computer, will be displayed. Click OK.

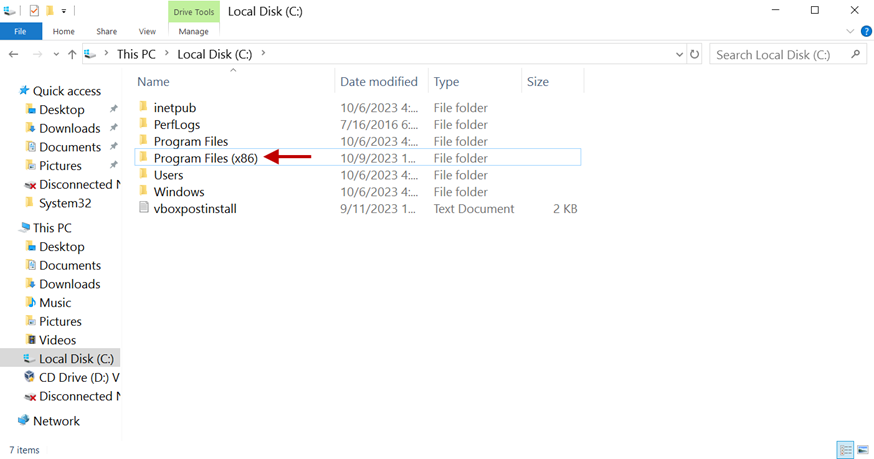
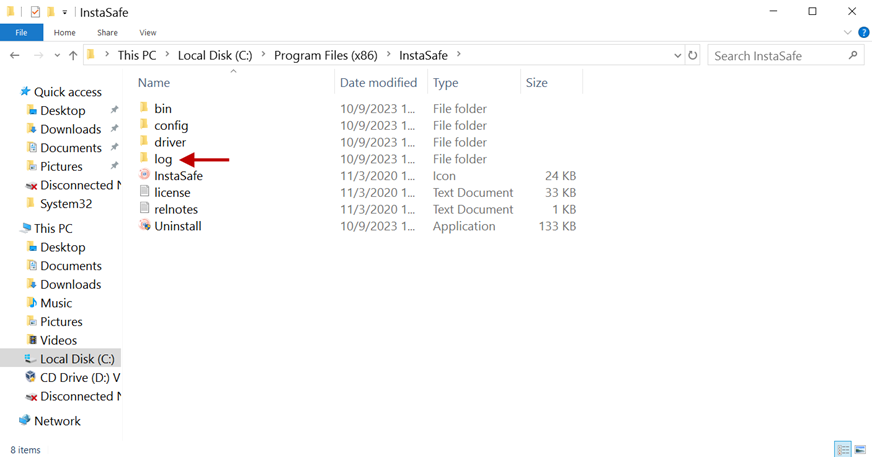
9.Open File Explorer and navigate to C:** and open the folder Program Files (x86)**.
10.Open the Log folder.
11.Open the log file isa-training.txt
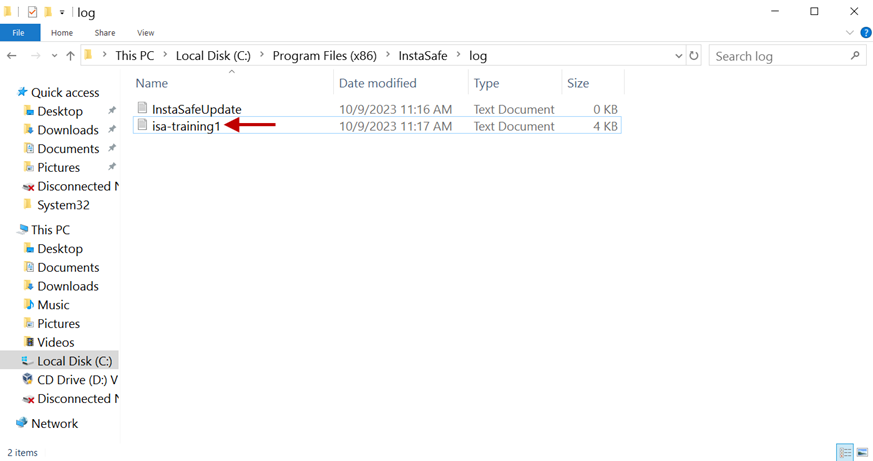
12.Scroll down.

13.Here you can see the IP address assigned to the Tap-Windows Adapter V9 virtual interface.

14.Open the command line window and enter ipconfig at the command prompt to see the IP address assigned to the Tap-Windows Adapter V9 virtual interface.

15.On the ISA web console, you will be able to see the Gateway listed under the LOGS & REPORTS > Live Gateways page
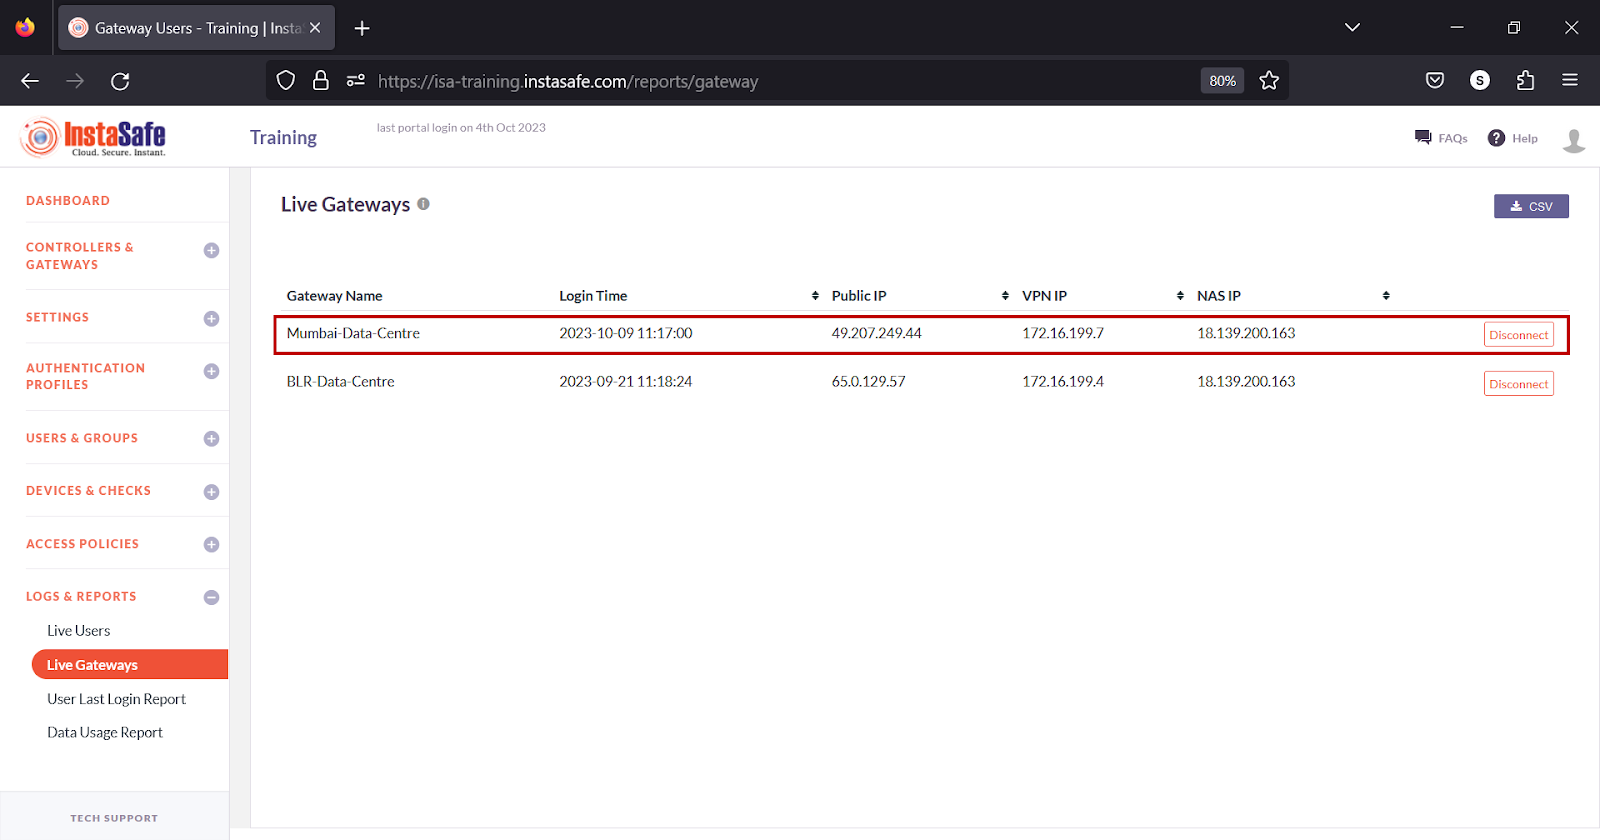
The Gateway Agent will initiate an outbound connection to the ISA Controller and establish a secure connection.
Adding Remote Access Service
On the Windows Server, make sure the Routing and Remote Access Service role is enabled:

Configuring NAT on the Routing and Remote Access server
1.On the Server Manager screen, click Tools and select Routing and Remote Access from the drop-down.
2.Right-click on the server’s name. In this example, Win2k16.

3.Click on Configure and Enable Routing and Remote Access.

4.In the Configuration window, select the Network address translation (NAT) radio button and click Next.
5.On the NAT Internet Connection window, select the public interface. In this example, it is Ethernet with an IP address of 192.168.0.101 and click Next.
6.On the next window, click Finish.
7.Expand the server’s name and expand IPv4.

8.Select NAT and right-click the physical interface selected for NAT.

9.Click Show Mappings.
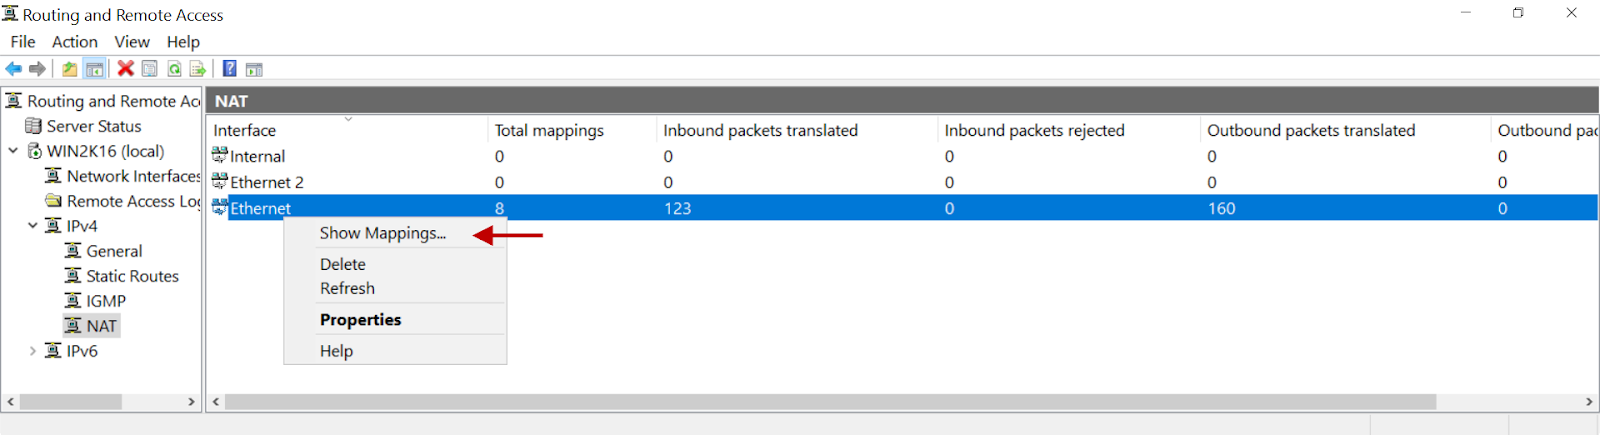
10.On the mapping table, you will see inbound packets translated on the interface selected for NAT.

In case you are unable to install the Agent by following these steps, contact your organization's IT Team.
If you are the administrator of the organization's ISA Account and need assistance, contact support@instasafe.com
How to Uninstall the ISA Gateway Agent
- Login into the server using administrator credentials.
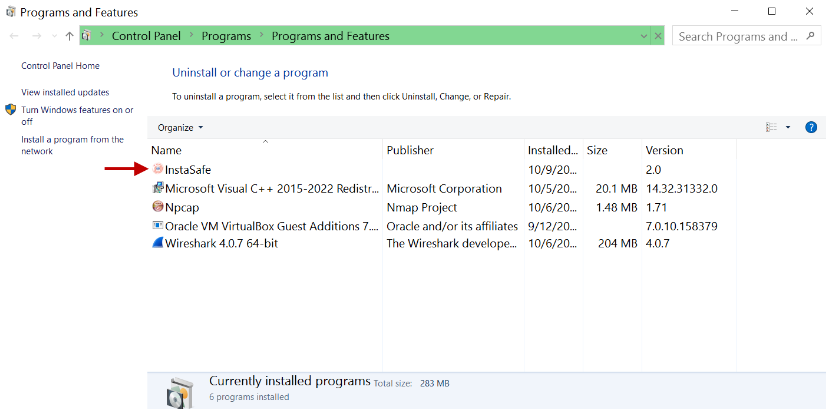
- Open Programs and Features from Control Panel.
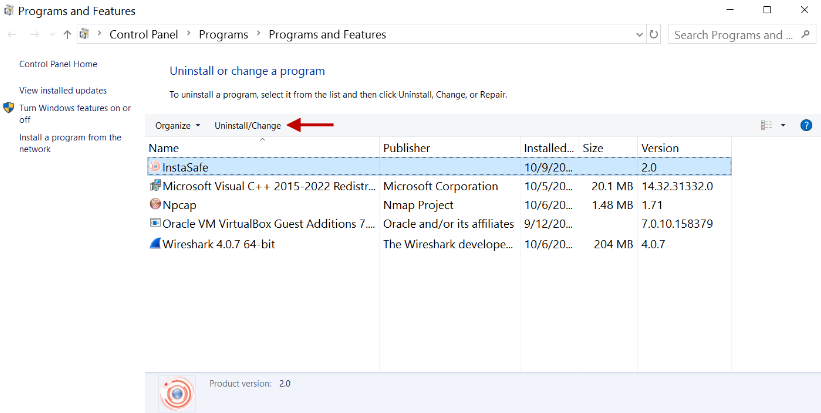
- Select InstaSafe.
- Click Uninstall/Change.
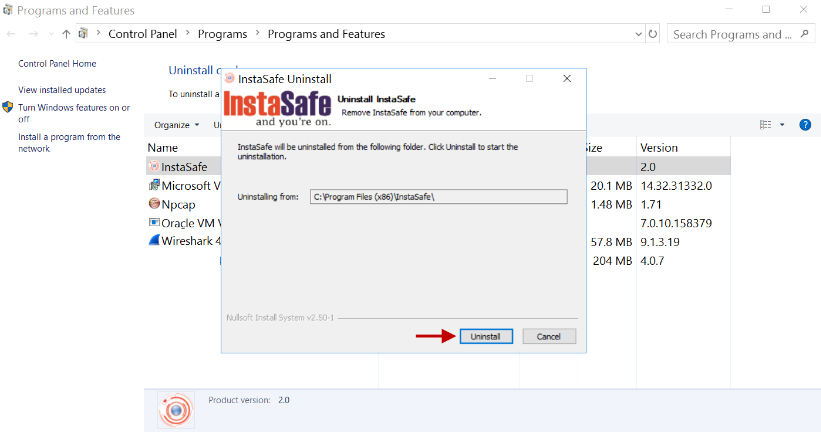
- In the Uninstall InstaSafe window, click Uninstall.
- Click Close.
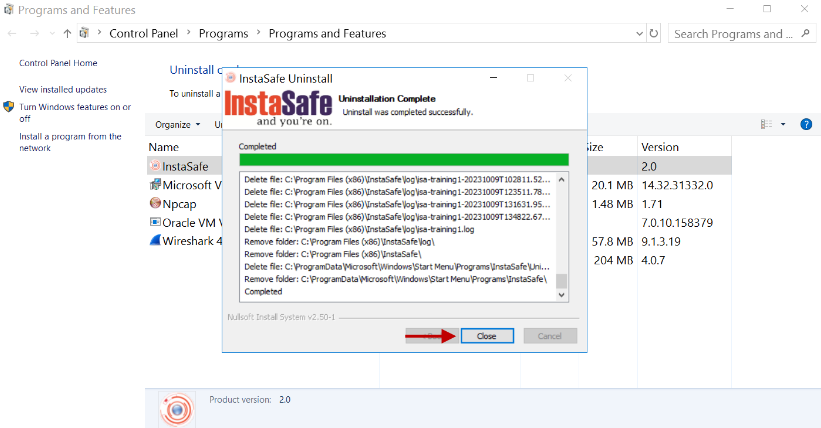
- Make sure the InstaSafe folder is deleted under C:\Program Files (x86)
In the event you are unable to uninstall InstaSafe Gateway Agent by following these steps, contact your organization's IT Team.
If you are an administrator of the organization's ISA Account and need assistance, contact InstaSafe Support
How to install the ISA Gateway Agent on Linux
InstaSafe Secure Access (ISA) Gateway Agent is a software that acts as the entry and exit point for user access. Gateways are deployed at the edge of a private network, and are used to connect remote clients or networks to the private network. It is responsible for encrypting and decrypting data sent over the secure connection, as well as routing the data between the client and the private network.
The ISA Gateway must be provisioned on a physical or virtual server at each of the data centres where applications and other services are hosted that are remotely accessed by users. To ensure redundancy, it is recommended to provision a backup Gateway as well. This ensures that unforeseen issues like hardware failure or OS corruption do not lead to network downtime.
Both the primary and back-up Gateways must be configured with static IP addresses. These IP addresses must be given to the InstaSafe administrator for the purpose of opening the required ports in the controller to accept the connection from the Gateway Agents.
Although the Agent software can be installed on other OSs, such as Microsoft Windows servers, best practice recommends that it be installed on a Linux server due to ease of installation and it being open-source. This KB describes the installation process on an Ubuntu desktop VM.
For the prerequisites for installing the Gateway Agent, refer to KB article Prerequisites for installing ISAGateway Agent.
1.Log into the ISA web portal using admin credentials.
2.On the left-side menu, navigate to the CONTROLLERS & GATEWAYS > Gateways page. Listed here are two Gateways added. This KB article will describe the process of installing the Gateway Agent for Mumbai-Data-Centre.

3.Next, on the left-side menu, under Downloads, click on Gateway Agents.
4.Listed here are the Gateway Agents and their respective back-up Gateway Agents. Click on the Linux icon to download the Agent script to the local disk.
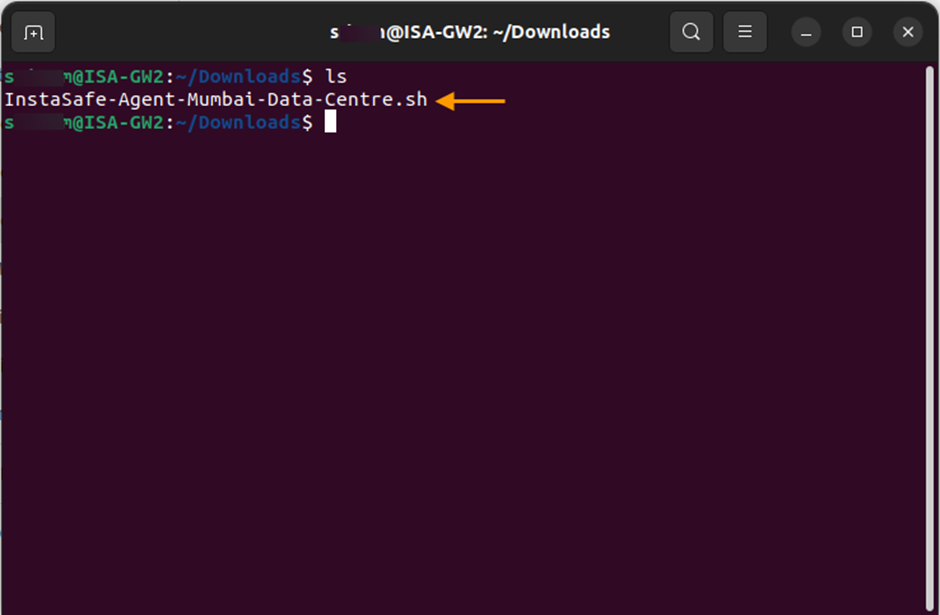
5.The file has been downloaded.
6.Open Terminal and navigate to the folder where the script is downloaded.
7.Set the read and write permission to the script file by entering the command: chmod 700
8.Execute the script by entering the command: sudo sh
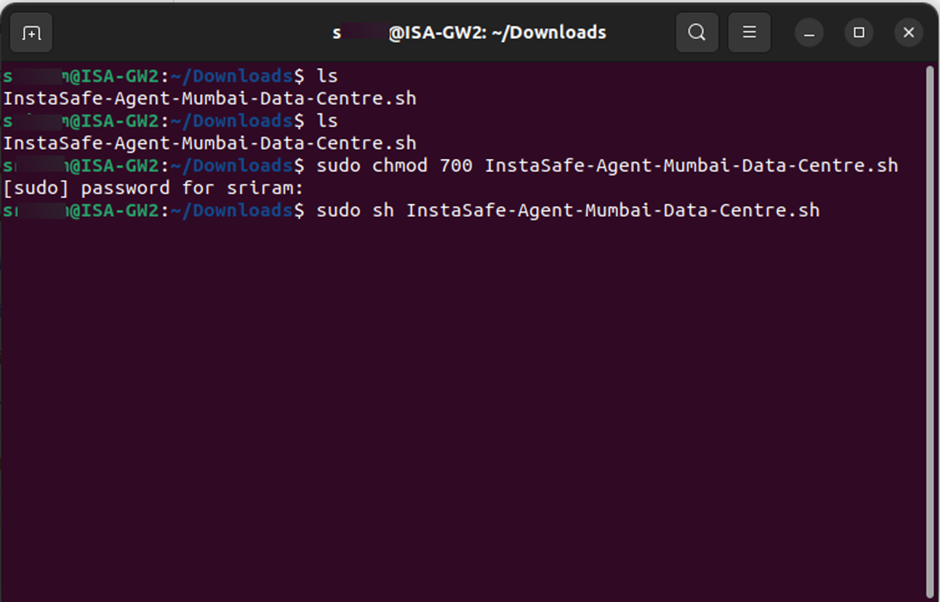
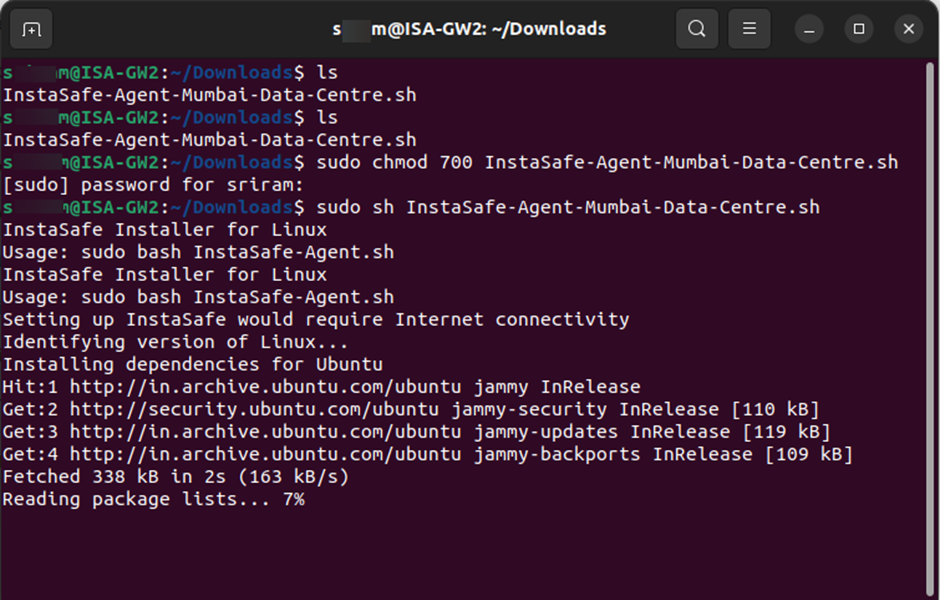
9.The installation will begin.
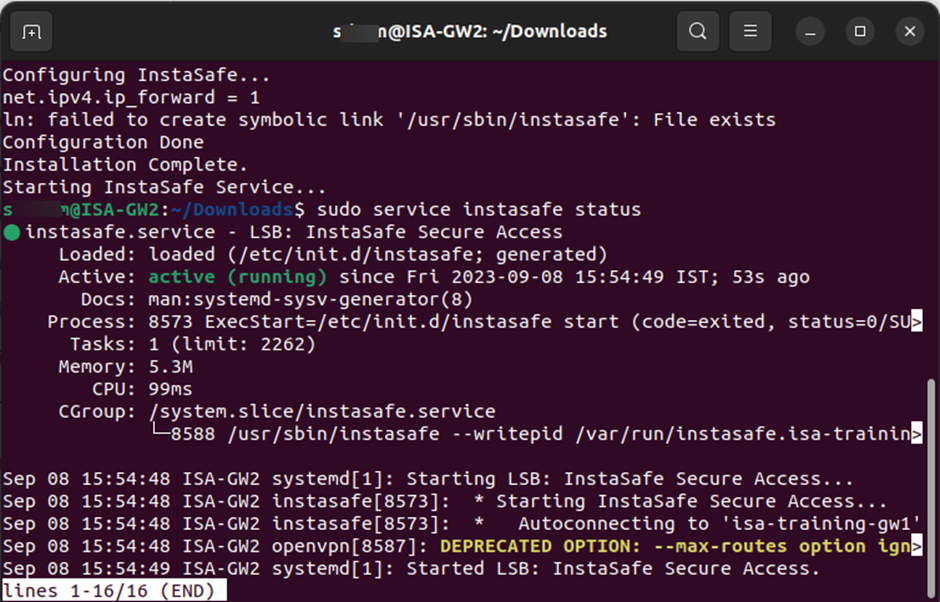
10.After the installation is completed successfully, check the status of the Instasafe Agent service by entering the command: sudo service Instasafe status
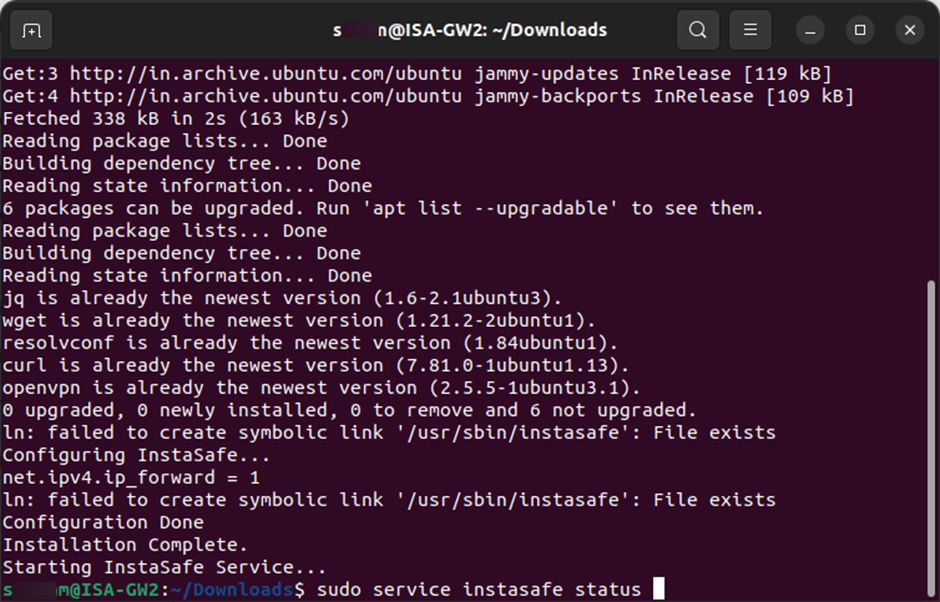
11.Here is a snapshot of the status indicating that the Instasafe Agent has successfully started and an outbound connection to the ISA controller has been made by the Instasafe Gateway Agent.
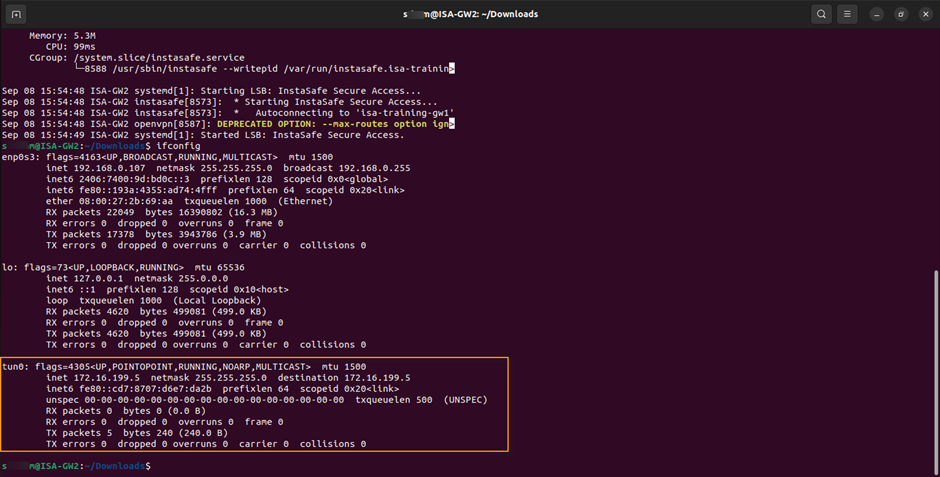
12.Enter ifconfig or ip addr to view the interfaces. If the installation is successful and the Instasafe service has started, a virtual interface, tun0, with its virtual IP address should be displayed.
The Gateway Agent will initiate an outbound connection to the ISA Controller and establish a secure connection.
In case you are unable to install the Agent by following these steps, contact your organization's IT Team. If you are the administrator of the organization's ISA Account and need assistance, contact support@instasafe.com.
How to Uninstall the ISA Gateway Agent from Linux
In certain circumstances, the ISA Gateway Agent, due to various reasons, may need to be changed. Before installing the Agent on a new Gateway, the Gateway Agent must be uninstalled. Login to the server as a user with root privileges Open Terminal Enter the command sudo service instasafe stop to stop the Instasafe Agent service. Enter the command sudo rm -rf /etc/instasafe/ to remove the Instasafe directory and its contents recursively. Enter the command sudo rm /var/log/instasafe*.log to remove any Instasafe log files with filename starting with “instasafe”.

The above steps will completely remove the Gateway Agent from the server. In case you are not unable to uninstall the ISA Gateway Agent by following these steps, contact your organization's IT Team.
If you are the administrator of the ISA Account and need assistance, contact support@instasafe.com