Users and Groups
Configure Local Users
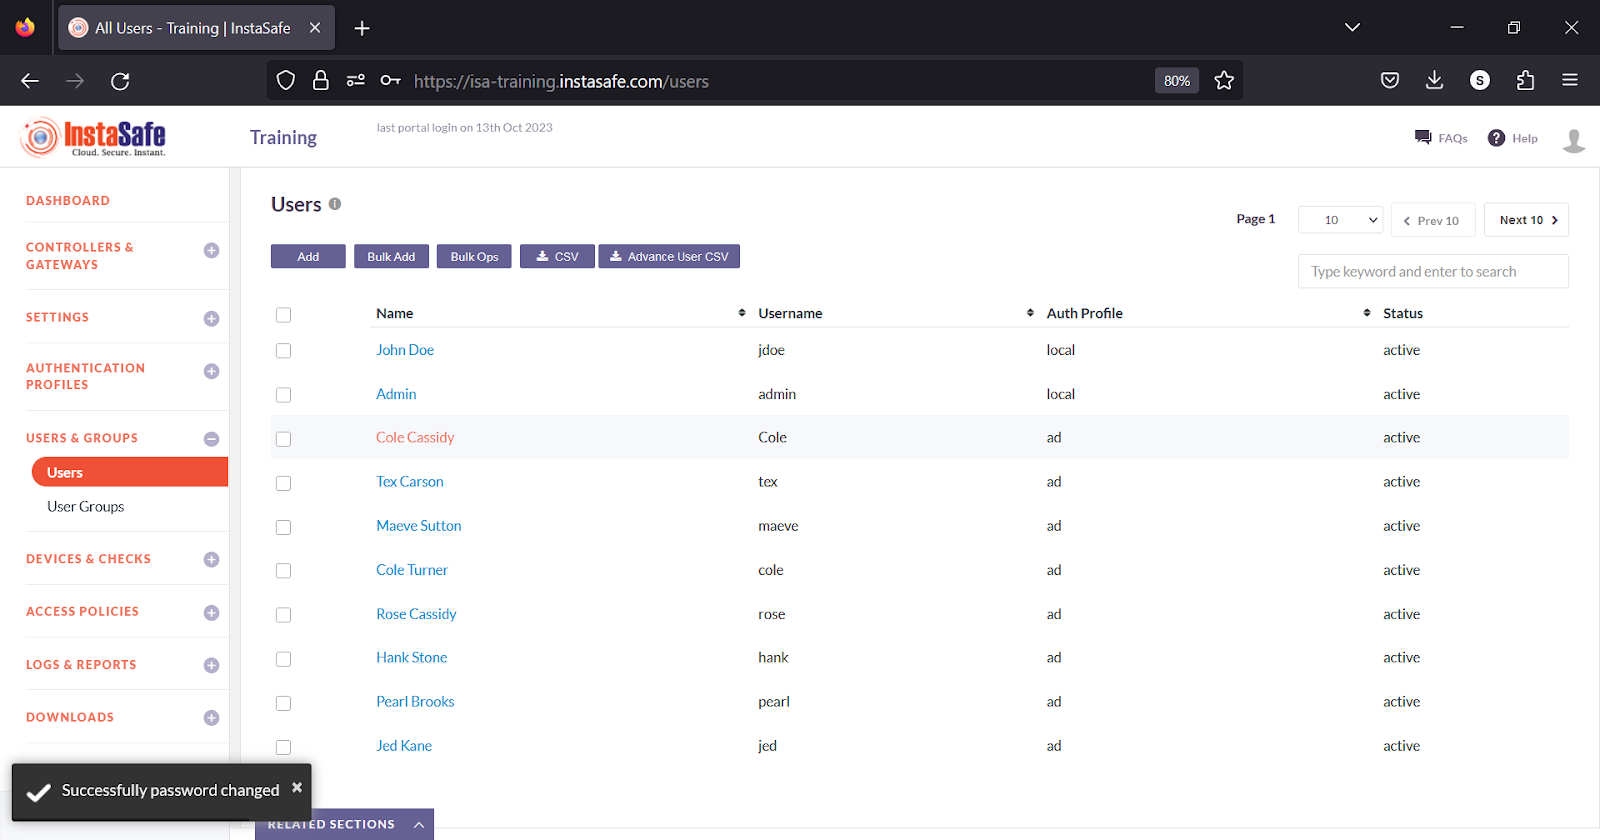
The Users page on the ISA web portal allows administrators to create and maintain a database of users that either connect remotely using the ISA User Agent or log into the portal for administrative purposes. Users can be created locally by adding the users manually or in bulk or imported from Active Directory (AD) and LDAP. The users can be configured with authentication parameters so they can be authenticated before accessing corporate resources or when logging into the web portal.
Local users are authenticated by the ISA authentication server and external users, such as AD/LDAP users, are authenticated by the respective corporate authentication servers. The primary authentication mechanism is Certificate and/or Password. Secondary authentication can be enabled for the user through Multi-Factor or Two-Factor Authentication using authenticator apps, email, or SMS.
User access can be further secured by configuring conditional access based on hardware and software parameters.
Add User
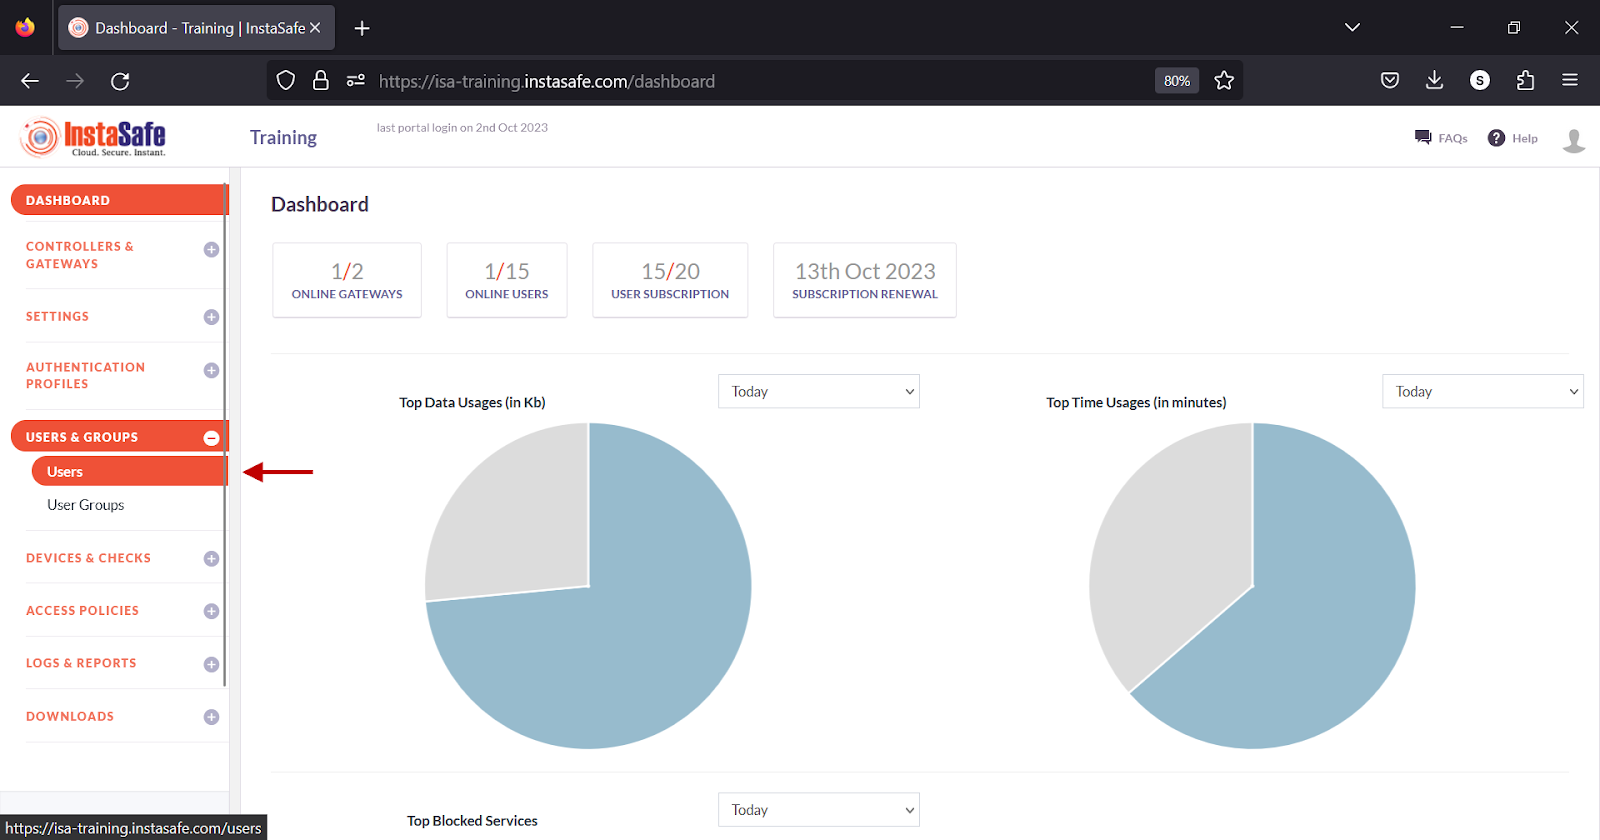
- Login to the ISA web console using administrator credentials
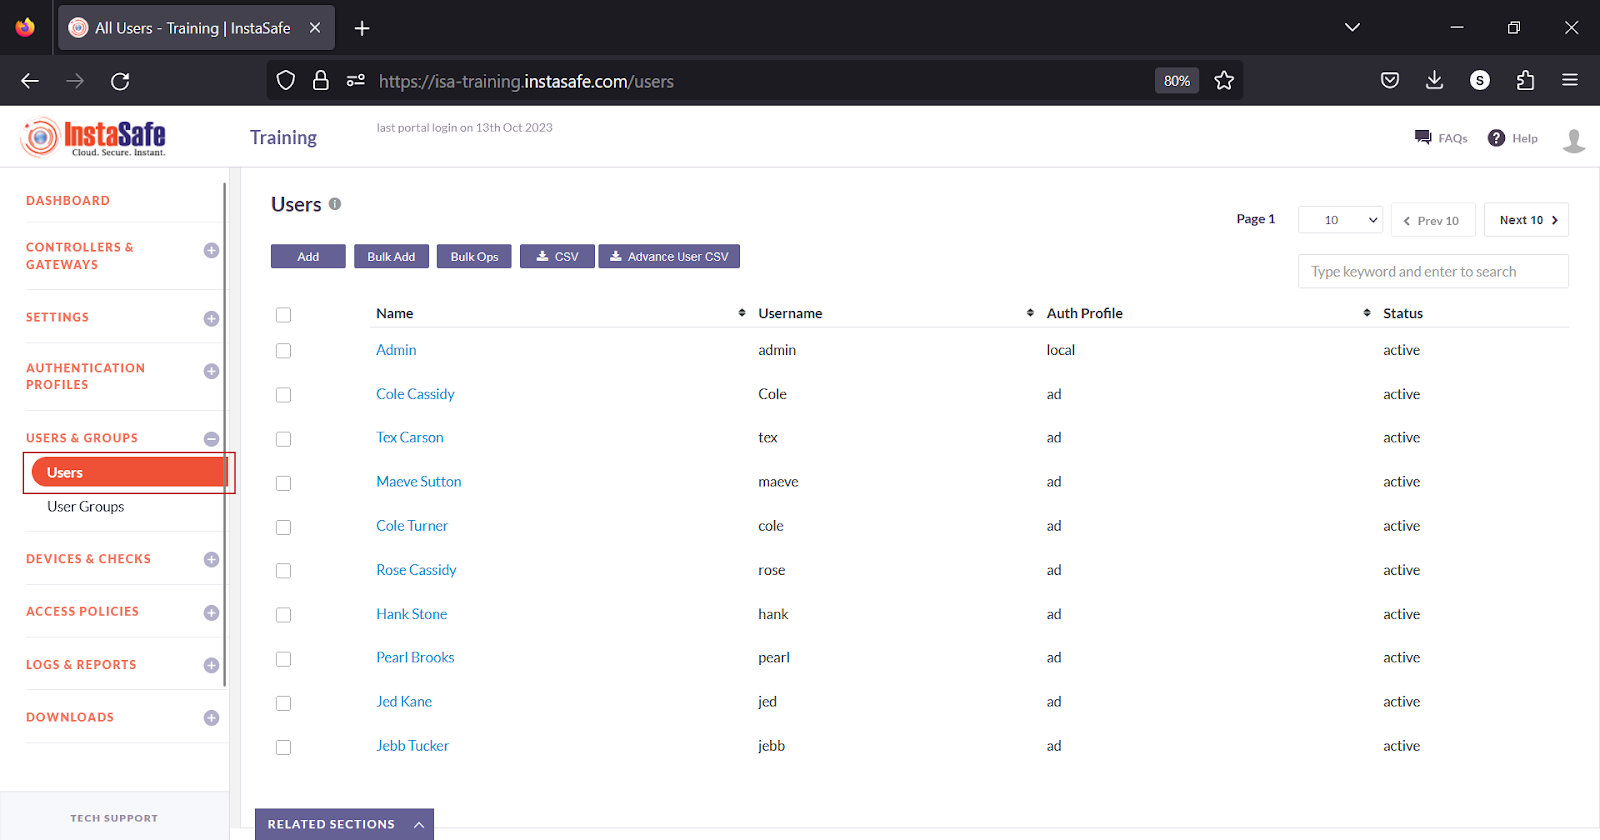
- Navigate to the Users page under the USERS & GROUPS menu.
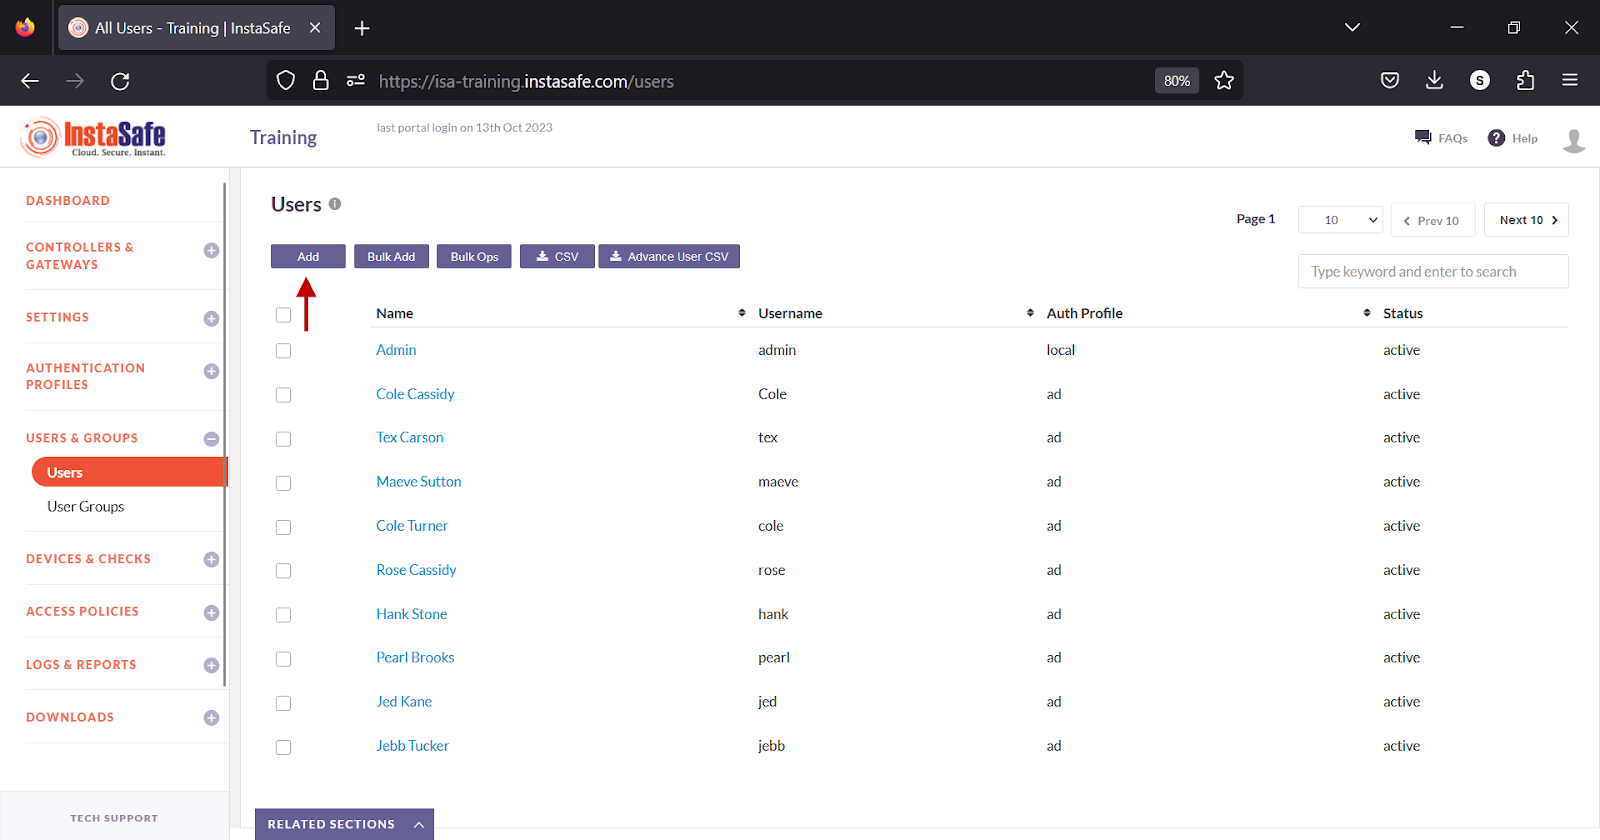
- Click the Add button at the top.
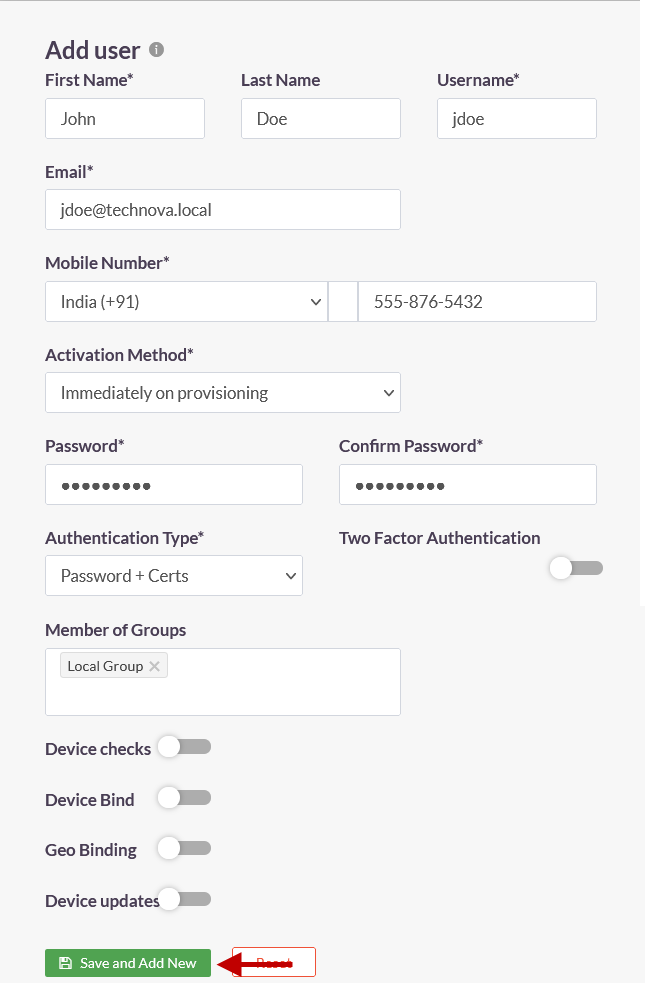
- On the Add User window, enter the following information:
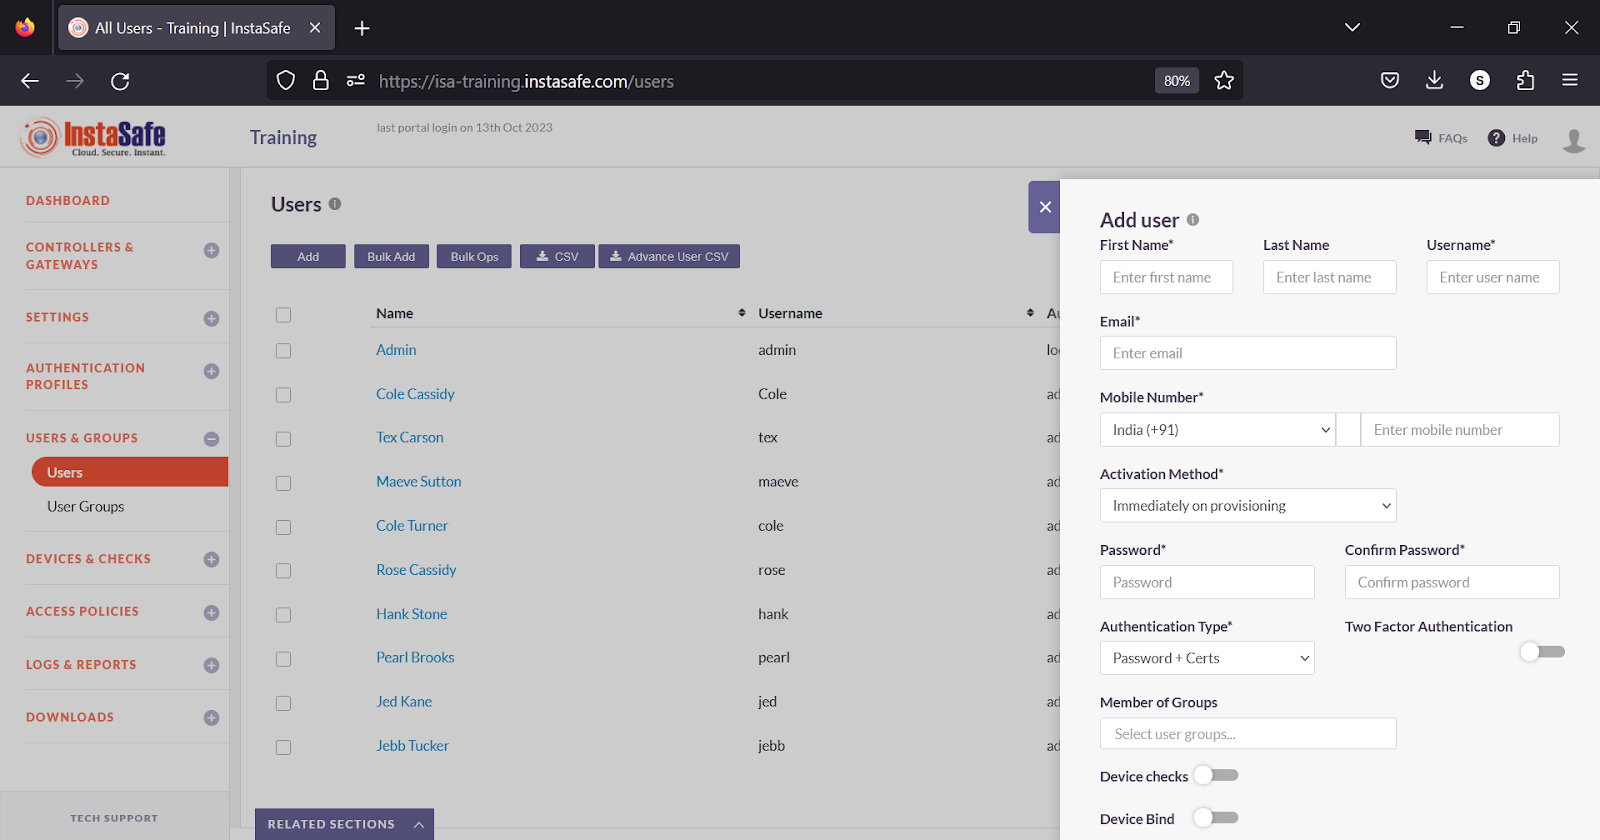
Starred fields are required fields.
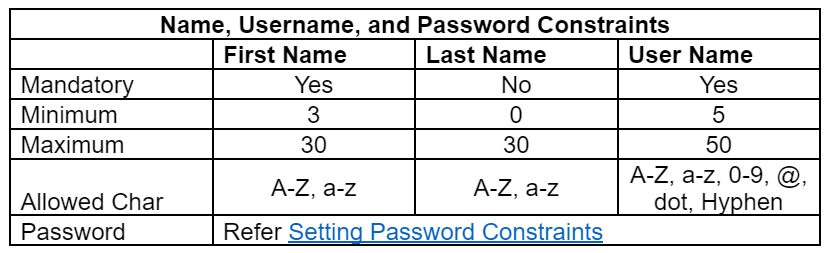
- First Name – Enter the first name of the user.
- Last Name – Enter the last name of the user.
- Username – Enter a username for the user.
- Email – Enter a valid email address.
- Mobile Number – Enter a valid mobile number.
- Activation Method – Click the drop-down and select the activation method. For more information on Activation Method, refer to the KB article, User Settings.
- Password – Enter a password for the user. The password must meet the criteria defined on the Local Profile page under the Authentication Profiles menu. If Activation Method selected is not Immediately on provisioning, this field is not displayed.
- Confirm Password – Confirm the password. If Activation Method selected is not Immediately on provisioning, this field is not displayed.
- Authentication Type – Select the authentication method from the drop-down. By default, it is set to Password+Certs, where, when the user connects the ISA User Agent, the user is prompted for the username and password and an mTLS connection is established. When the Type is set to Certificate, the Agent is prompted for the username and password once during the installation of the Agent. All subsequent connections will use mTLS for authentication. Authentication Type set to Password is also known as Always-On mode.
- Two Factor Authentication – Turn on the toggle button to enable Two Factor Authentication.
- Member of Groups – Click the box to select the user group for this user. When added to an existing user group referenced in an access rule, the user gains access to the group's resources.
- Device checks – Turn on the toggle button to enable Device Checks.
- Device Bind - Turn on the toggle button to enable Device Binding.
- Geo Binding – Turn on the toggle button to enable Geo Binding.
- Device updates - Turn on the toggle button to enable Device updates.
- Click Save and Add new to add the user.
Change Password
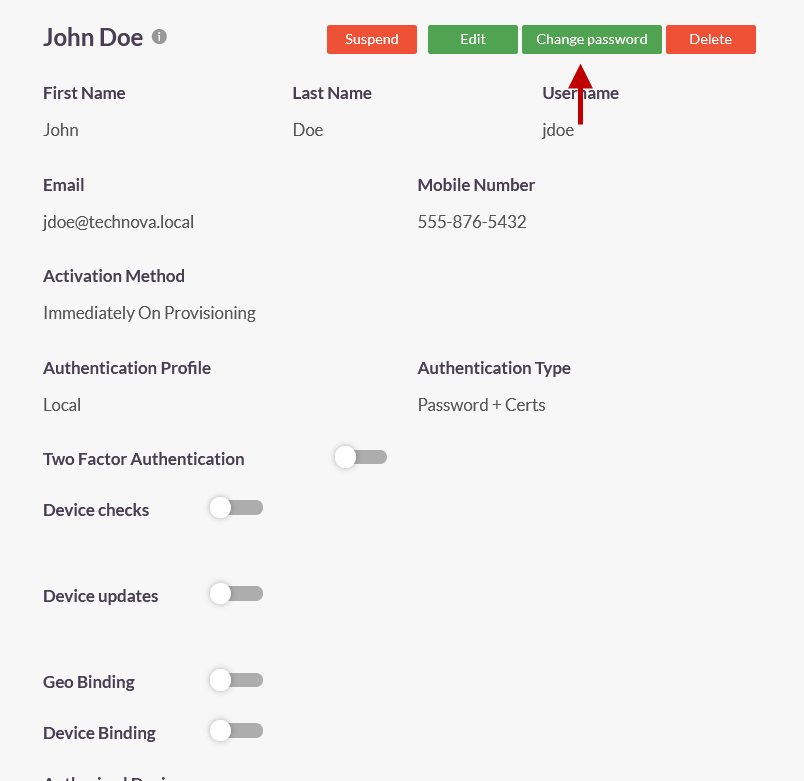
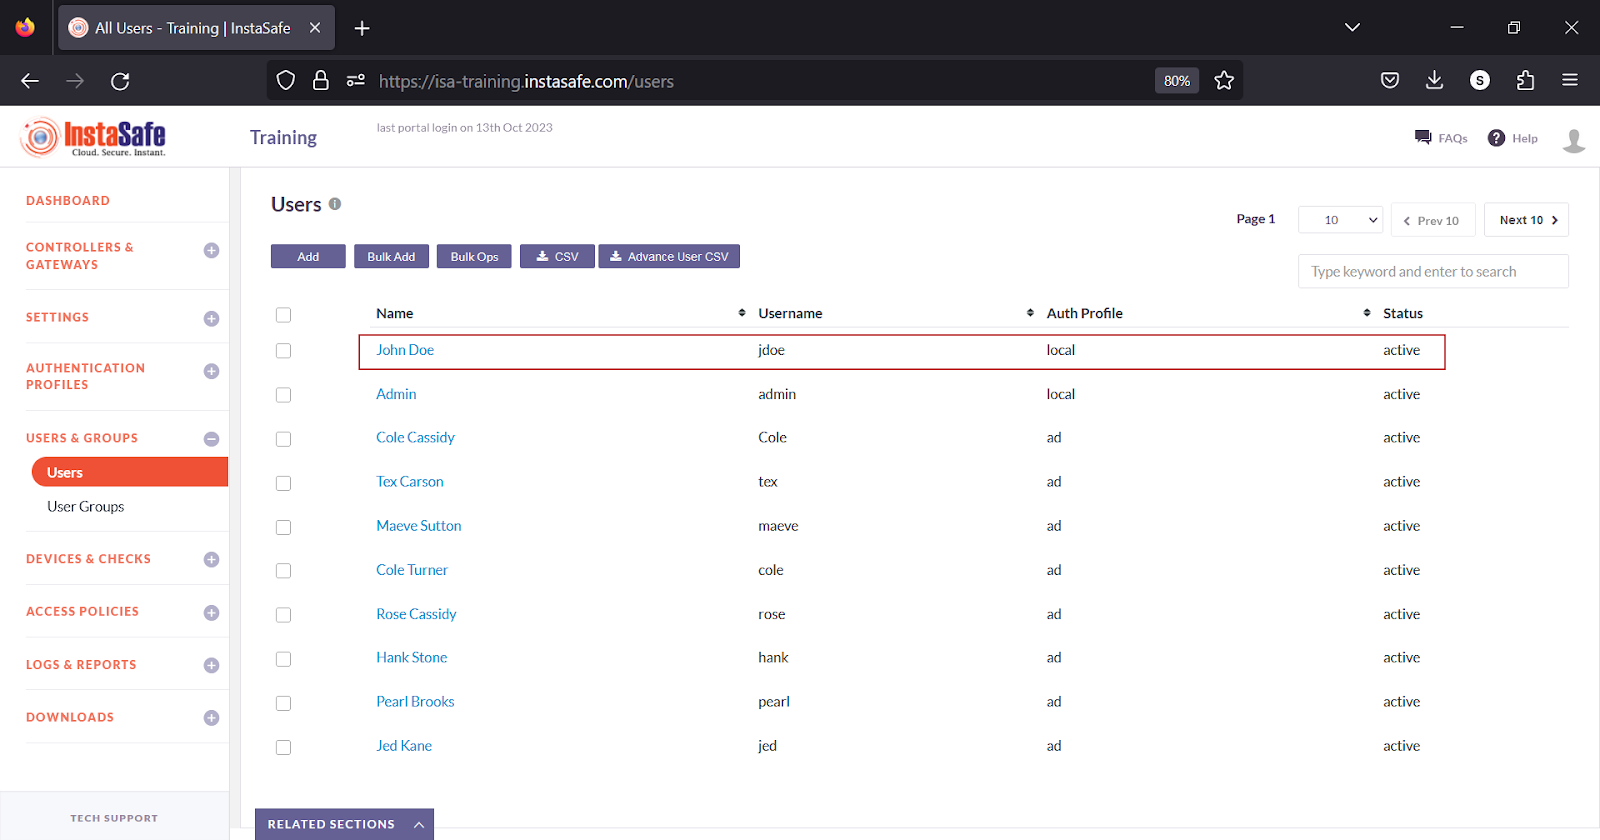
- Click the name of the user.

- Click Change password.
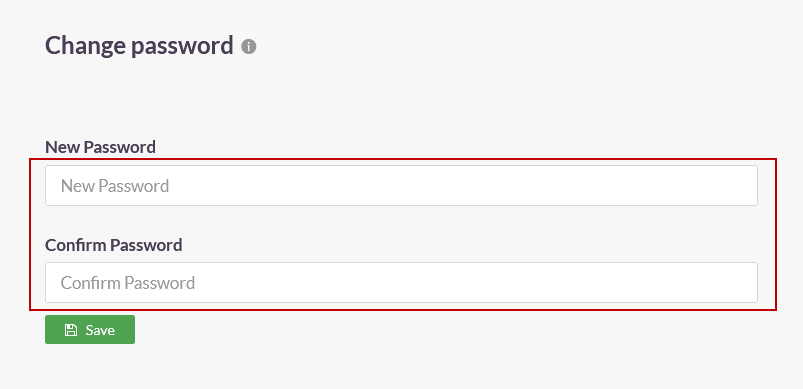
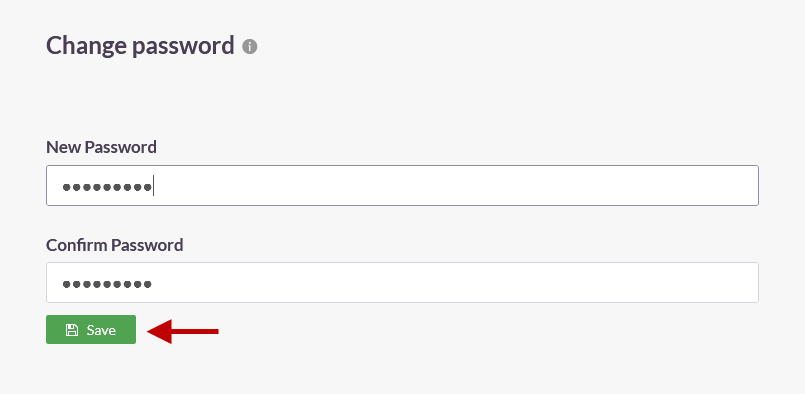
- In the Change password window, enter the new password and confirm it.
- Click Save.
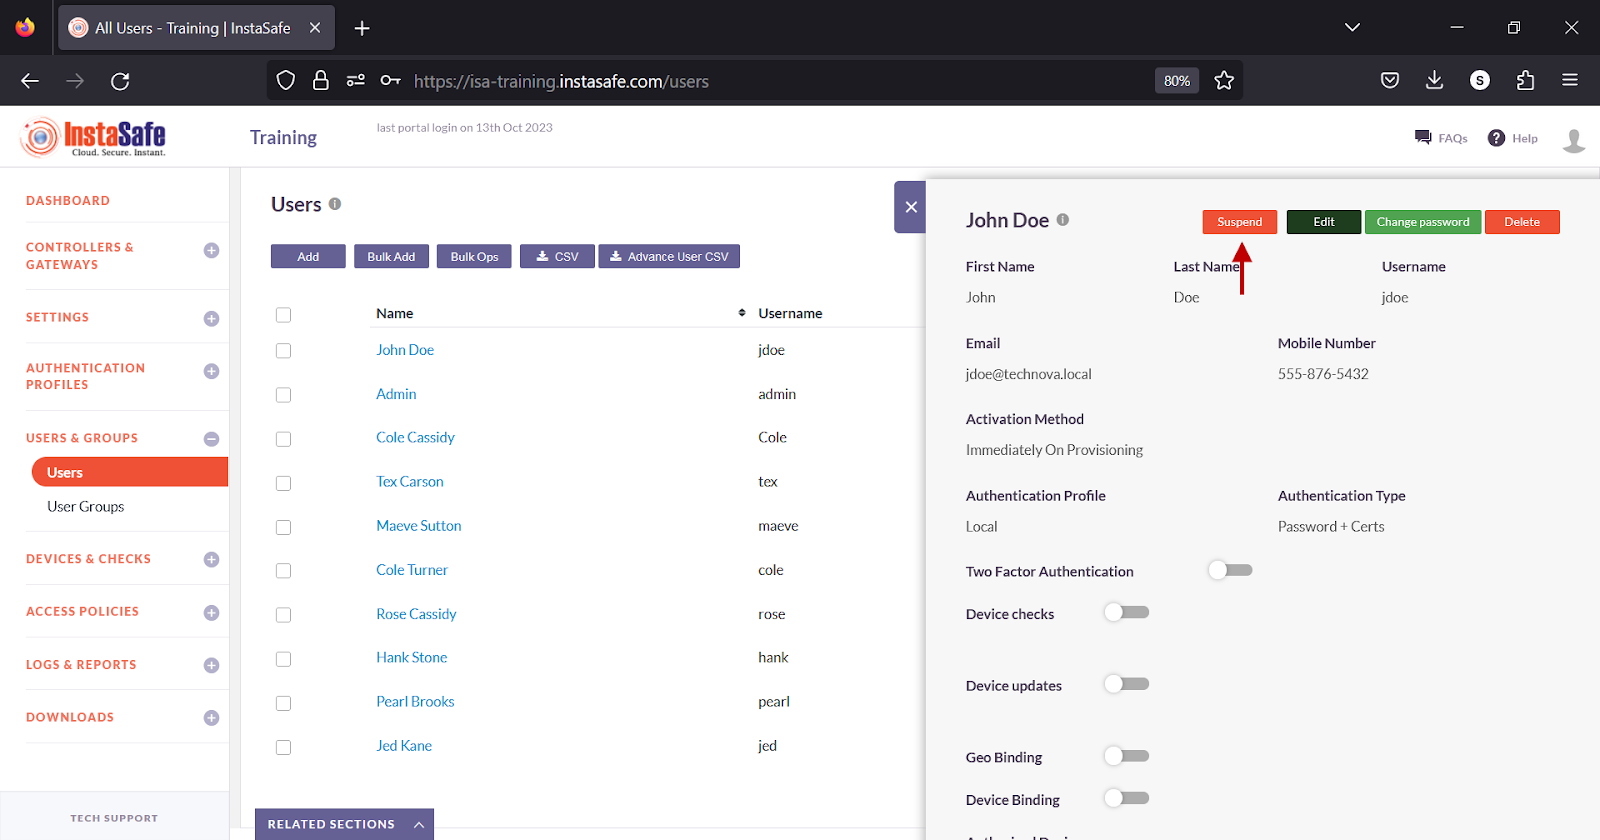
Suspend User
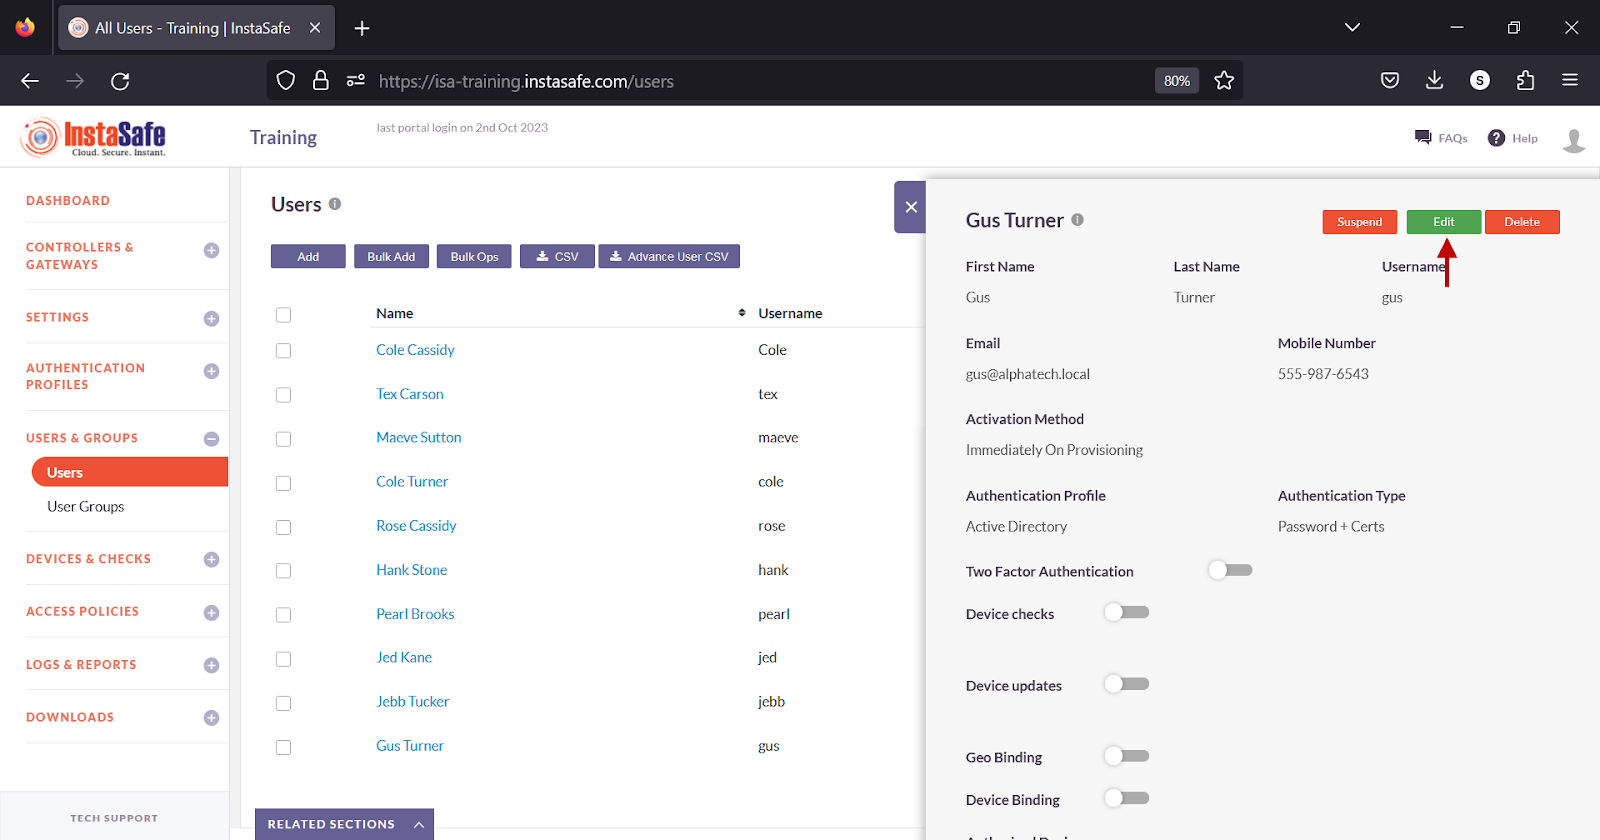
- Click the name of the user.

- In the user window, click Suspend.
- On the pop-up window, click Yes, Suspend it!.
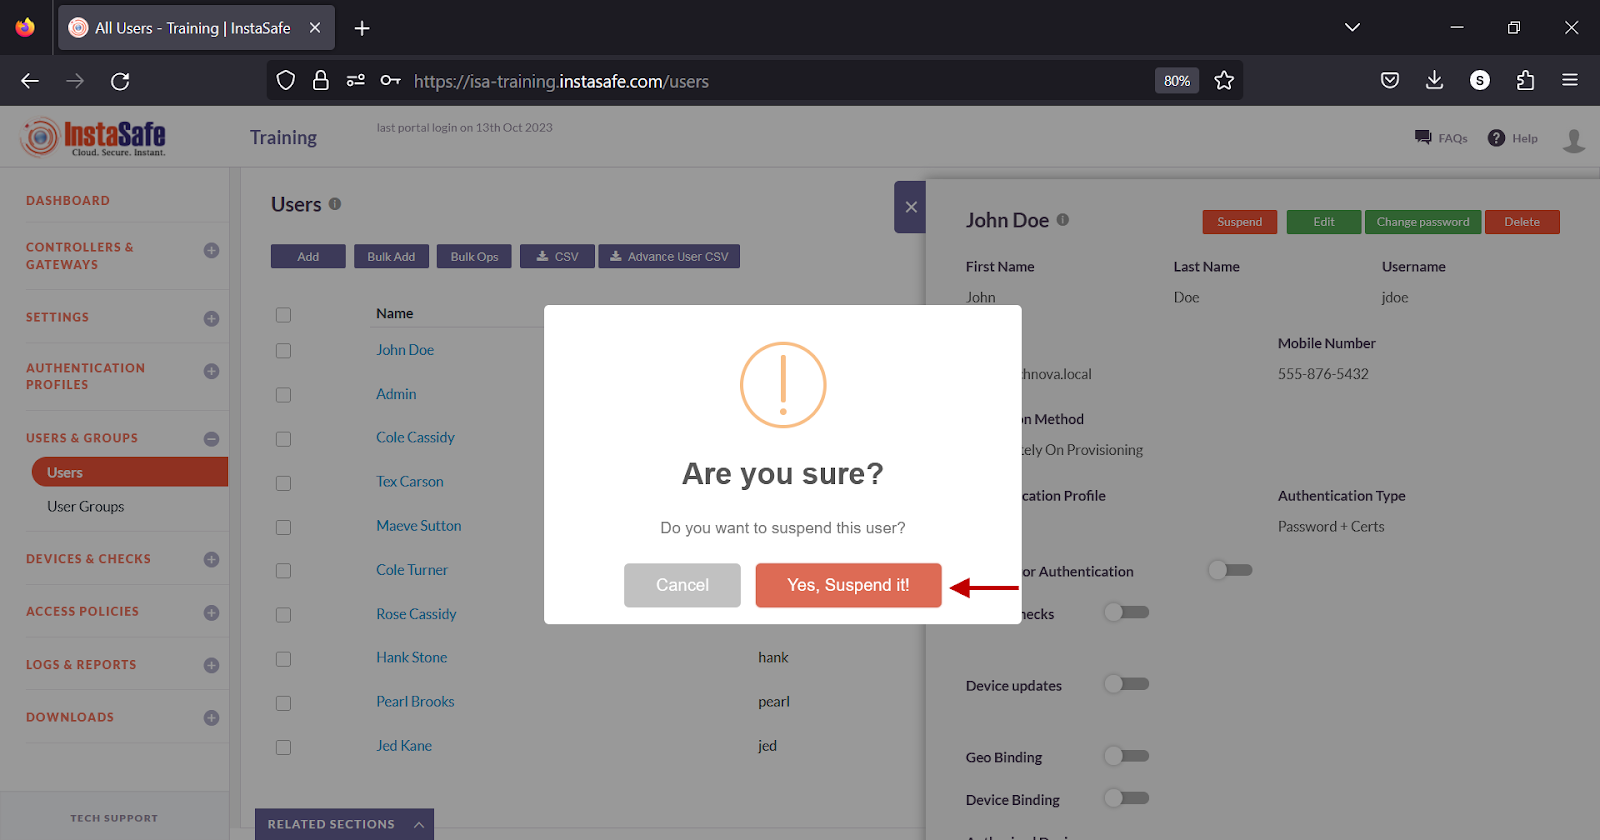
- The status of the user is changed to suspended.

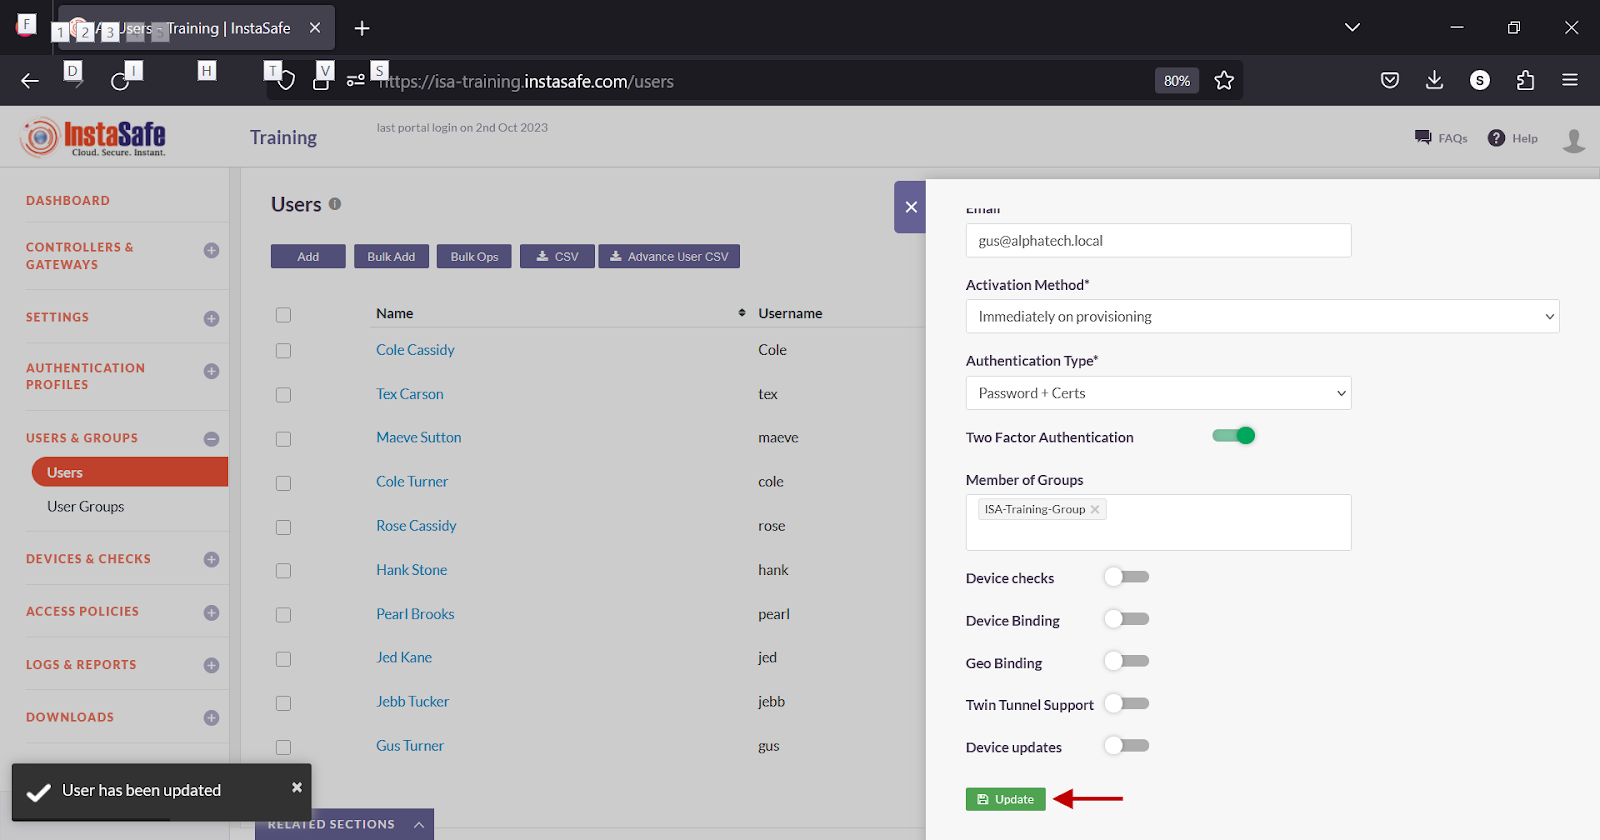
Edit User
- Click the name of the user.
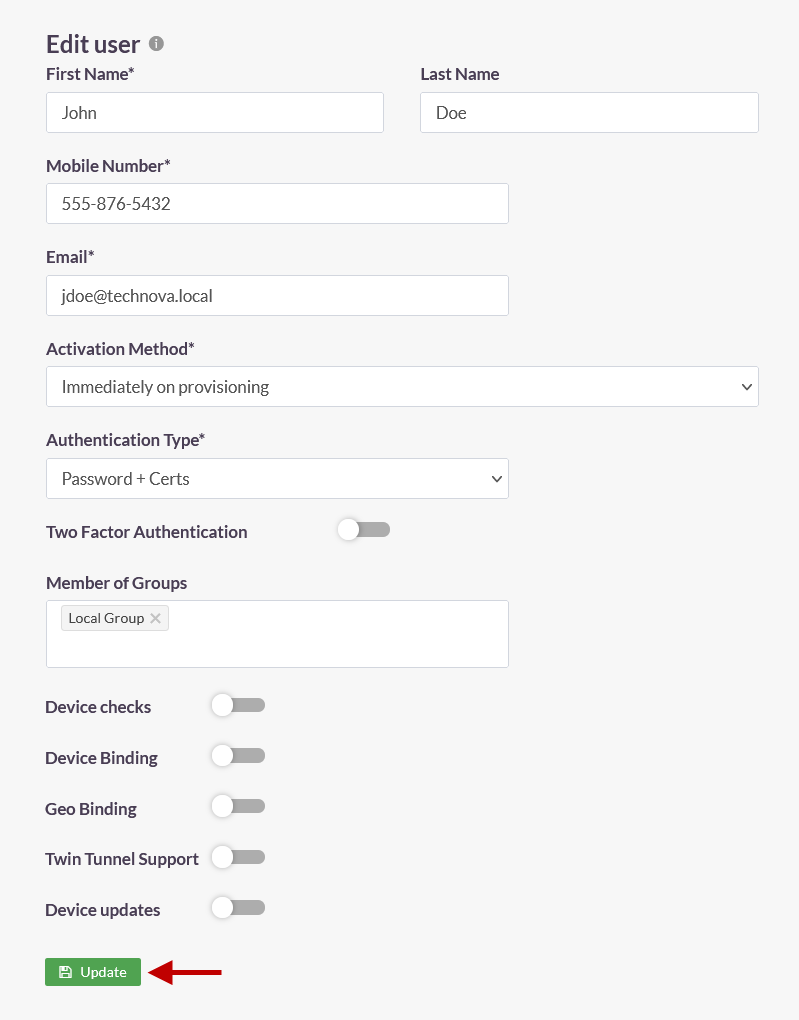
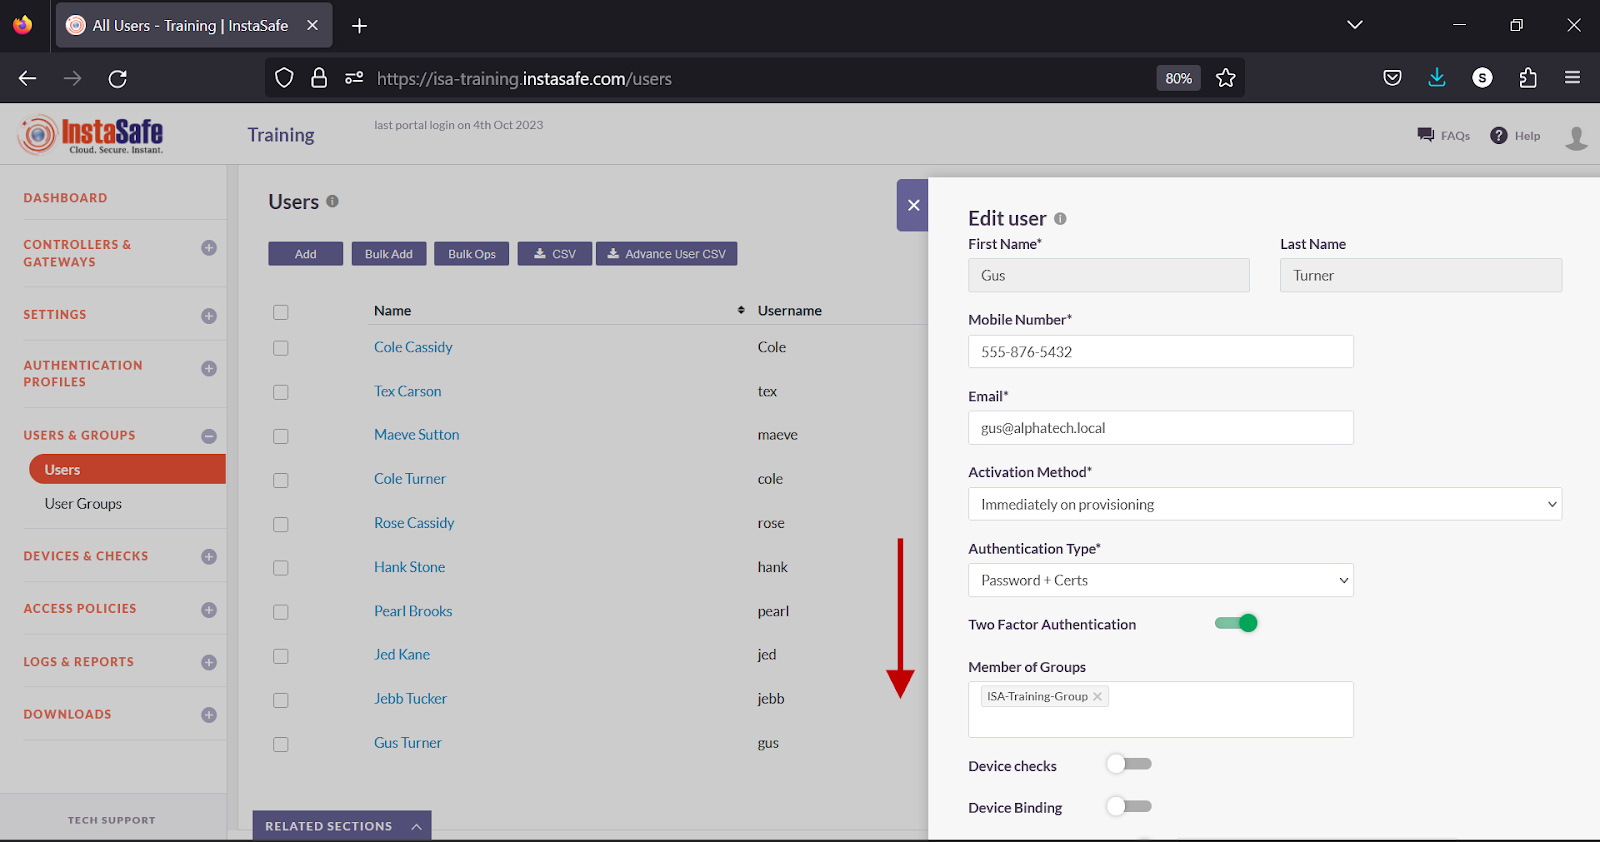
- In the user window, click the Edit button.
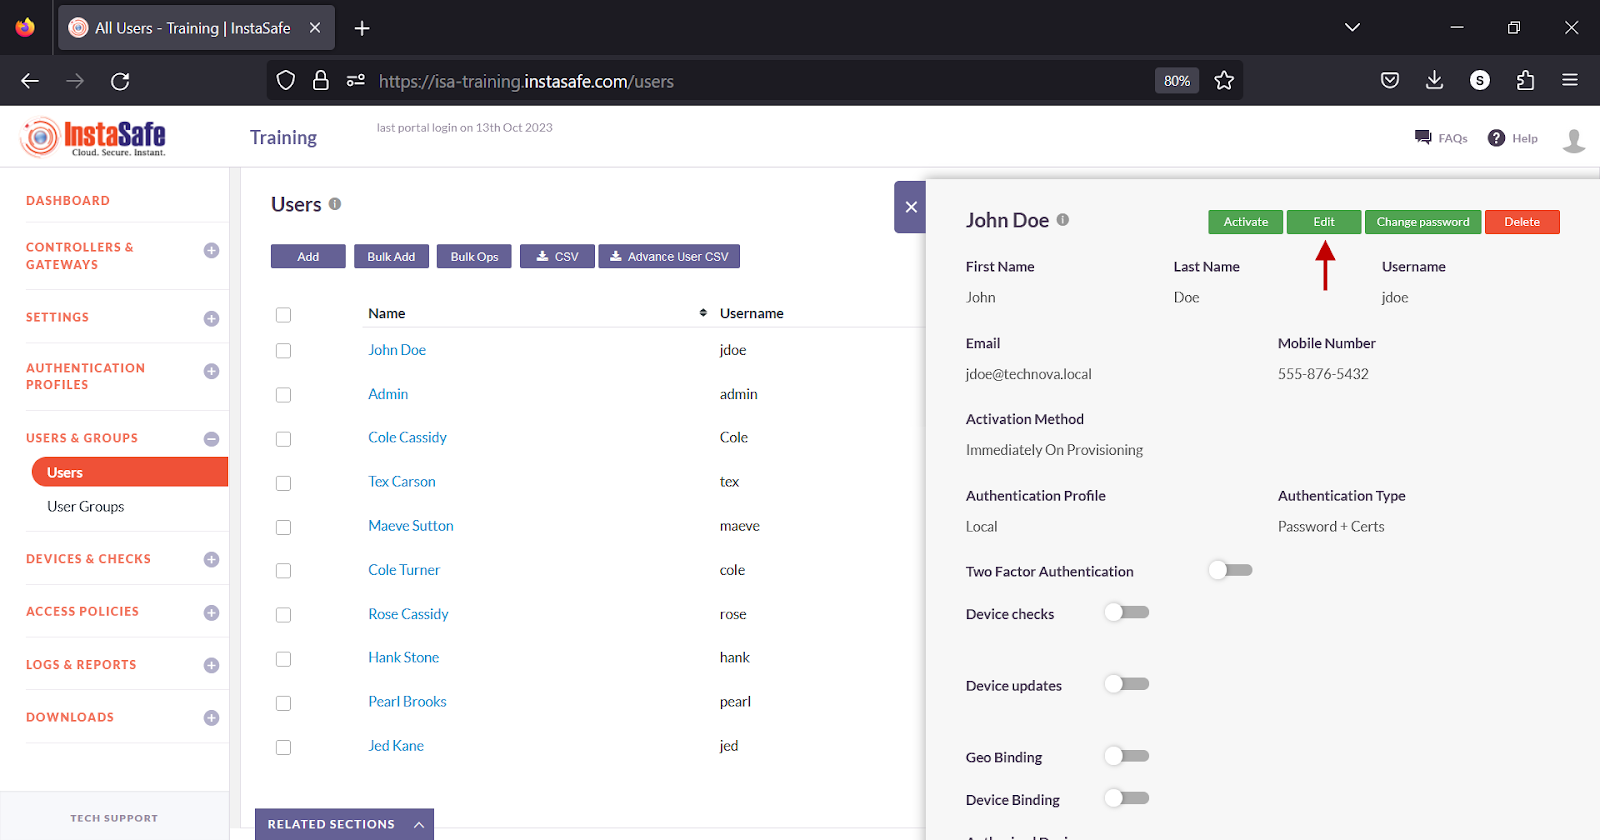
- Make changes and click Update at the bottom.
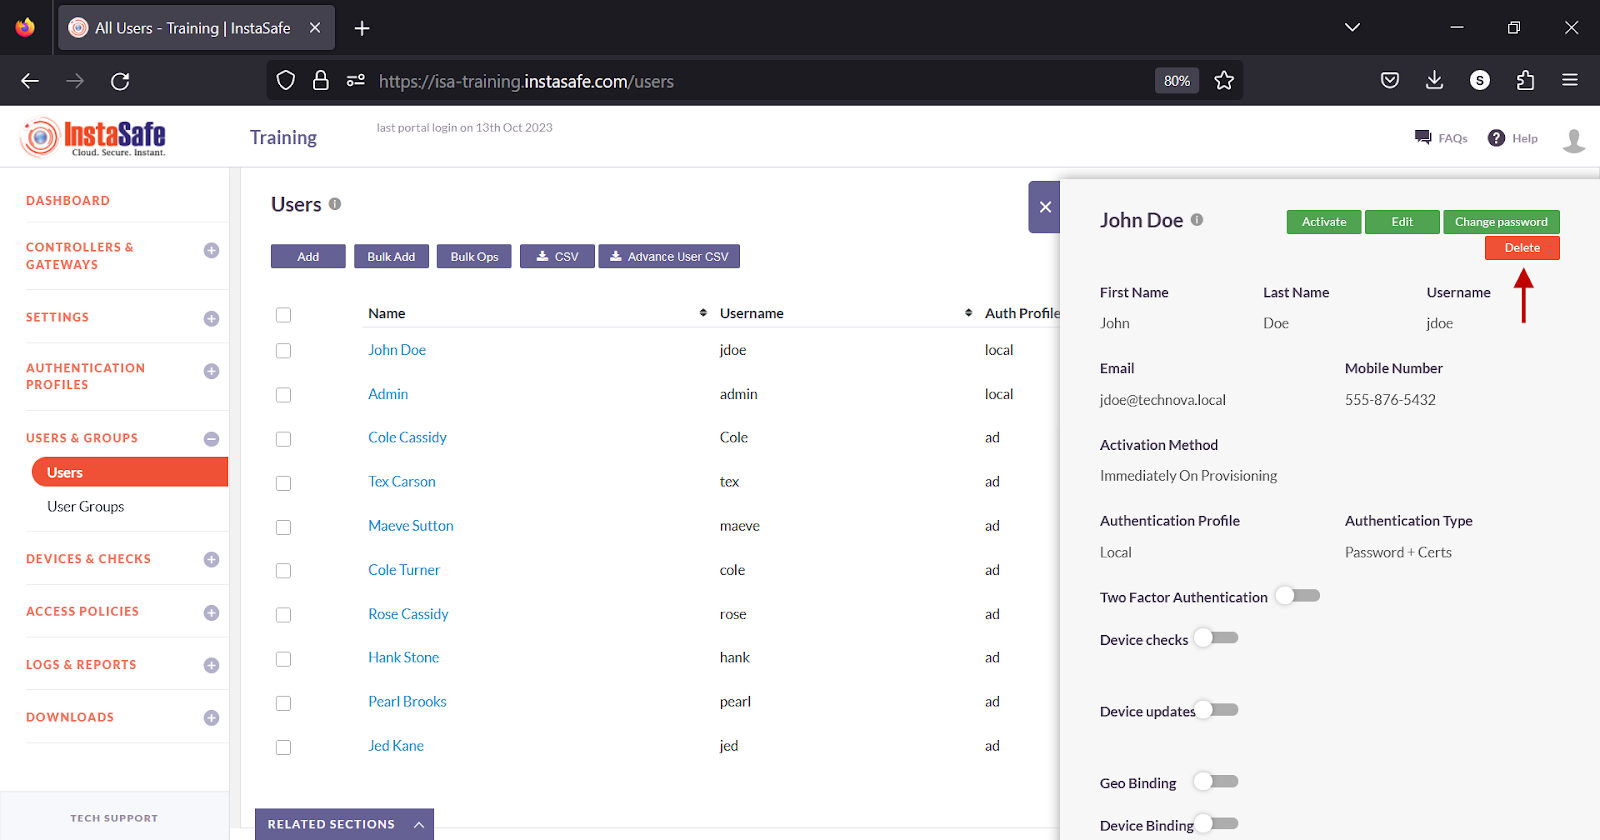
Delete User
- Click the name of the user.

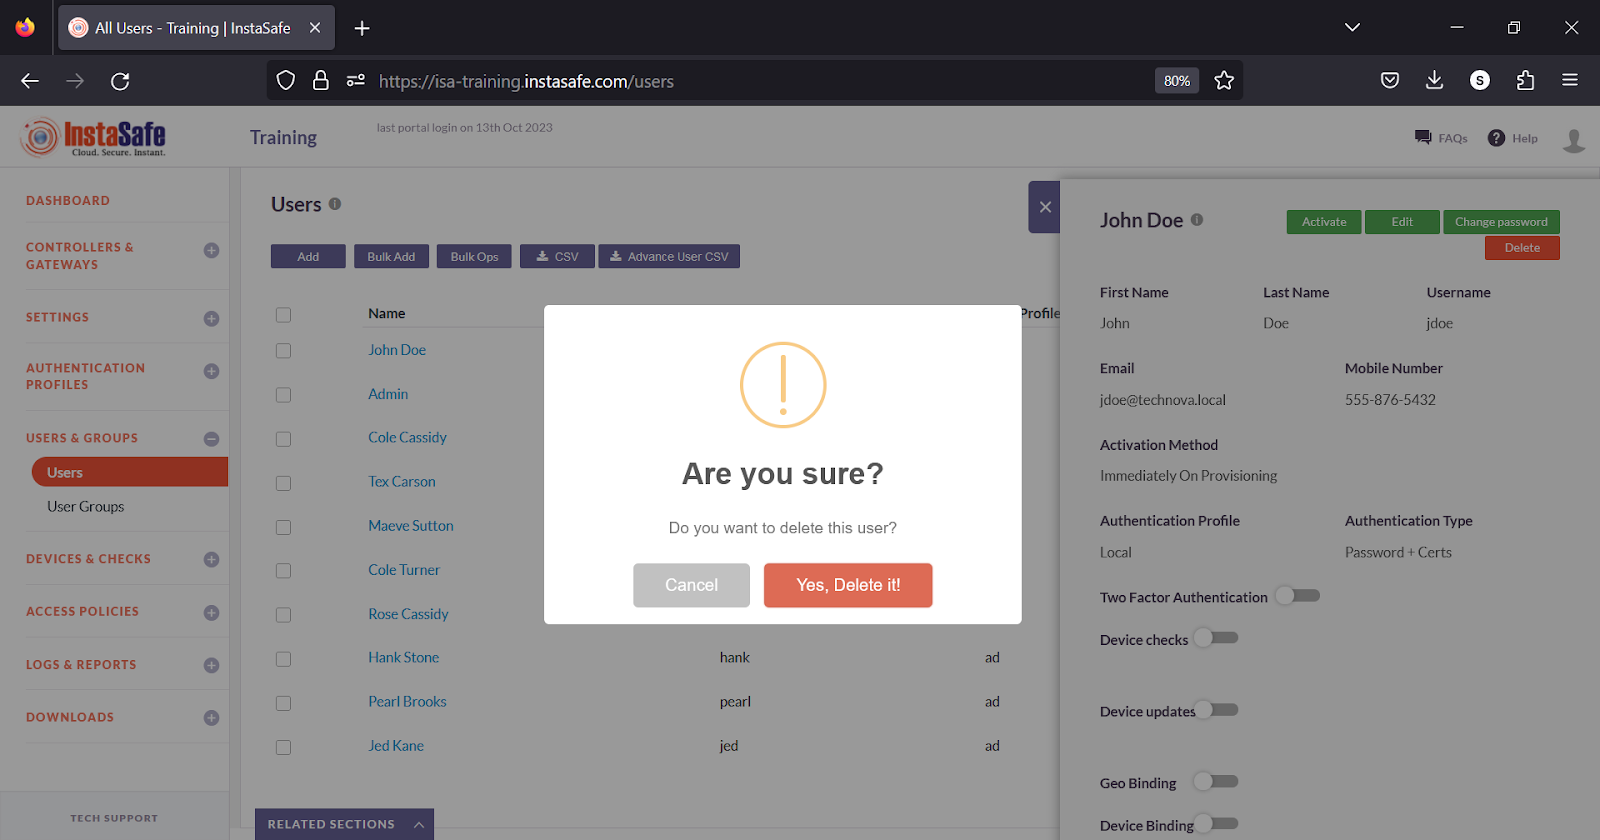
- In the user window, click the Delete button.
- On the pop-up window, click Yes, Delete it!.
Bulk Add Users
This option allows the administrator to add a large number of users at once. The uploaded users have the following conditions:
- The number of users added is limited to the subscribed number of user licenses. If the list of users exceeds the licensed quantity, users are uploaded up to the allowed license limit, and the rest are discarded with an error.
- Activation Type of users is set to "Immediately on Provisioning".
-
Supported fields in the file are:
- First Name
- Last Name
- Username
- Email address
- Country Code
- Mobile Number
- Password
- GroupName
-
CSV file must begin with a header line with the above fields
- Mandatory fields are First Name, Username, E-Mail id. Optional fields may contain a valid value or blank.
-
User authentication type is set to "Password + certificate".
-
On the Users page, click the Bulk Add button.

- In the Bulk Upload User window, click Download Sample CSV.
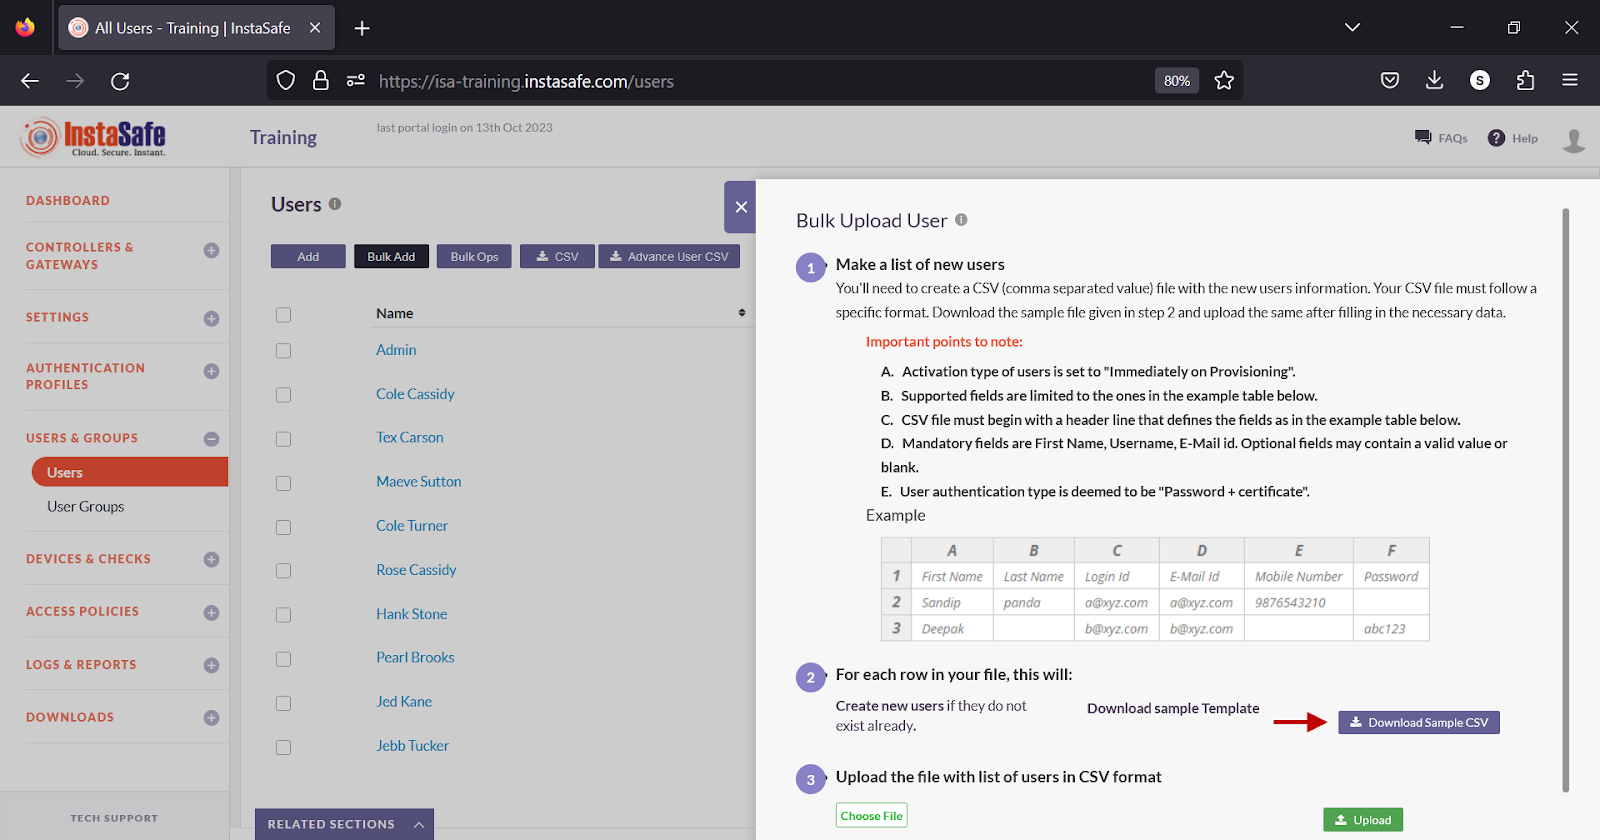
- The template file has the following fields.
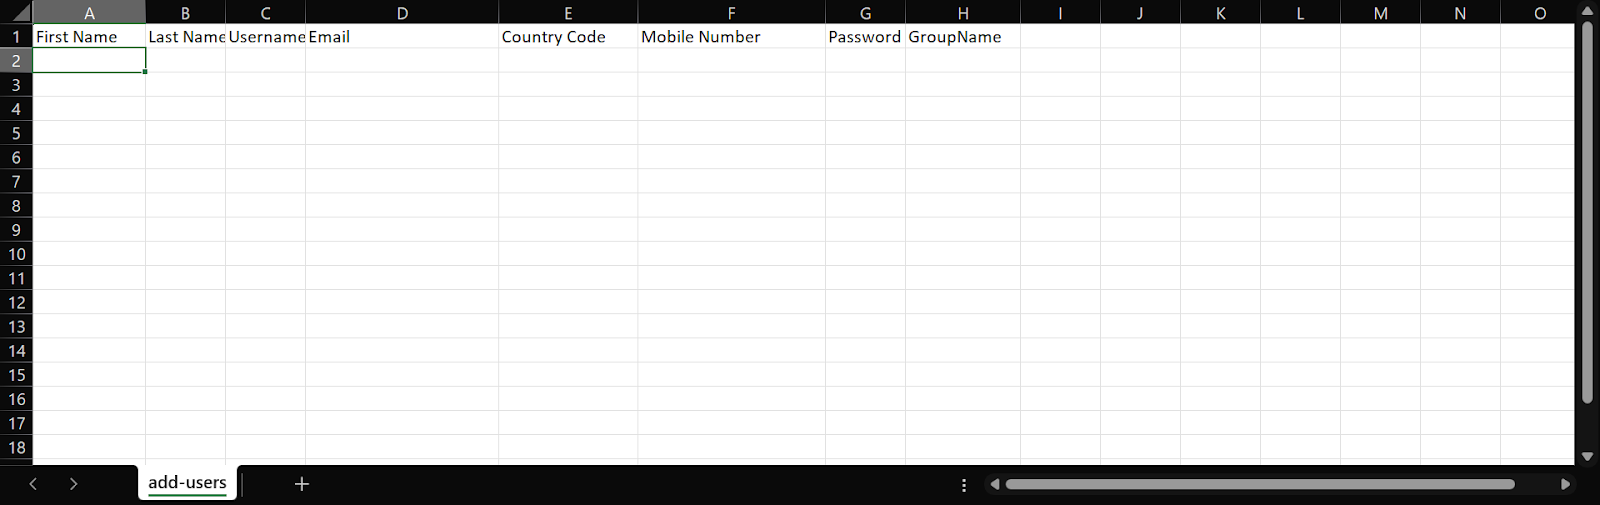
- Enter the user information in the respective fields.
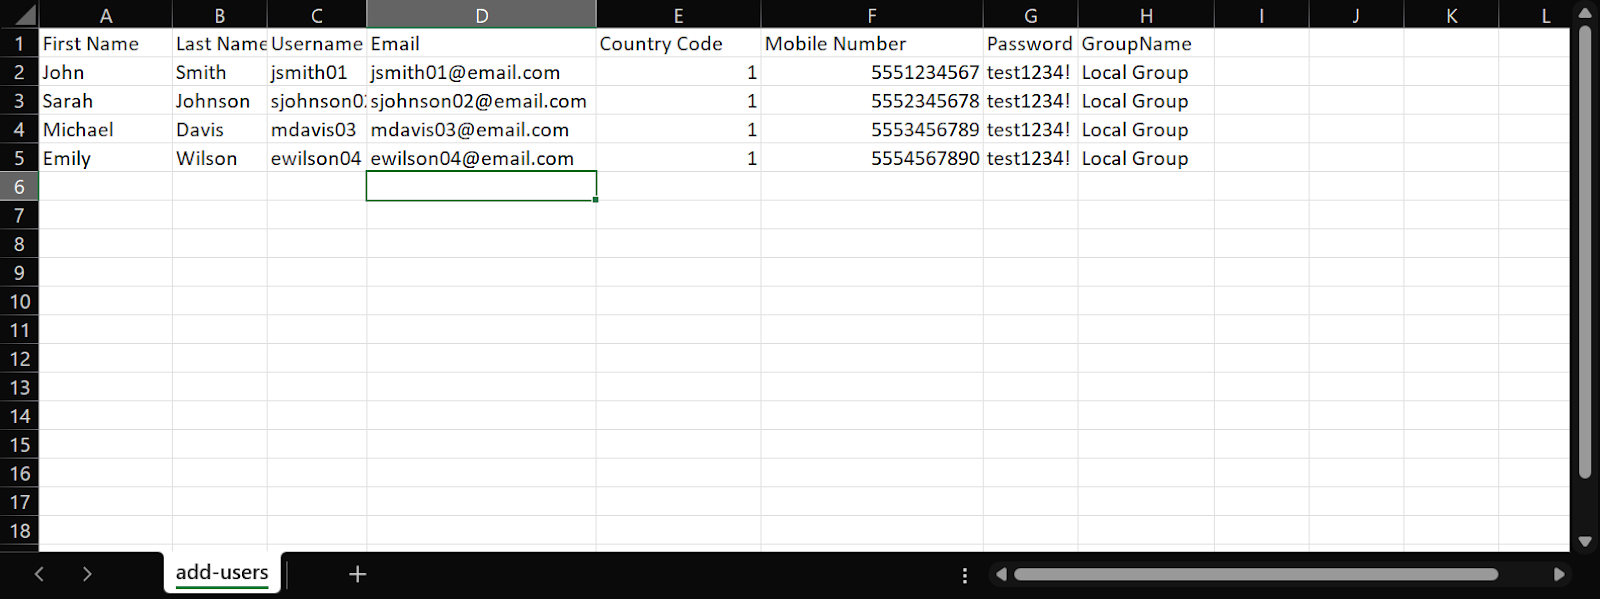
- In the Bulk Upload User window, click Choose File and select the file from the local drive.
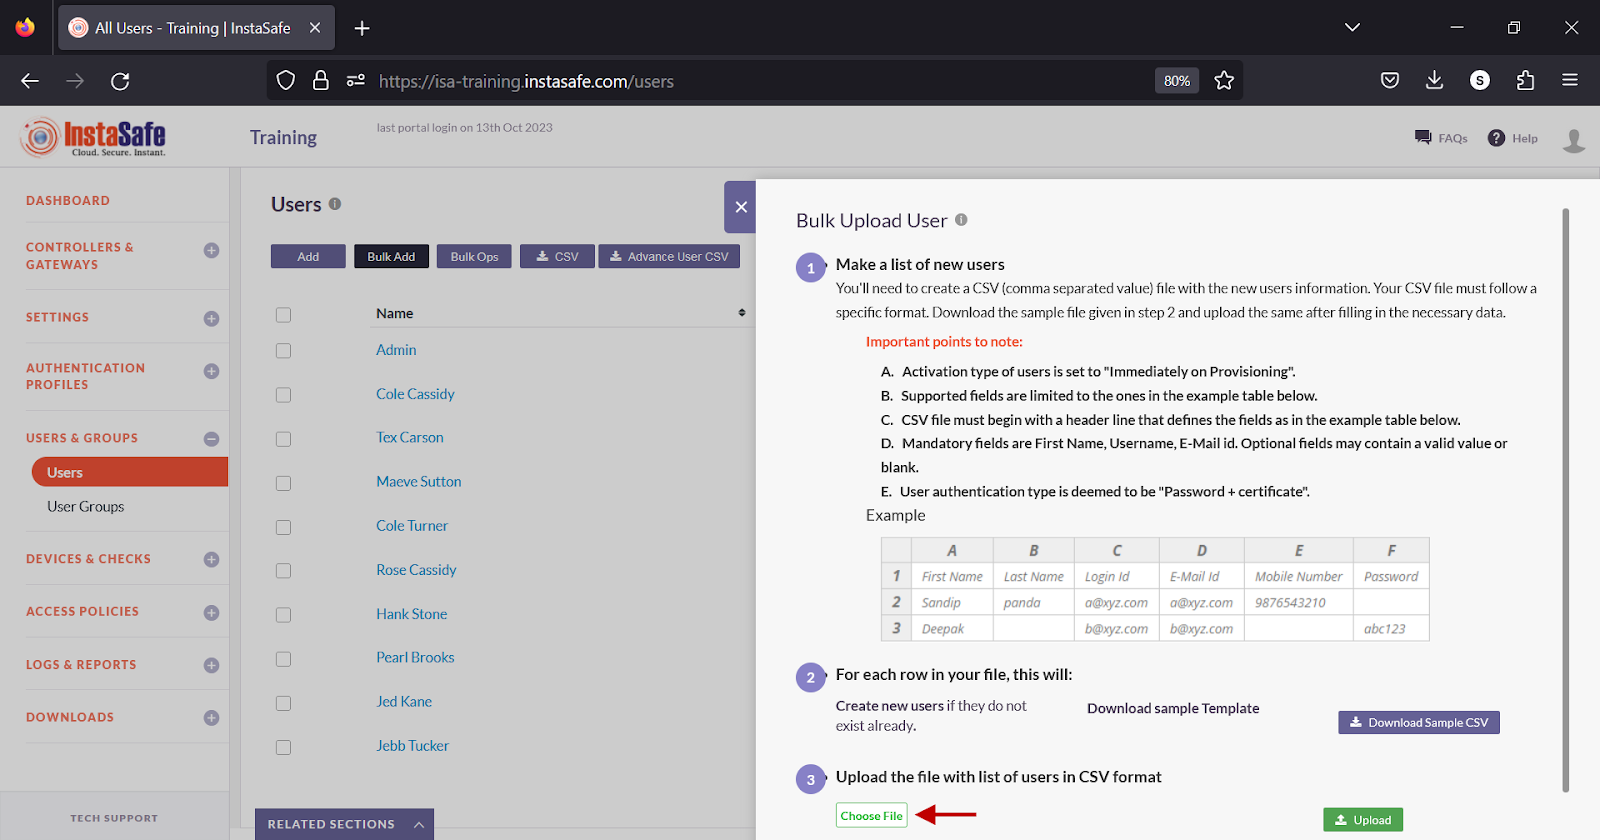
- Click Upload.
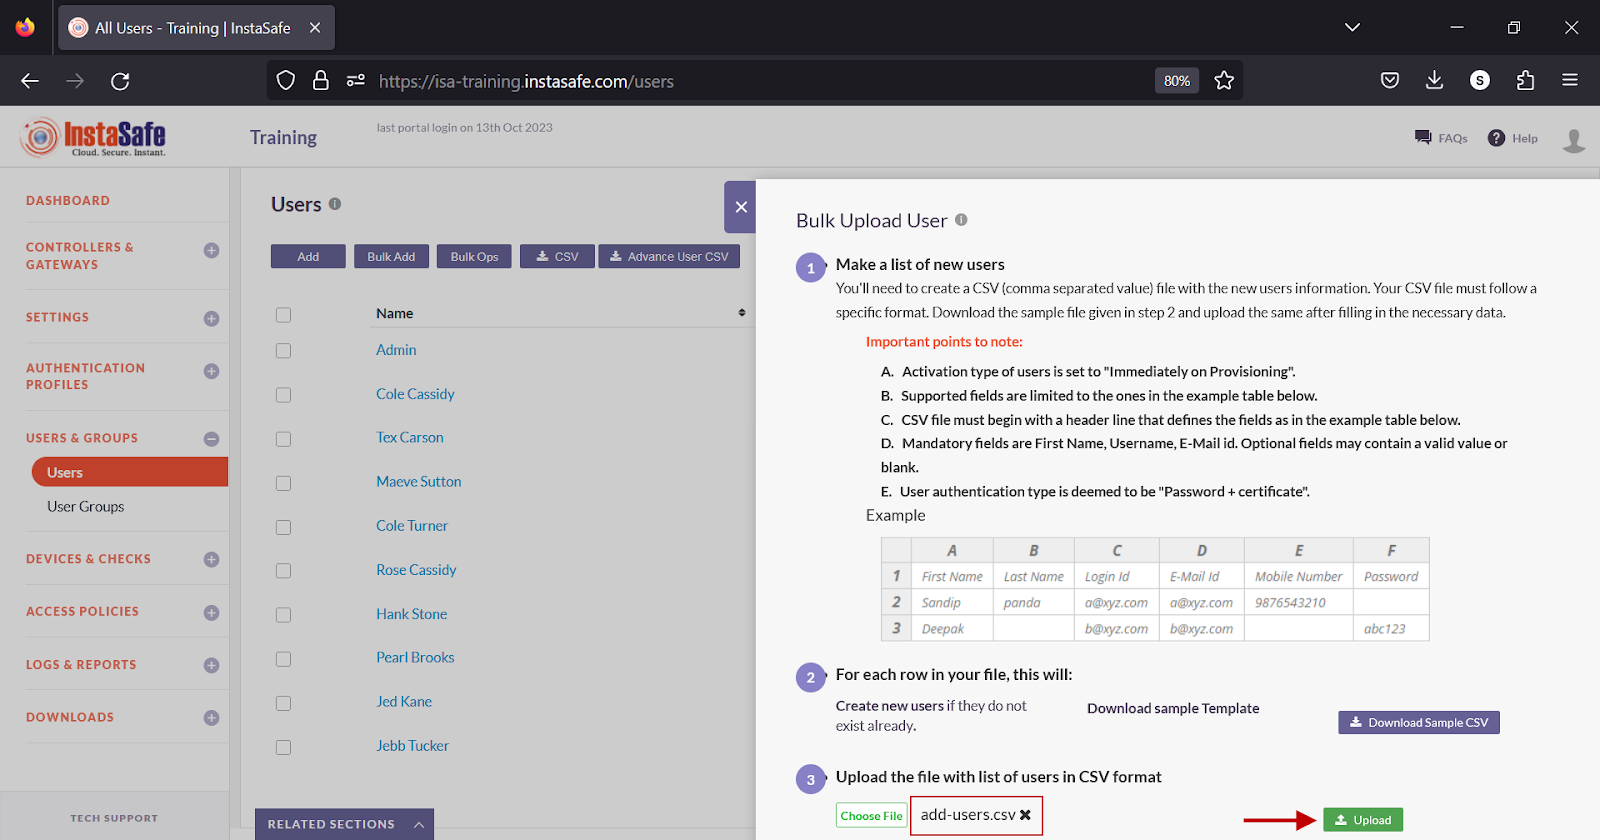
- In the Uploaded Users window, click Save Users.
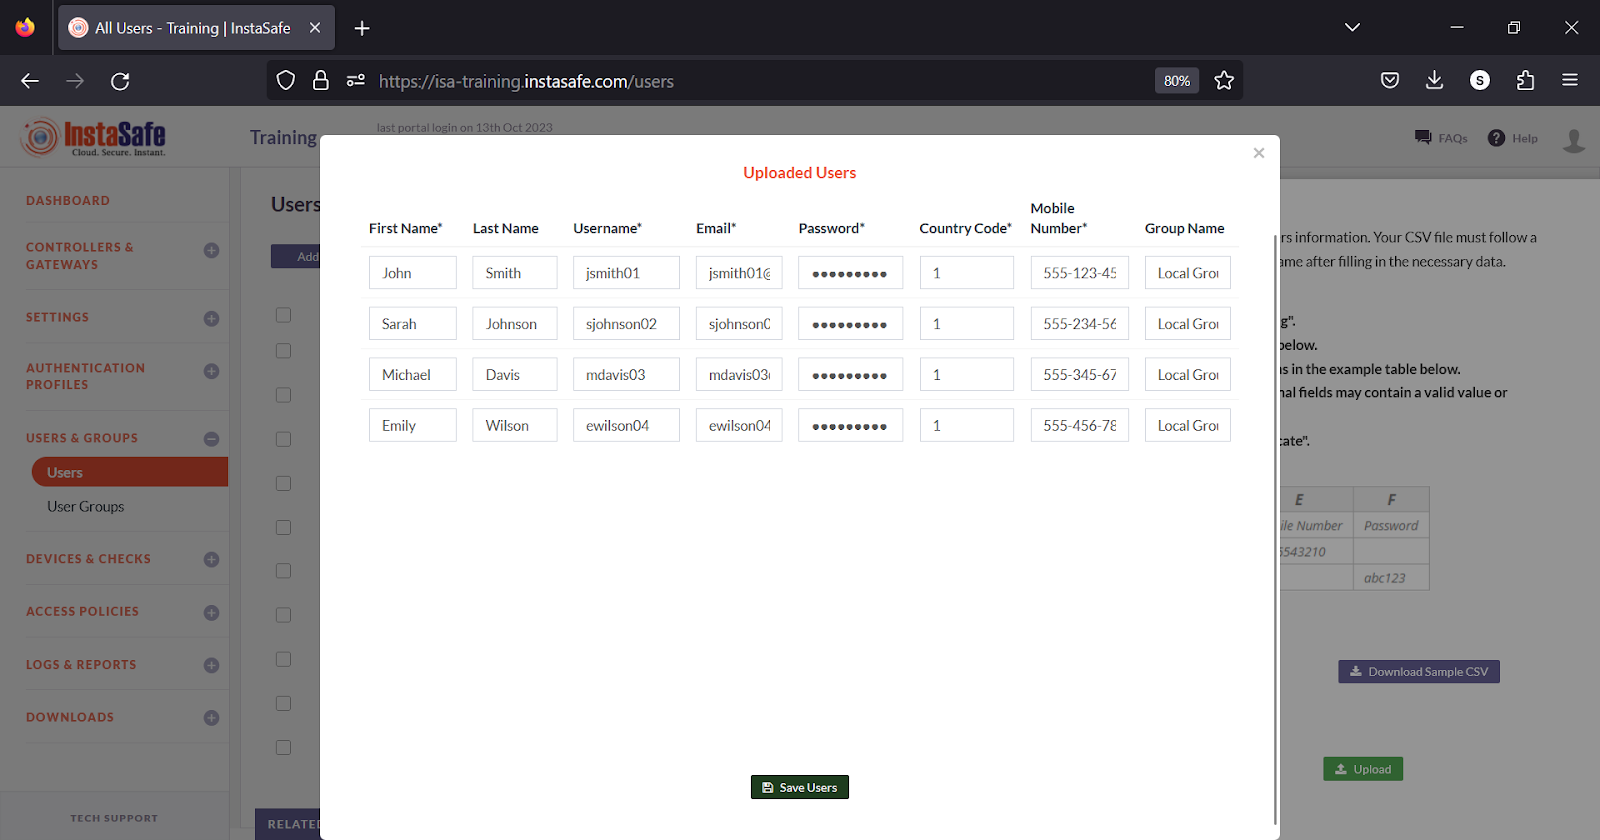
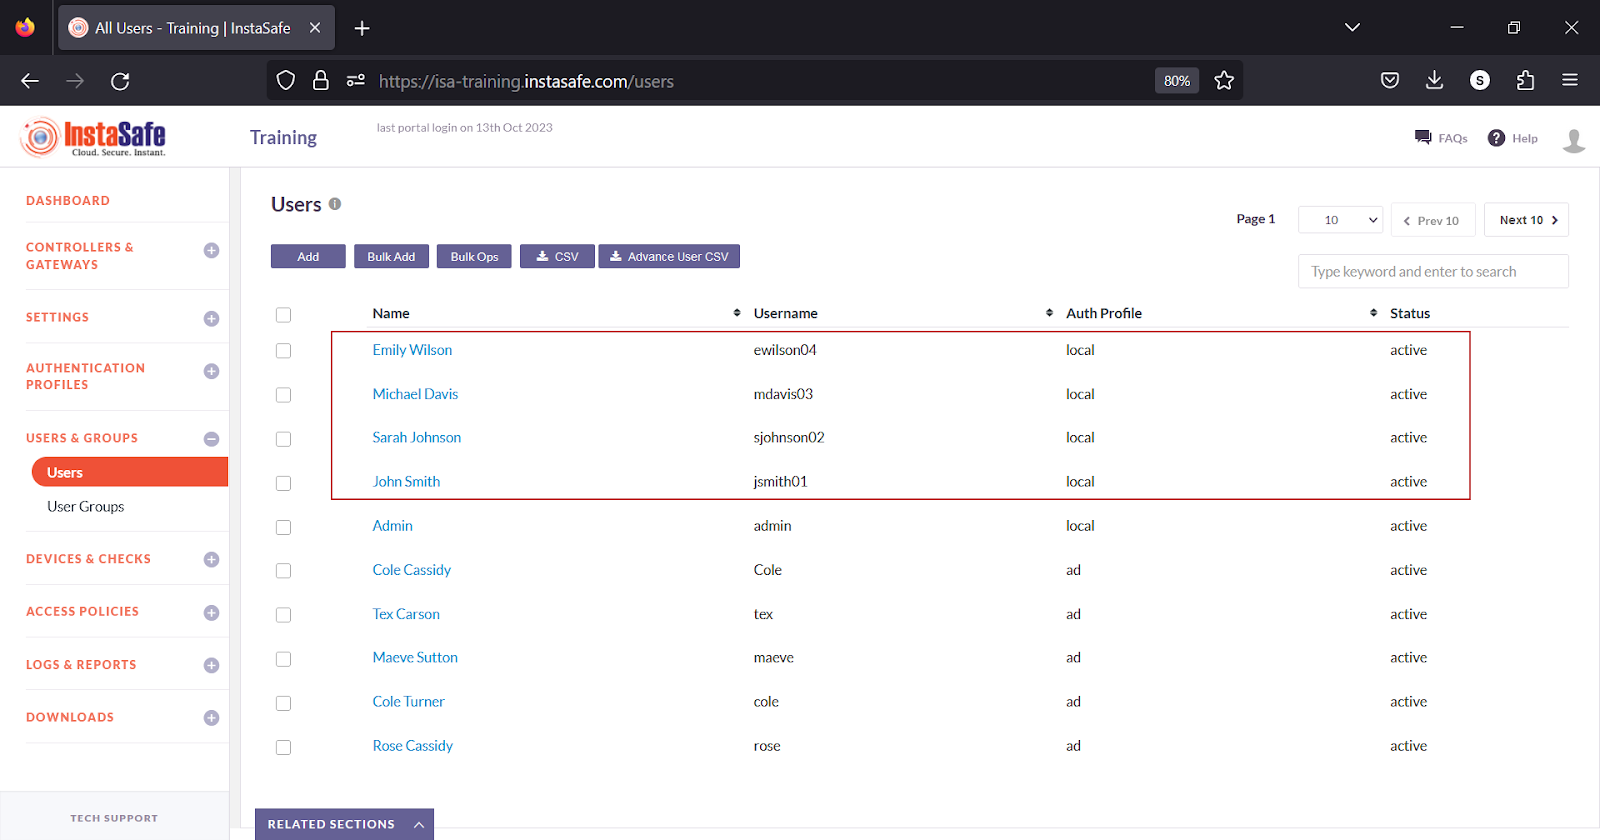
- The uploaded users are listed on the User page.
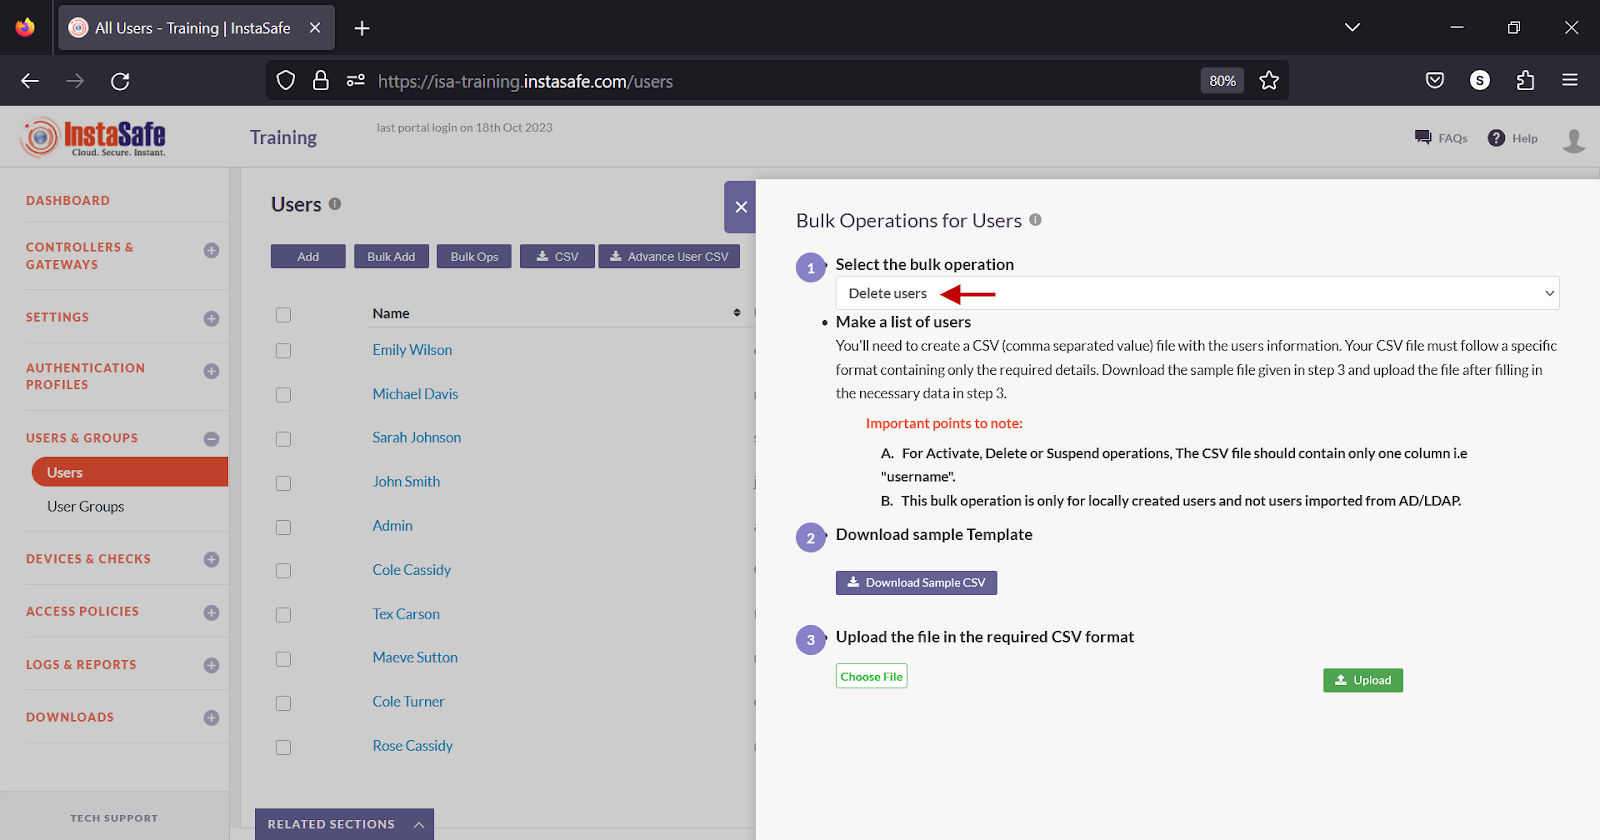
Performing Bulk Operation on Users
- On the Users page, click the Bulk Ops button.
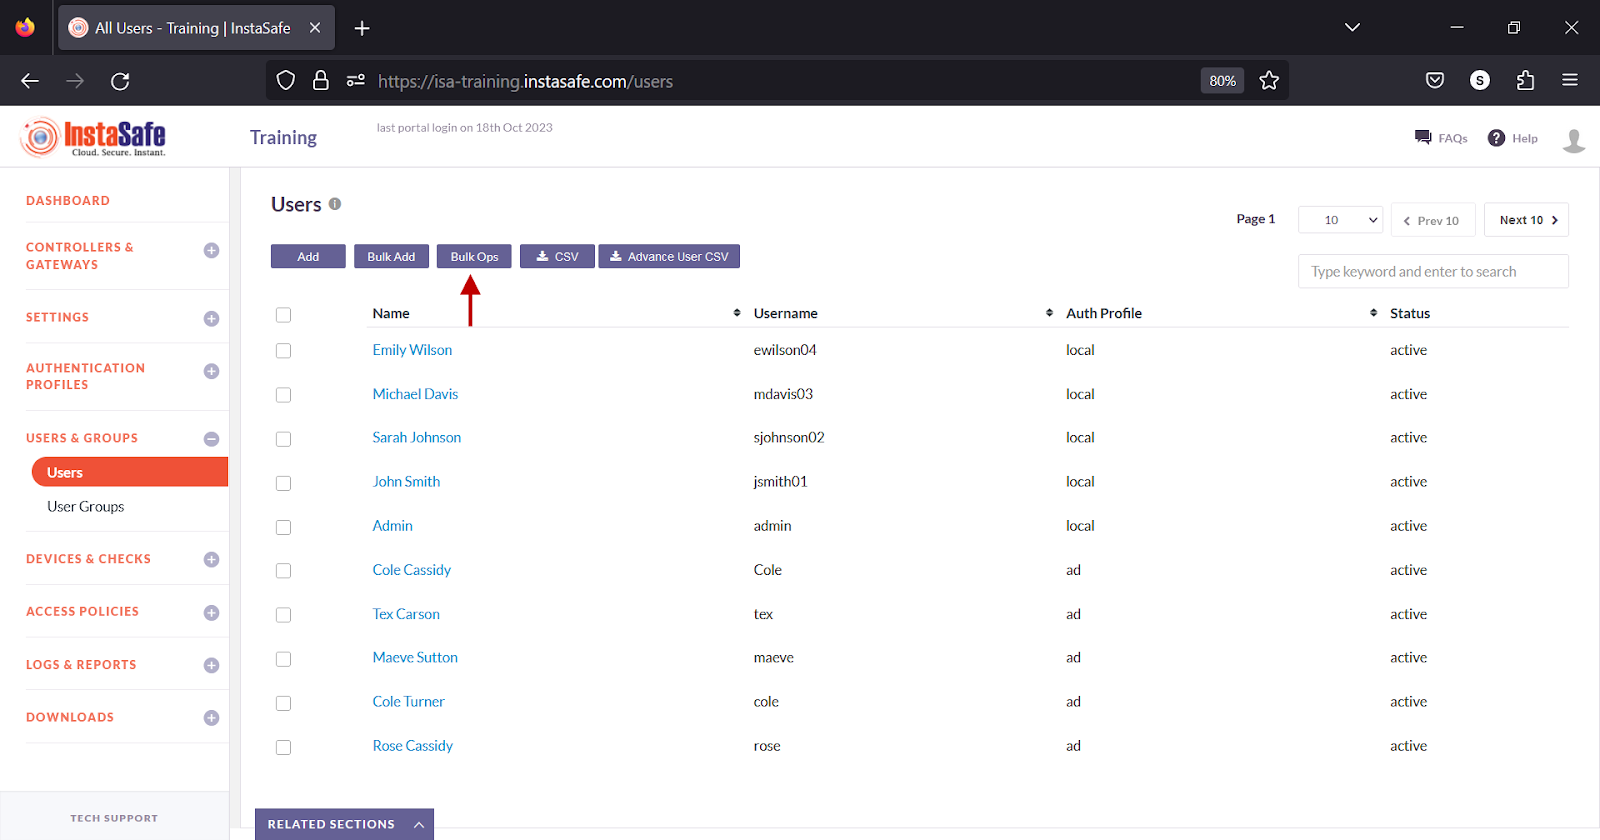
- In the Bulk Operations for Users window, click the drop-down under Select the bulk operation.
-
Listed in this field are the following operations:
-
Activate – Activate the users.
- Suspend – Suspend the users and set the device status to suspended. Under this status, remote users cannot connect using the ISA User Agent.
- Delete – Delete the users from the Users page.

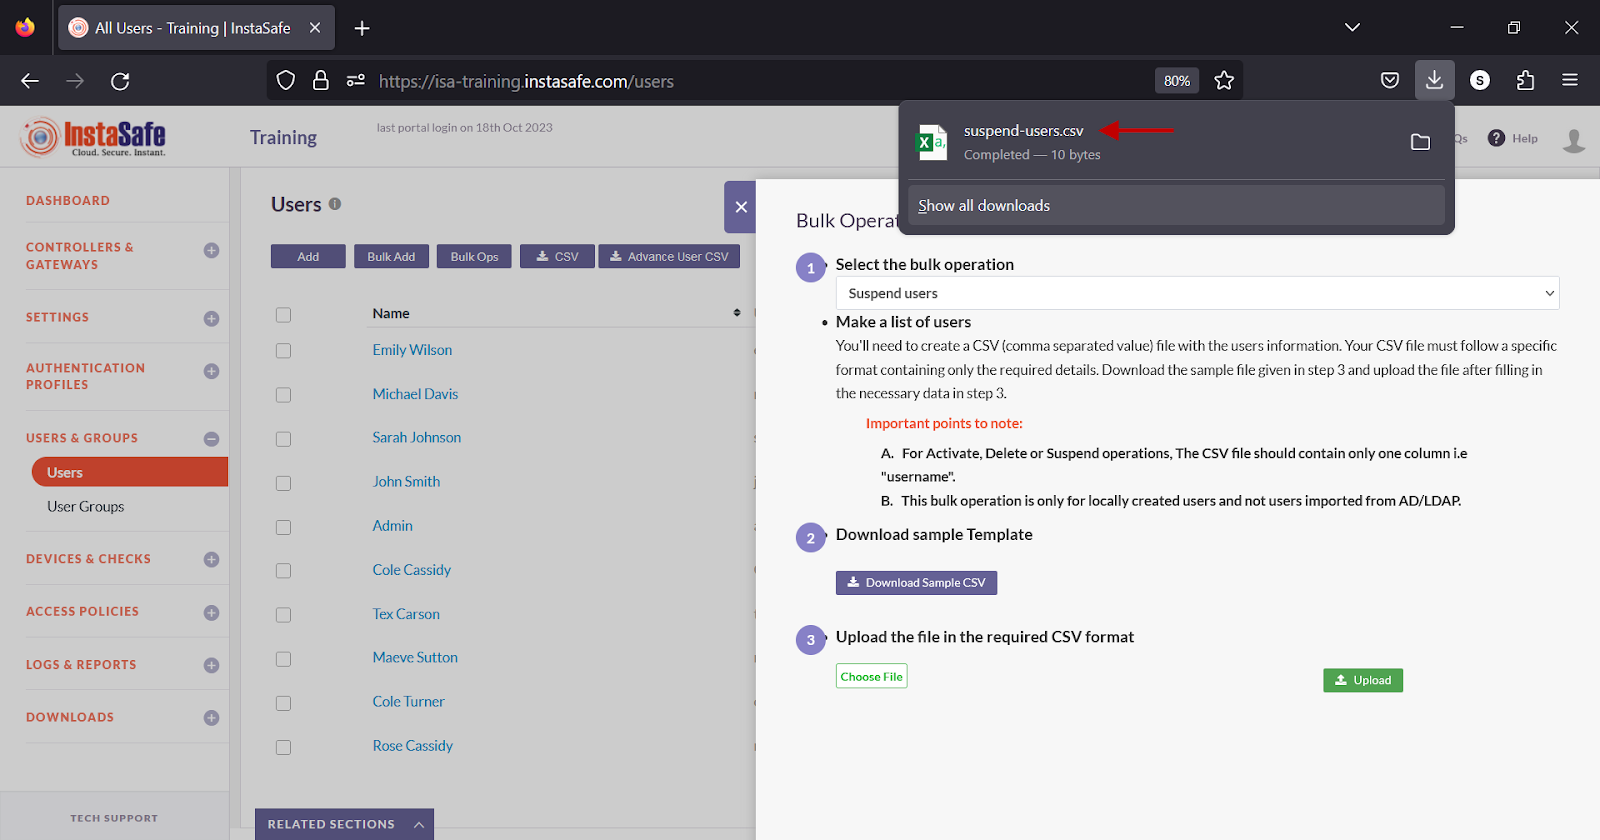
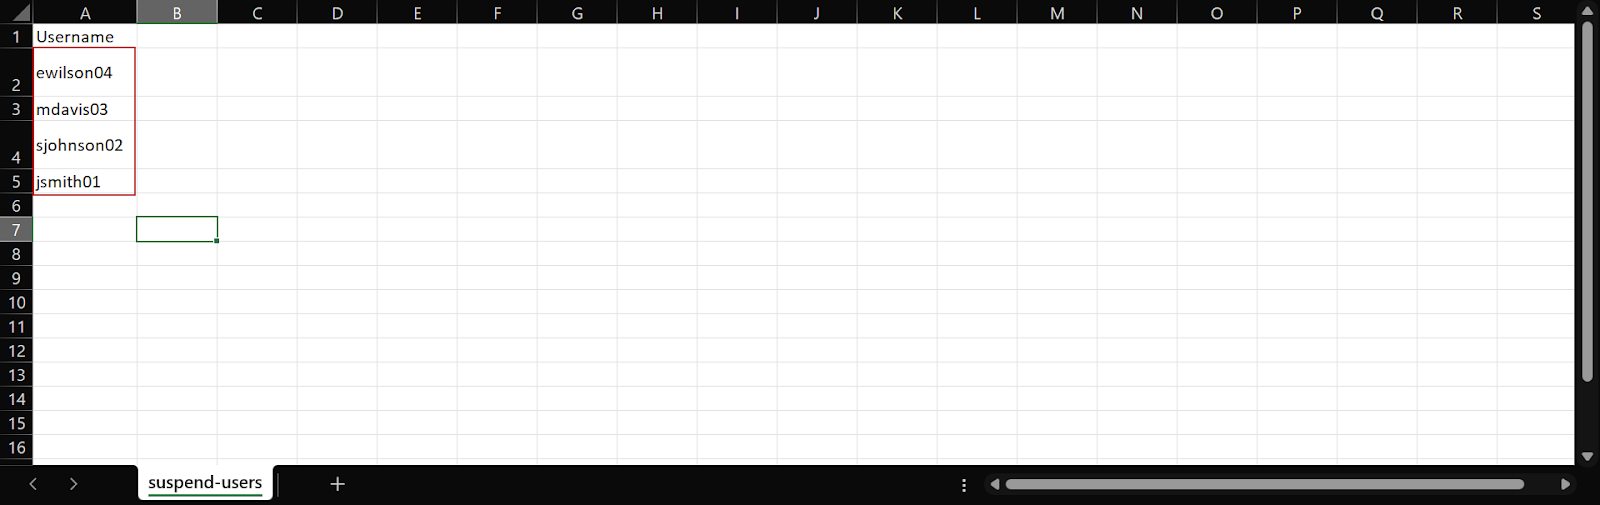
- Click the Download Sample CSV under Download sample Template.
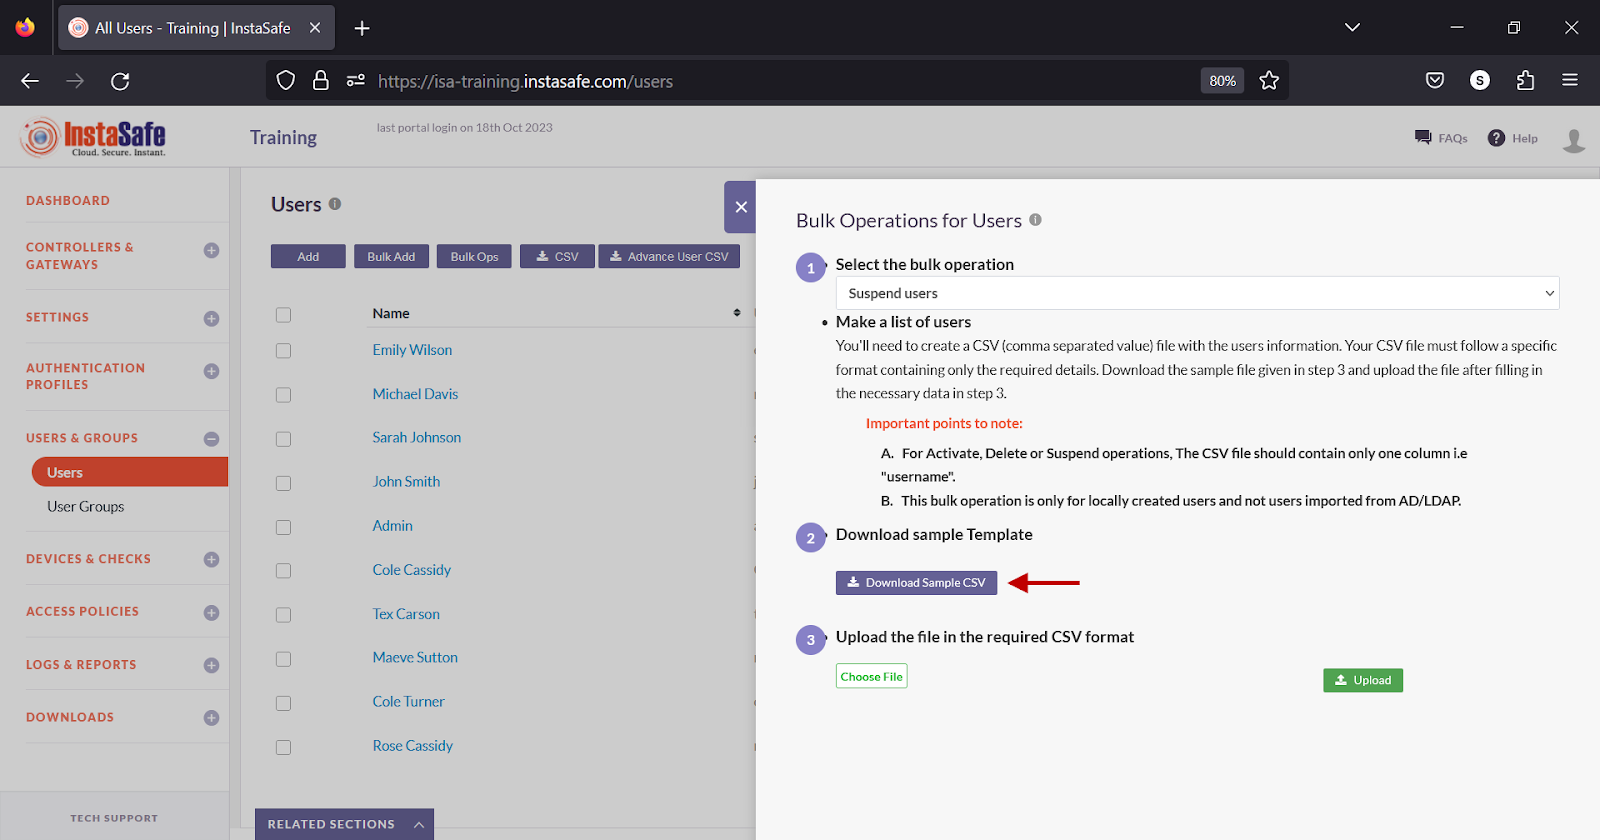
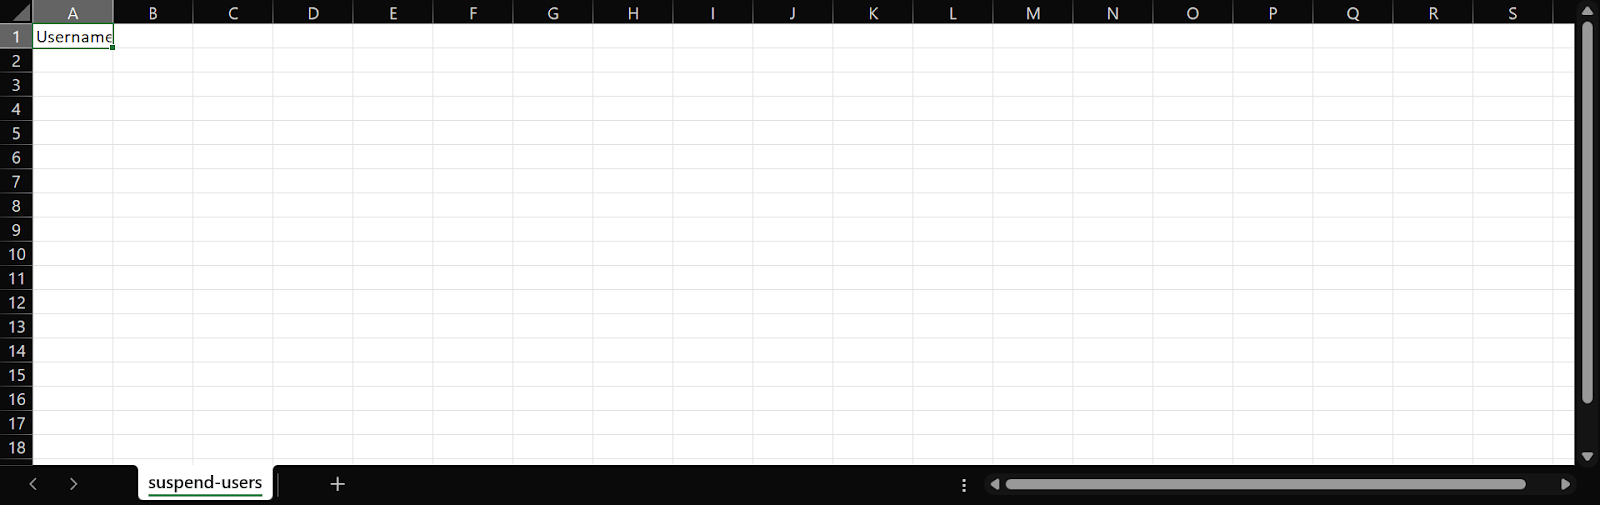
- Open the template in a spreadsheet application.
- By default, the file is empty with a header titled Username. Enter the names of the users under the Username column and save it.
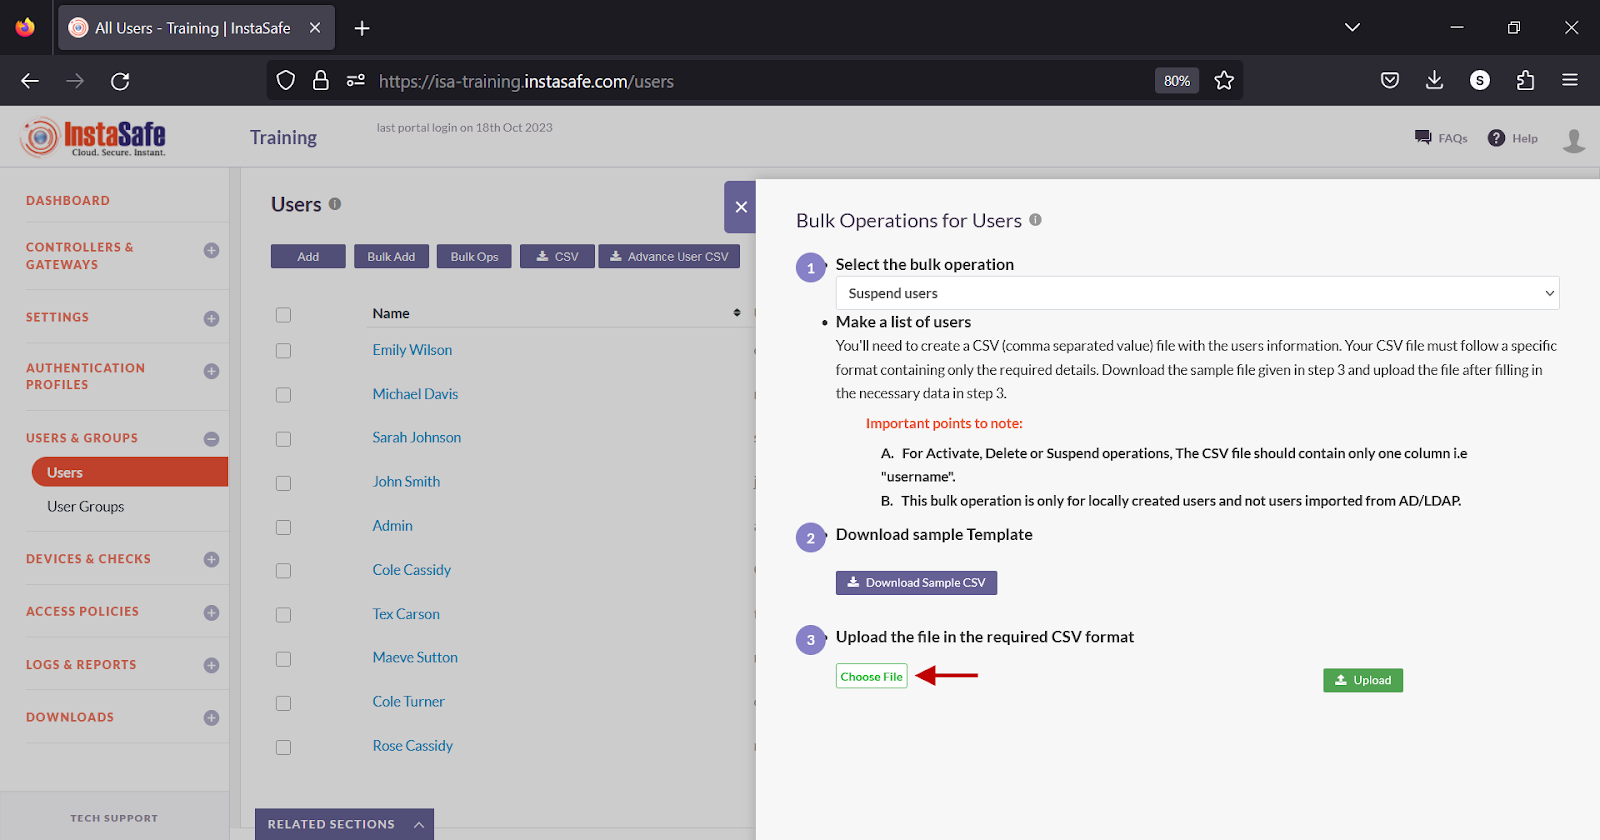
- Back on the Bulk Operations for Users window, click Choose File and select the saved template file.
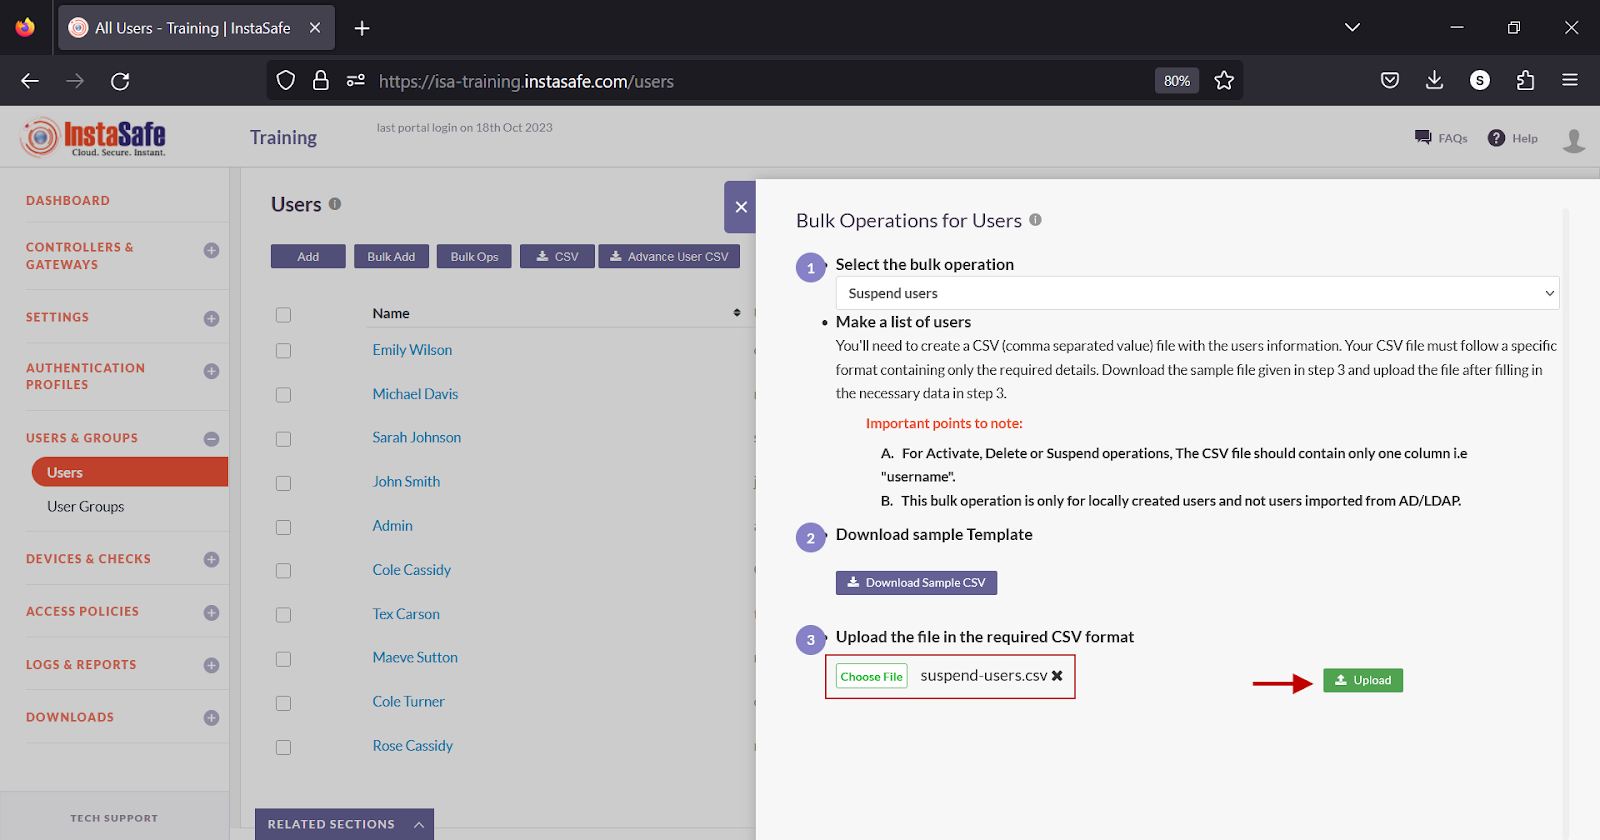
- Click Upload.
- In the Uploaded Users window, click Submit.
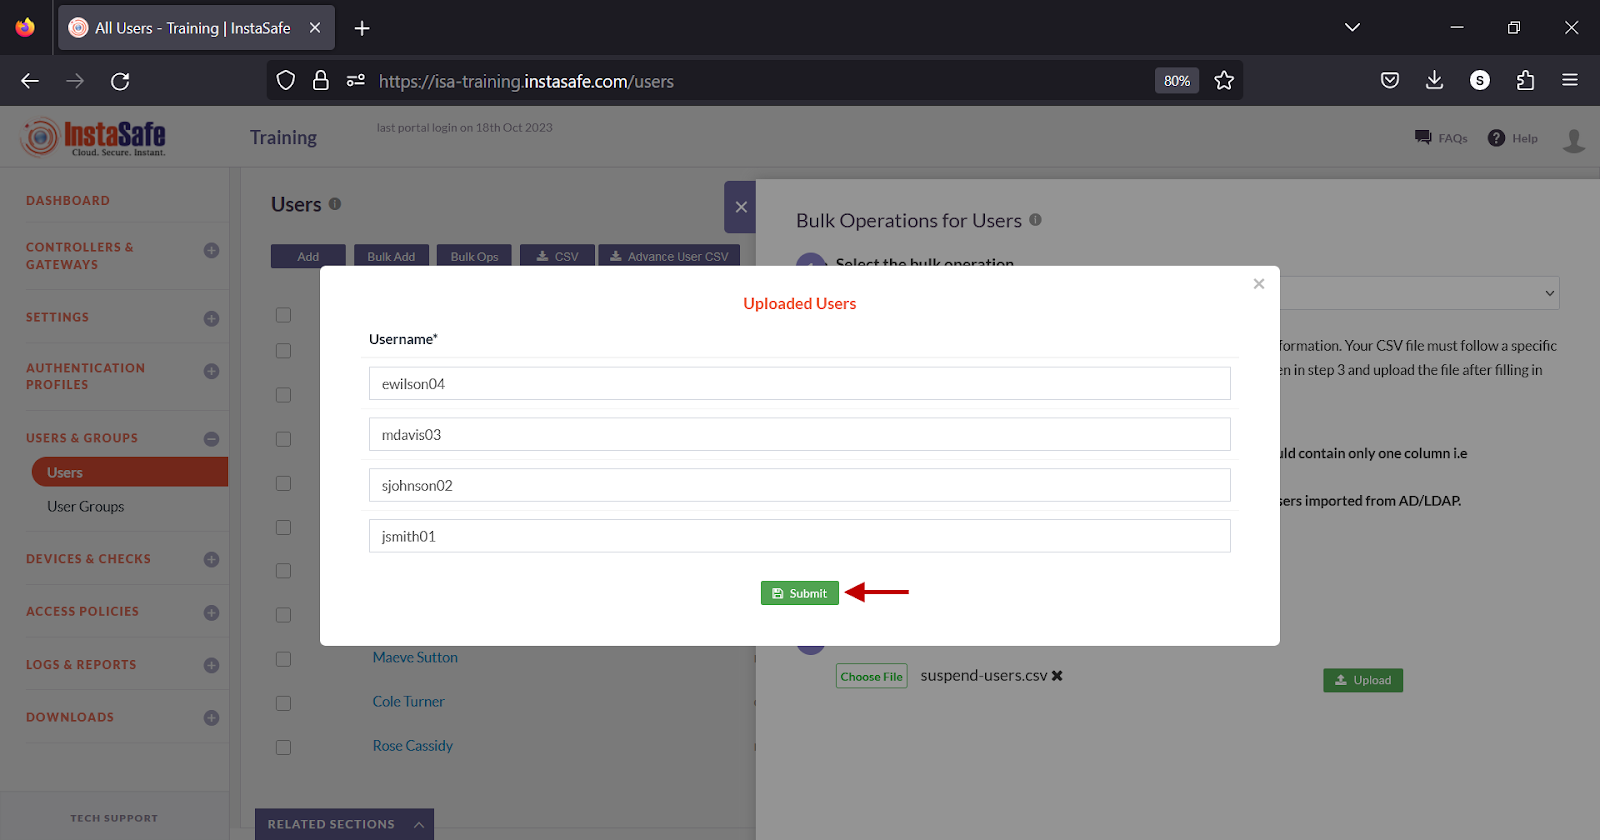
- A suspended message is displayed. Click the X icon to close the window.
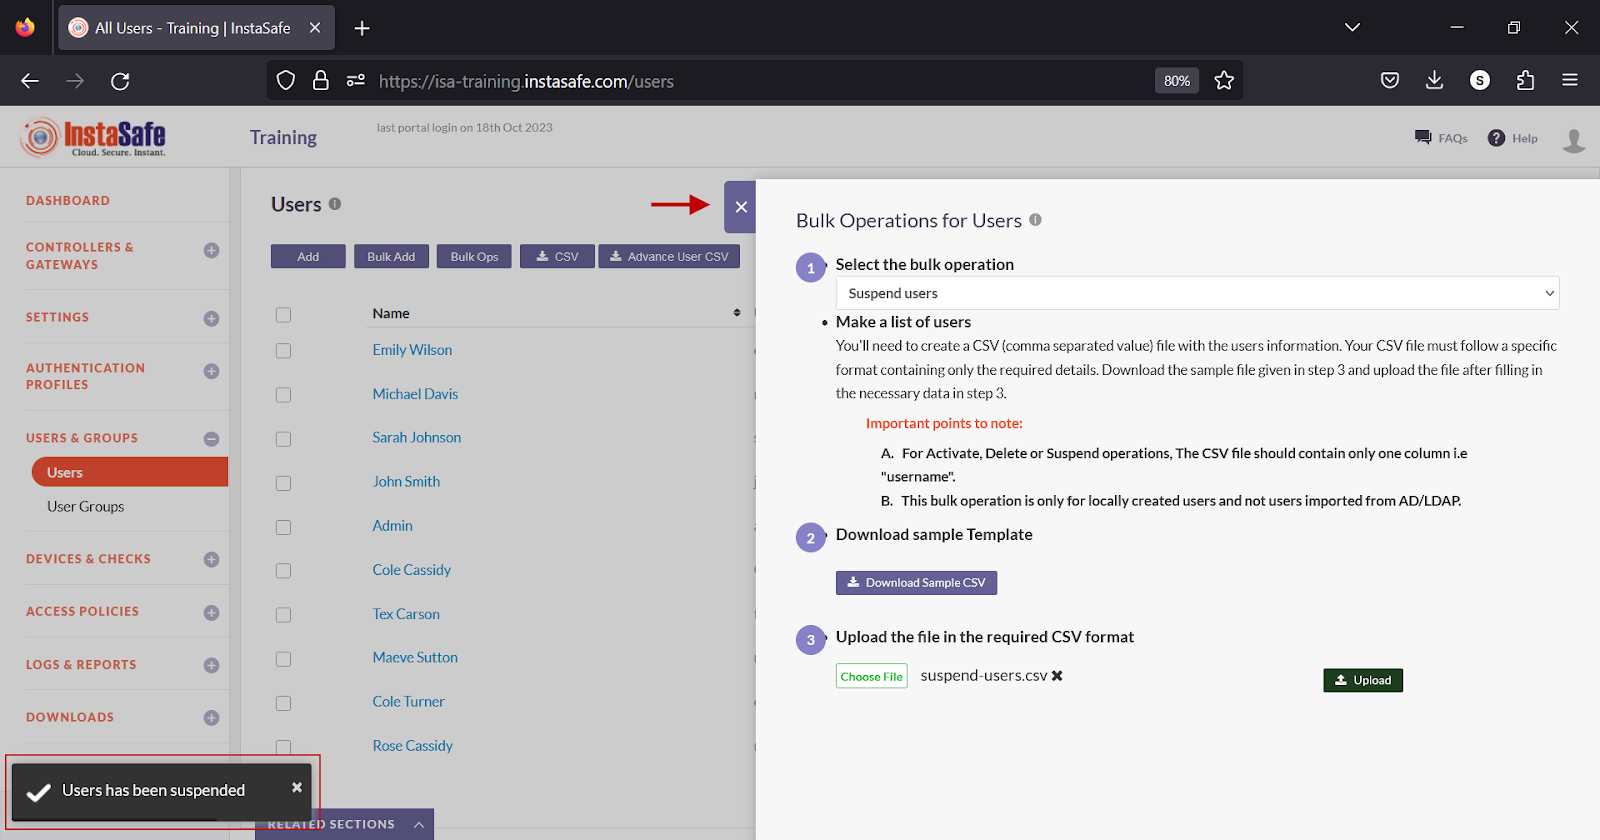
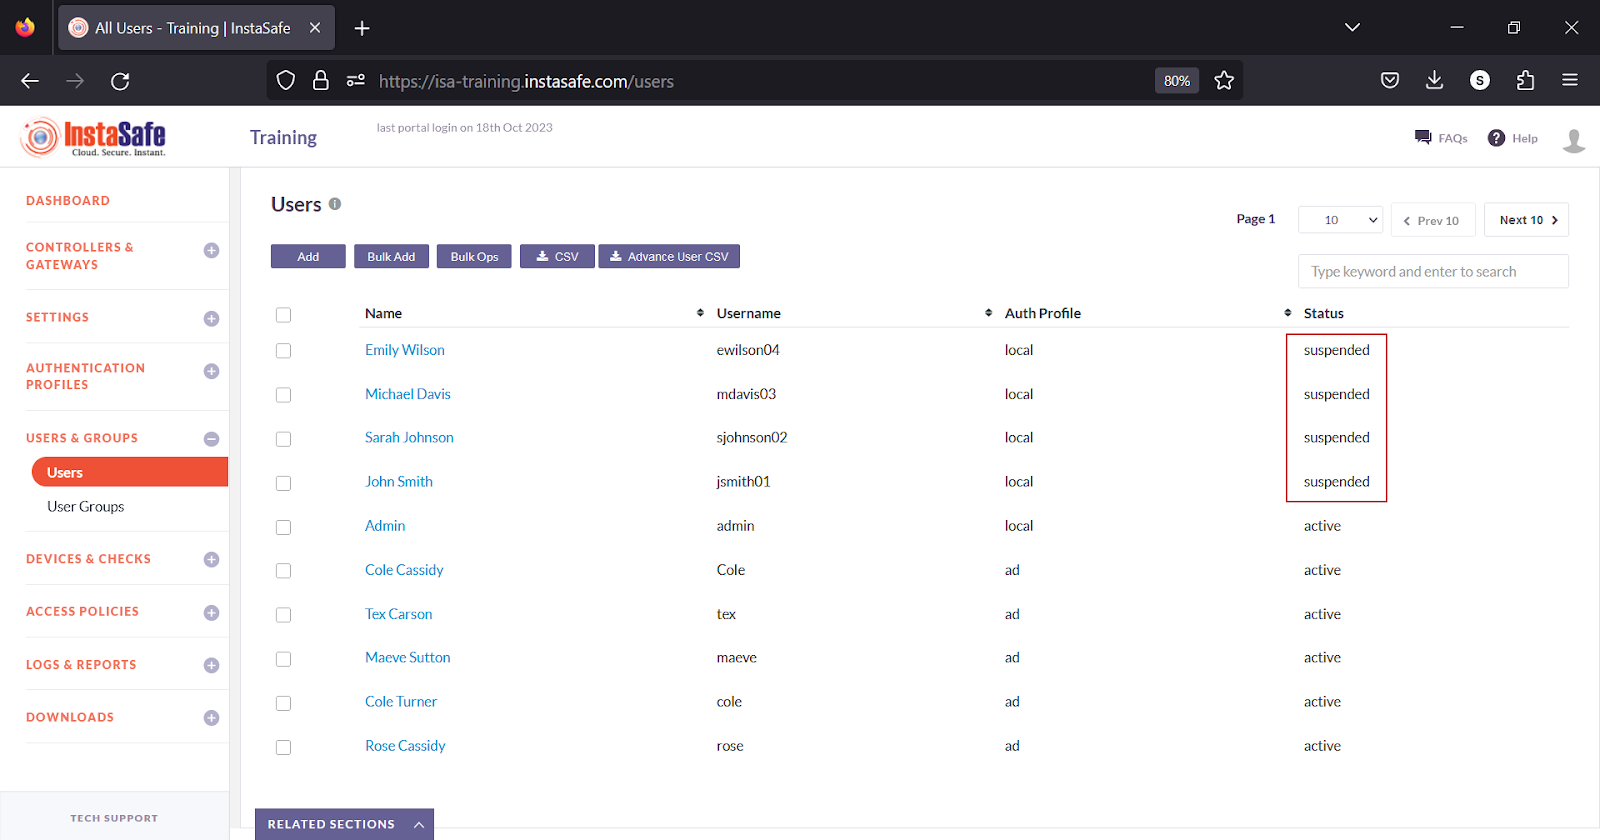
- The suspended users’ status is changed to suspended.
Download User List
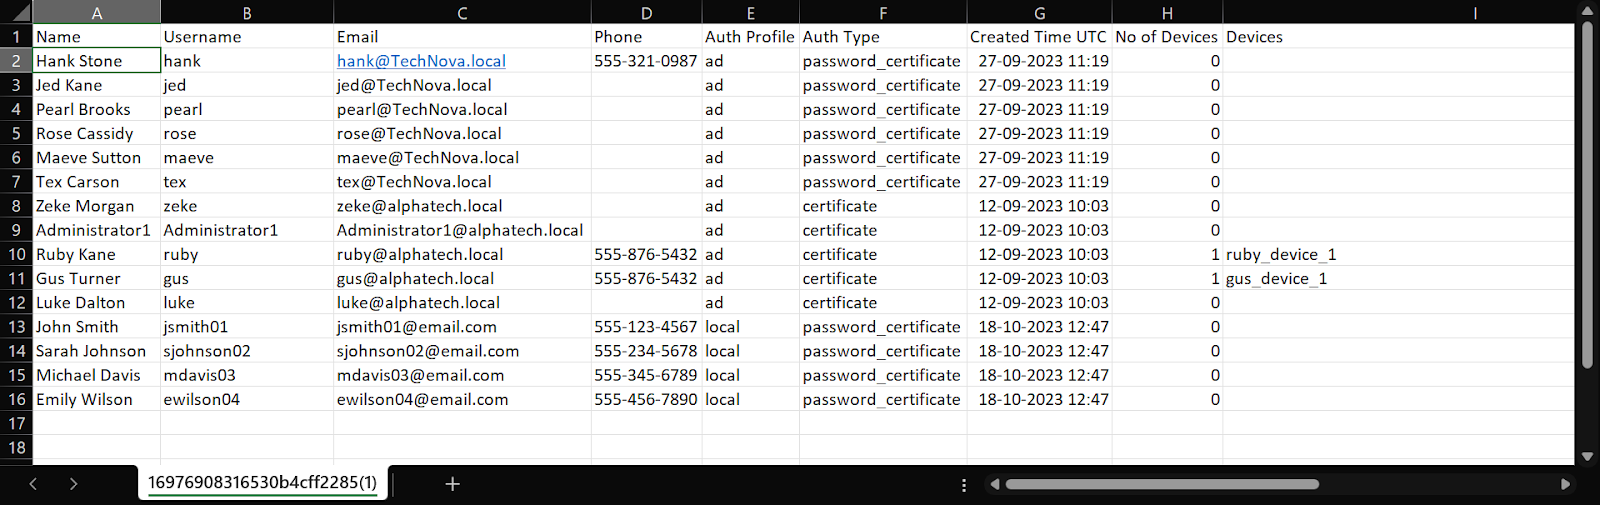
ISA web portal administrators can download the complete list of users by clicking on the CSV button on the Users page. An email with the link to download the file in CSV format is sent to the logged-in administrator’s email address. The file has the following information:
- Name – Full name of the user
- Username – Username of the user
- Email – Email address
- Phone – Phone number
- Auth Profile – Whether the user belongs to local, AD or, LDAP.
- Auth Type – Authentication Type set in the user profile.
- Created Time UTC – Time in UTC format when the user was added to the portal.
- No of Devices – The number of devices the user has attempted to connect using the ISA User Agent.
- Devices – The name of the object with the device information of the user on the Devices page.
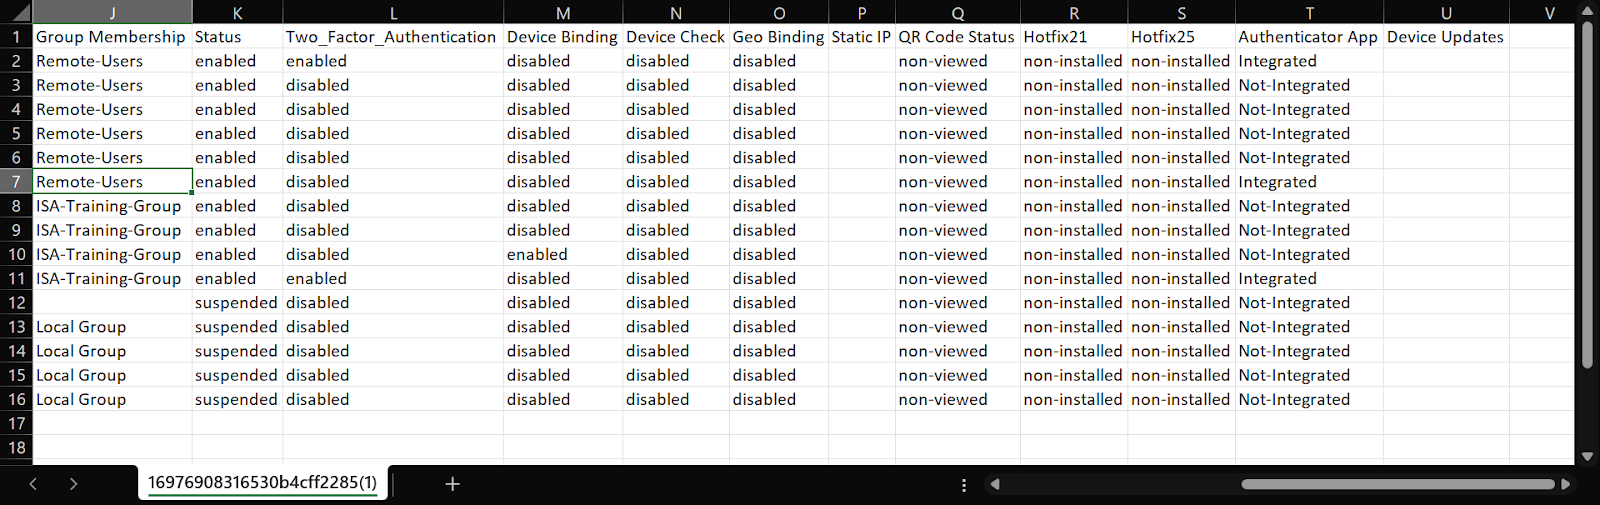
- Group Membership – The name of the user group the user is a member of.
- Status – The current status of the user, whether suspended or active.
- Two-Factor Authentication – Whether 2FA is enabled for the user.
- Device Binding – Whether Device Binding is enabled for the user.
- Device Check – Whether Device Check is enabled for the user.
- Geo Binding – Whether Geo Binding is enabled for the user.
- Static IP – Whether the IP address assigned to the user by the ISA User Agent is static.
- QR Code Status – Whether the QR code of the user was used in authenticator devices.
- Hotfix21 – Whether Hofix21 is installed for the user.
- Hotfix25 - Whether Hofix25 is installed for the user.
- Authenticator App – Whether the user is integrated to an authenticator app.
-
Device Updates – Whether device updates are installed for the user.
-
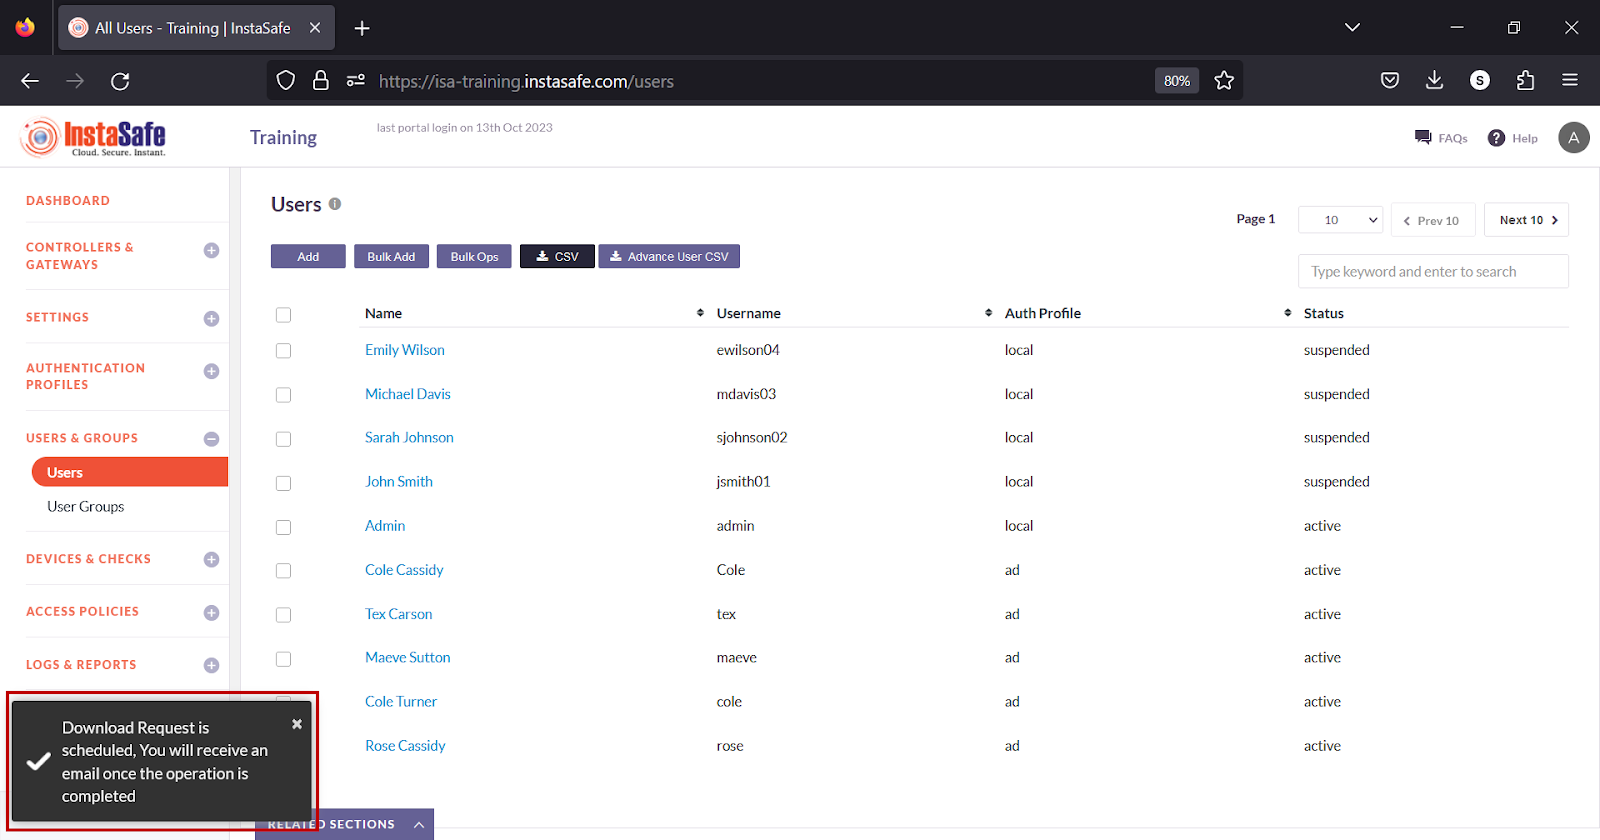
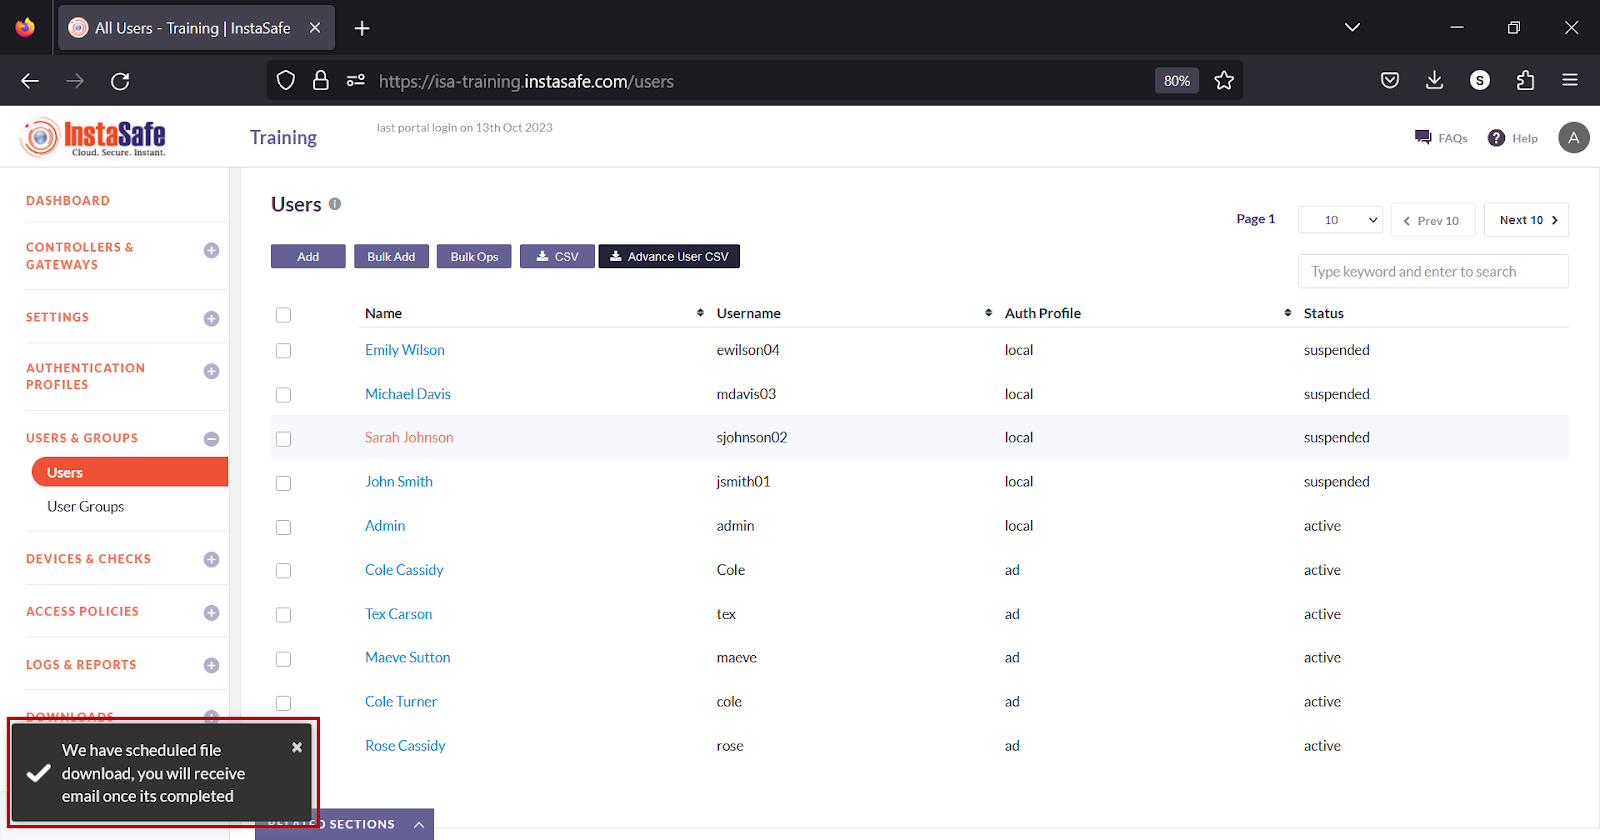
On the Users page, click the CSV button at the top.
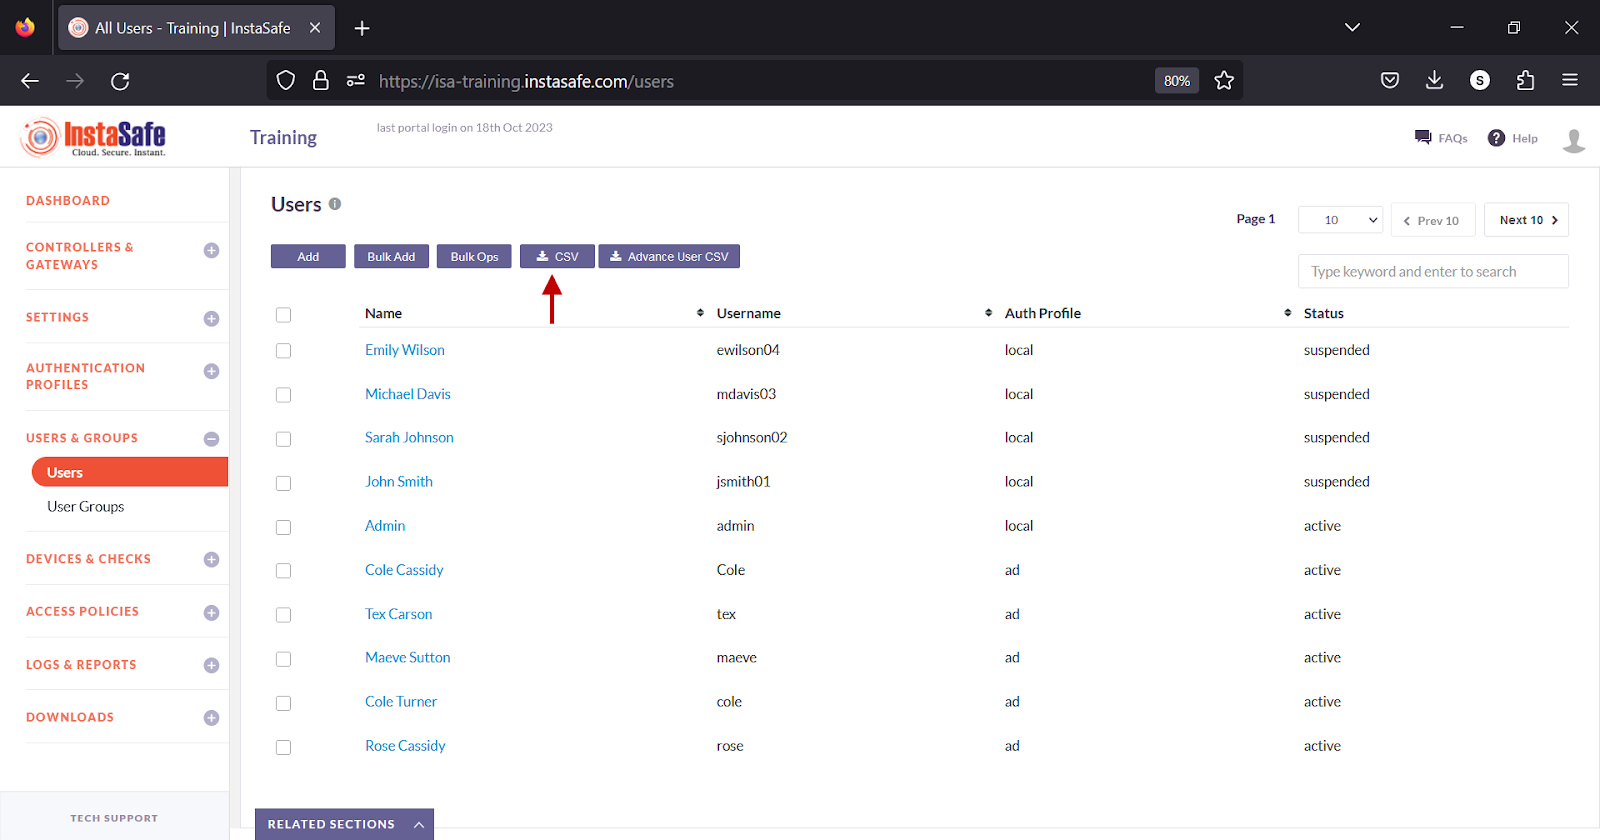
- A message that an email is scheduled to be sent to the administrator’s email address is displayed.
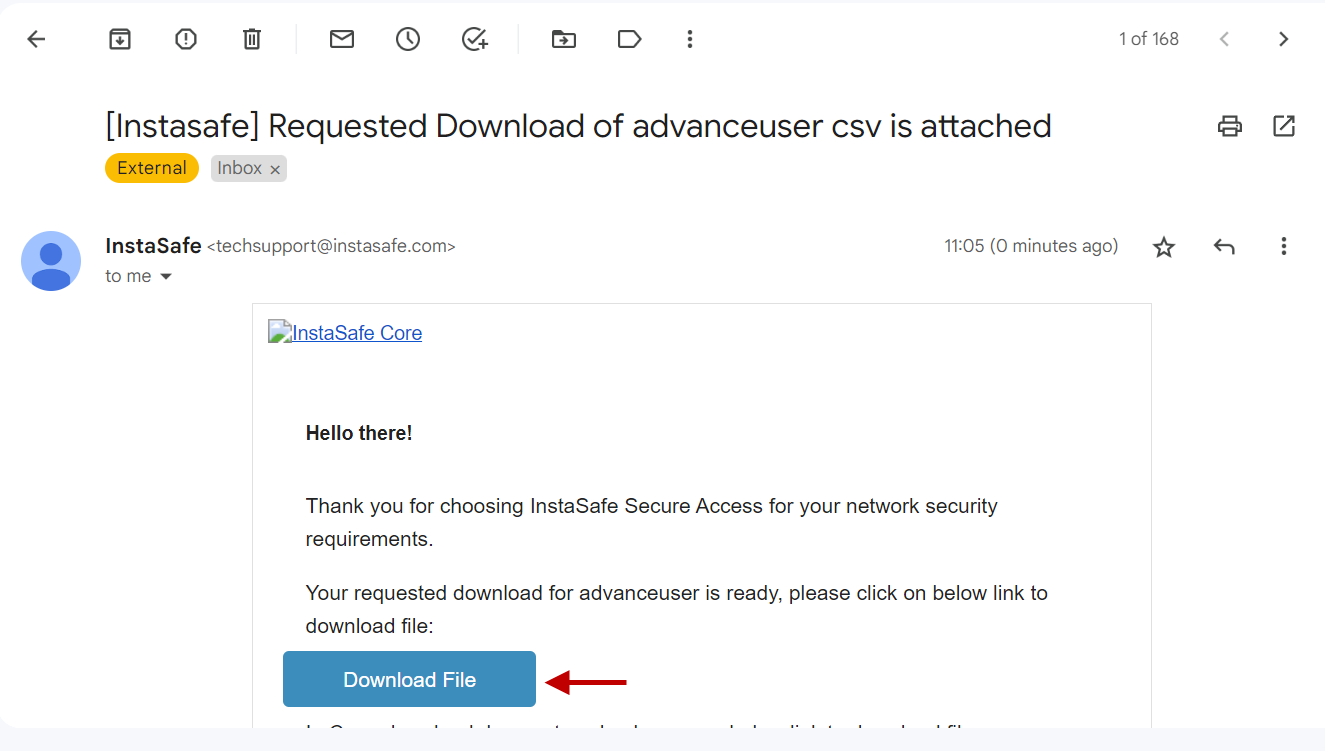
- On the email received, click the download link.
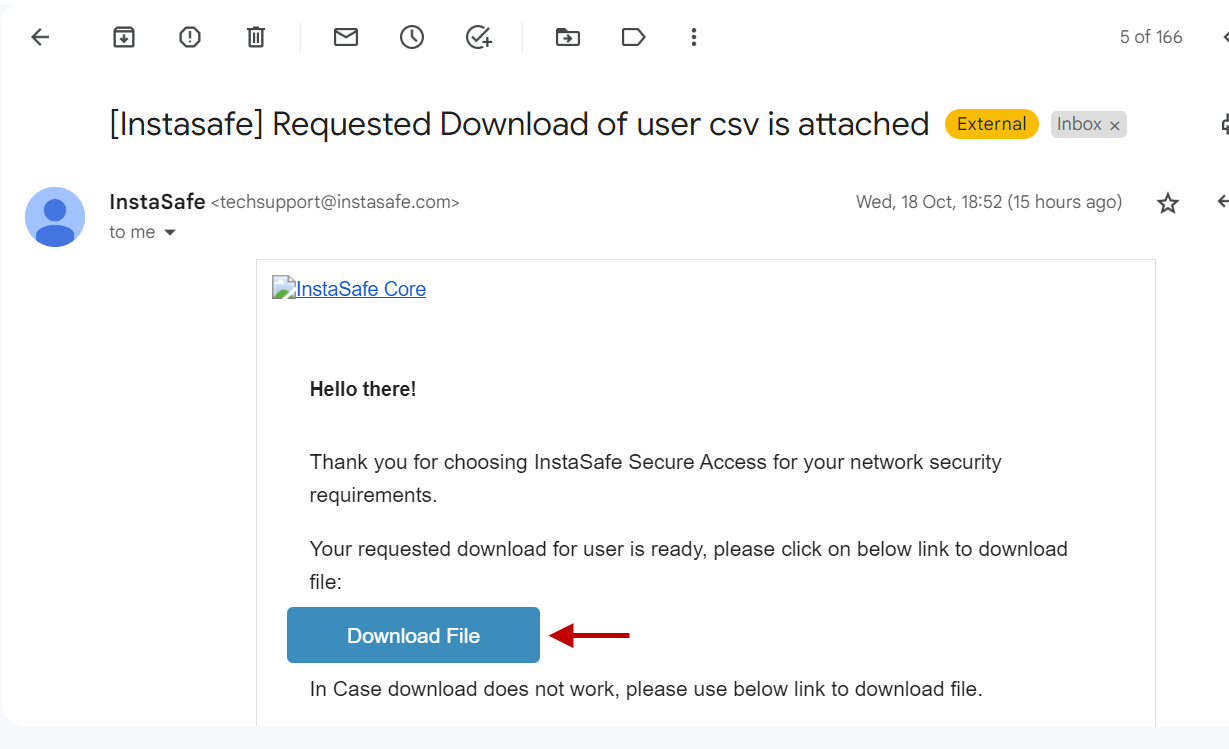
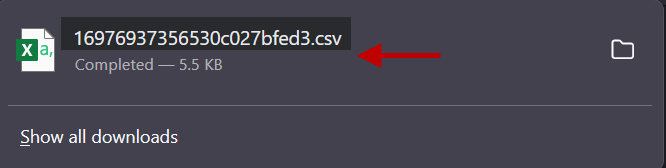
- Open the file.

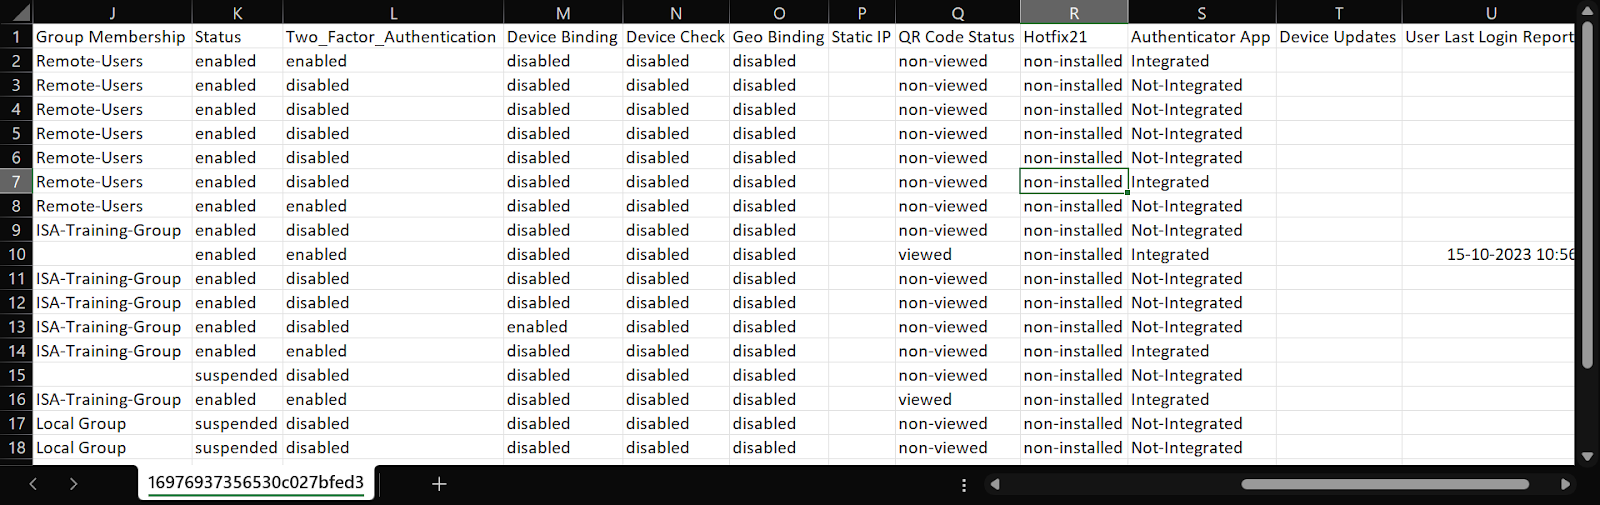
- View the file in a spreadsheet application.
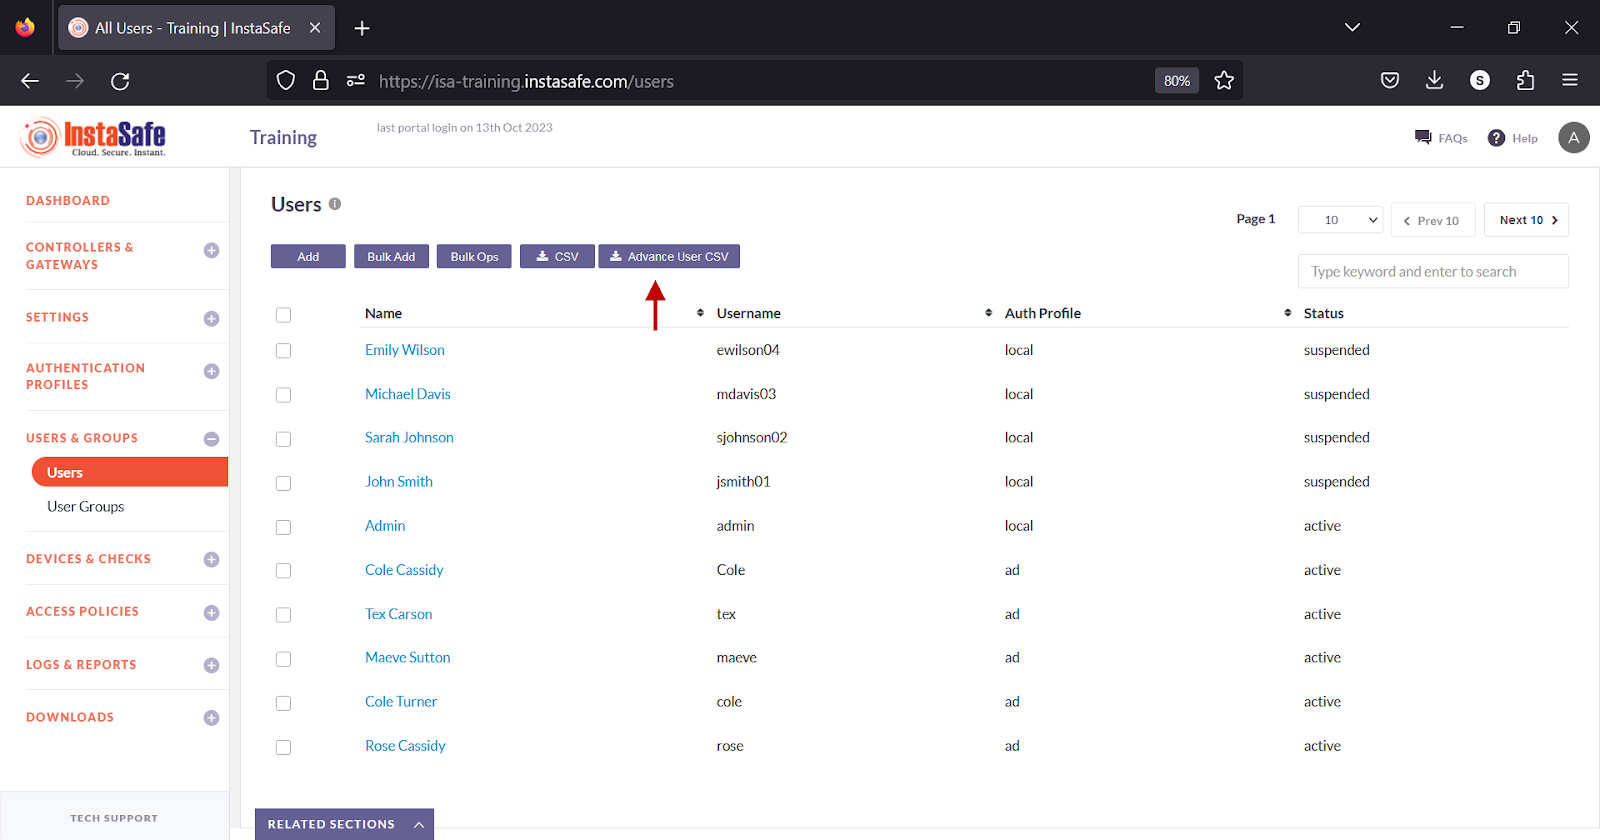
Download Advanced User List
ISA web portal administrators can download the advanced list of users by clicking on the Advance User CSV button on the Users page. An email with the link to download the file in CSV format is sent to the logged-in administrator’s email address. The file has the following information:
- Name – Full name of the user
- Username – Username of the user
- Email – Email address
- Phone – Phone number
- Auth Profile – Whether the user belongs to local, AD or, LDAP.
- Auth Type – Authentication Type set in the user profile.
- Created Time UTC – Time in UTC format when the user was added to the portal.
- No of Devices – The number of devices the user has attempted to connect using the ISA User Agent.
- Devices – The name of the object with the device information of the user on the Devices page.
- Group Membership – The name of the user group the user is a member of.
- Status – The current status of the user, whether suspended or active.
- Two-Factor Authentication – Whether 2FA is enabled for the user.
- Device Binding – Whether Device Binding is enabled for the user.
- Device Check – Whether Device Check is enabled for the user.
- Geo Binding – Whether Geo Binding is enabled for the user.
- Static IP – Whether the IP address assigned to the user by the ISA User Agent is static.
- QR Code Status – Whether the QR code of the user was used in authenticator devices.
- Hotfix21 – Whether Hofix21 is installed for the user.
- Authenticator App – Whether the user is integrated to an authenticator app.
- Device Updates – Whether device updates are installed for the user.
-
User Last Login Report – The date and time of each user’s last login.
-
On the Users page, click the CSV button at the top.
- A message that an email is scheduled to be sent to the administrator’s email address is displayed.
- On the email received, click the download link.
- Open the file.
- View the file in a spreadsheet application.

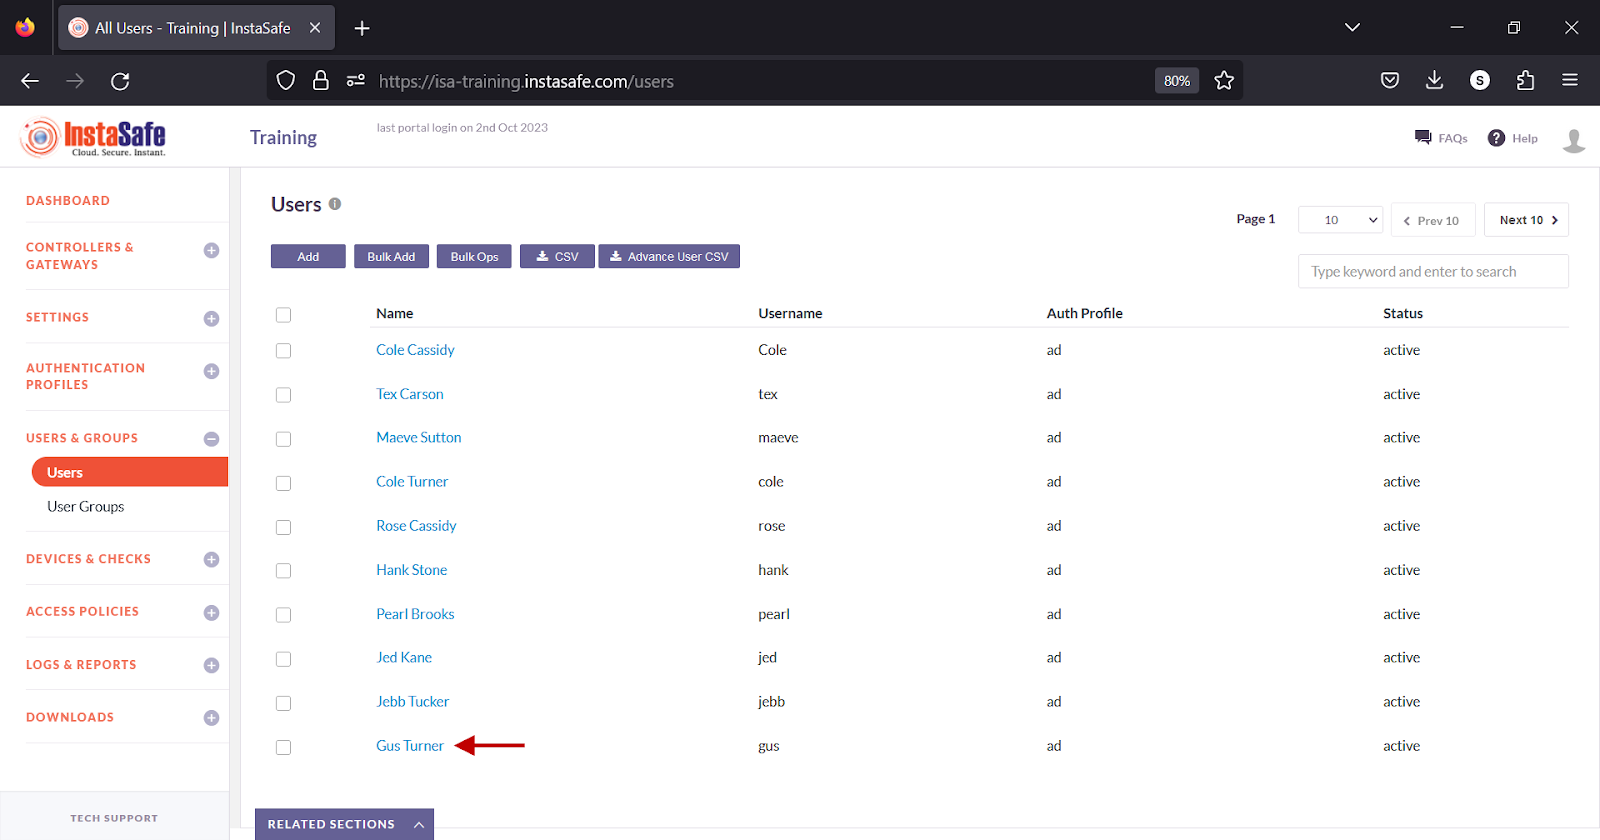
Navigating and Sorting the User list
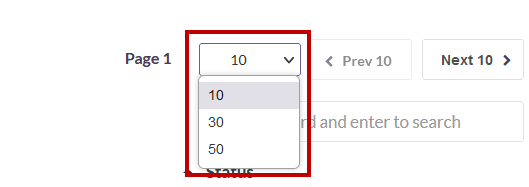
The Users page allows easy pagination for viewing a large number of users. You can view users by using the navigation control bar at the top right of the page.
Click the drop-down box to select the number of users to be displayed on the Users page. By default, it is set to display 10 users. You can change it to either 30 or 50 users.
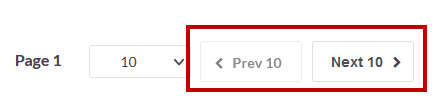
Click the Next button to view the next page of users. Click the Prev button to view the previous page.
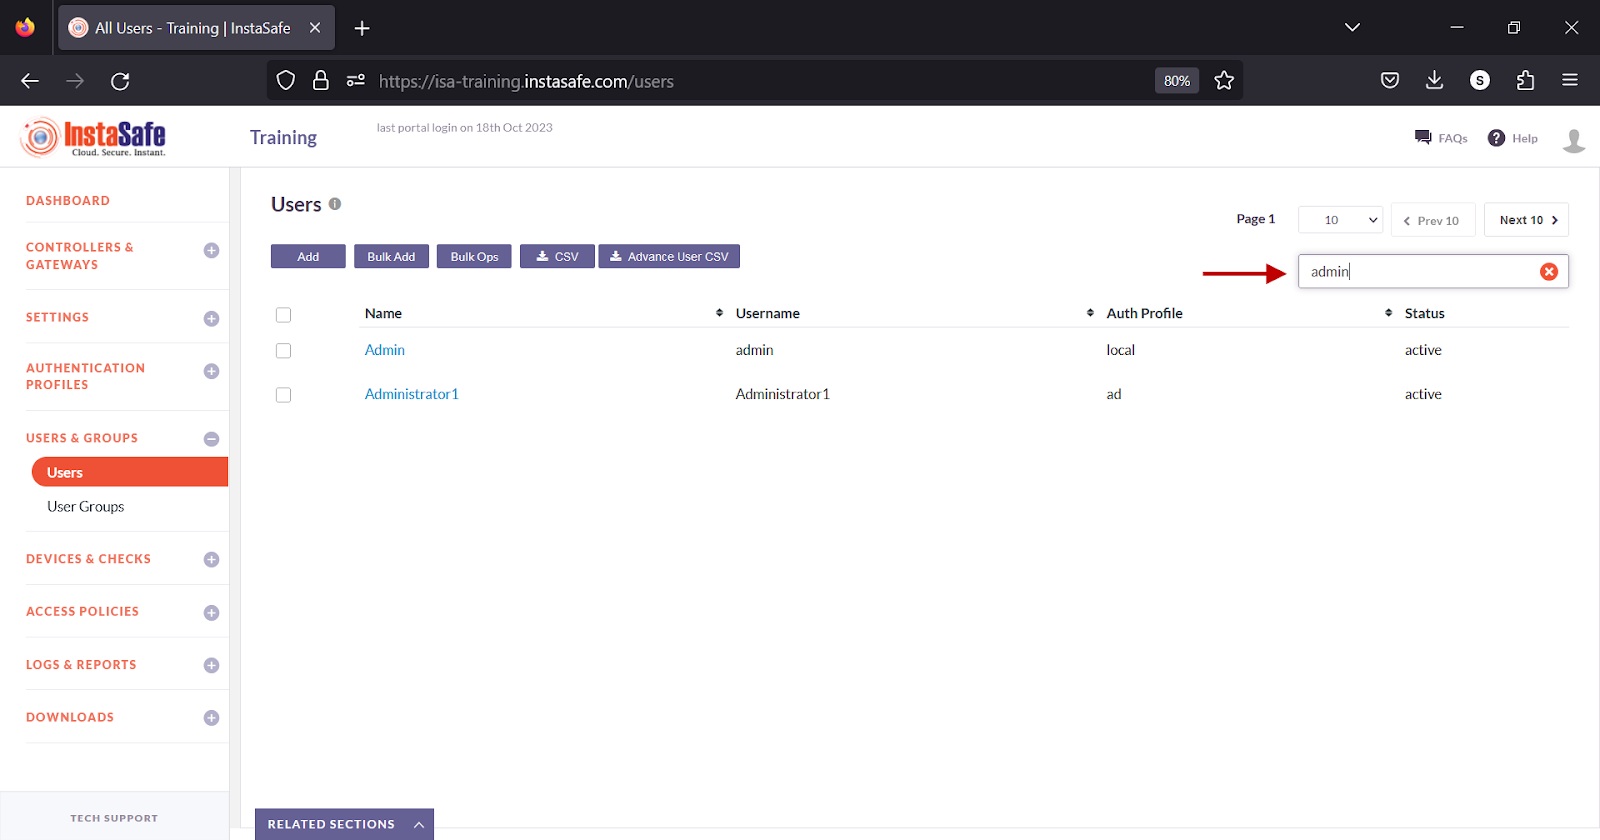
You can search a user by Name or Username by entering it in the search box.
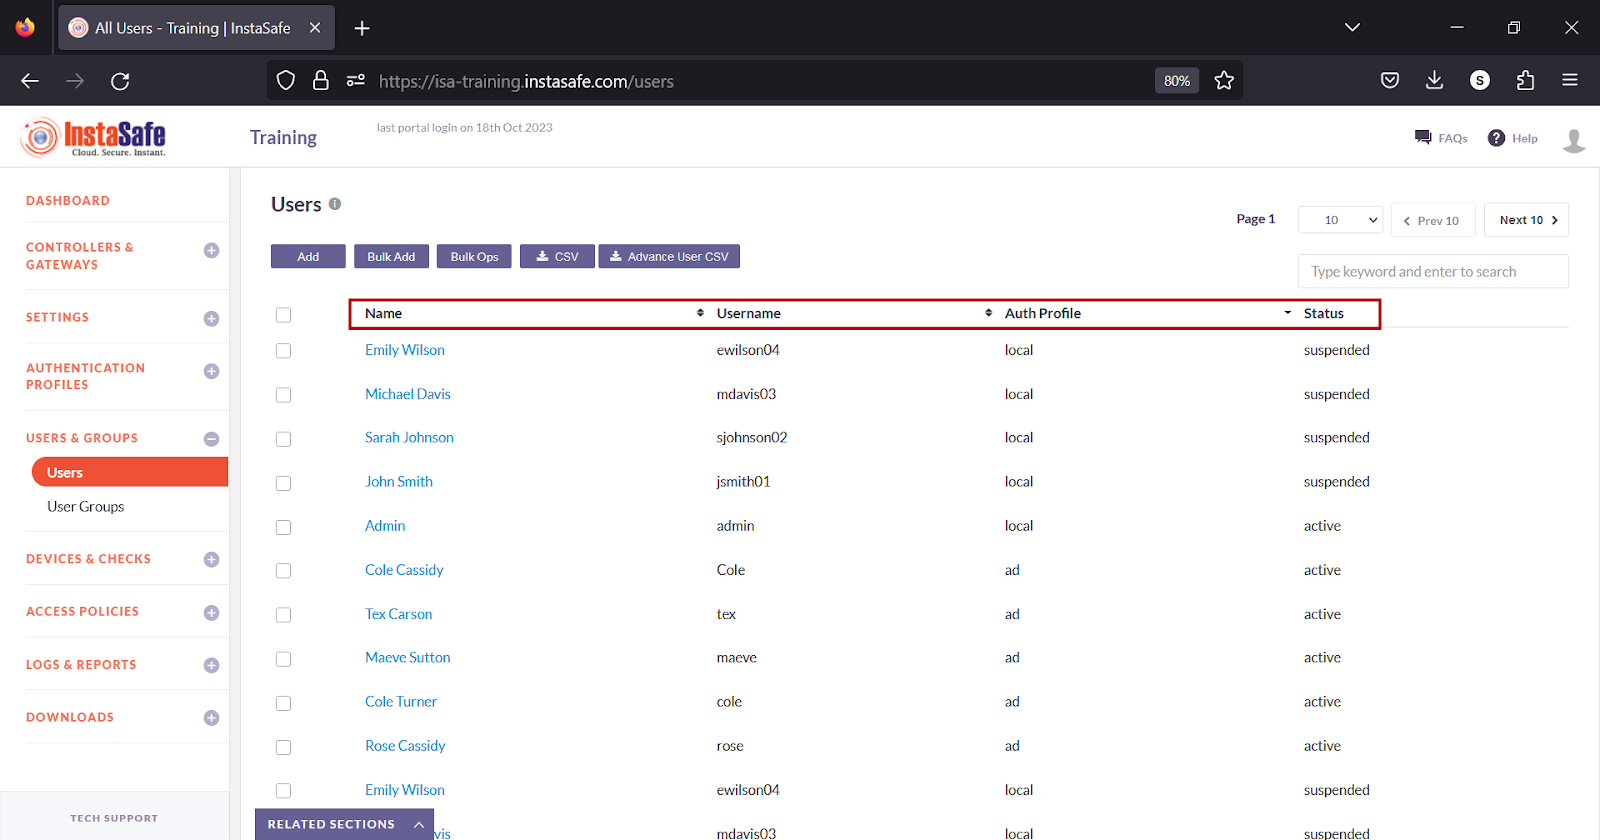
To sort the users by Name, Username, Auth Profile, or Status, click the respective header fields.
Conclusion
The Users page of the ISA web portal is the repository of users connecting remotely using the ISA User Agent or users logging into the web portal for administrative purposes.
Configure Local User Groups
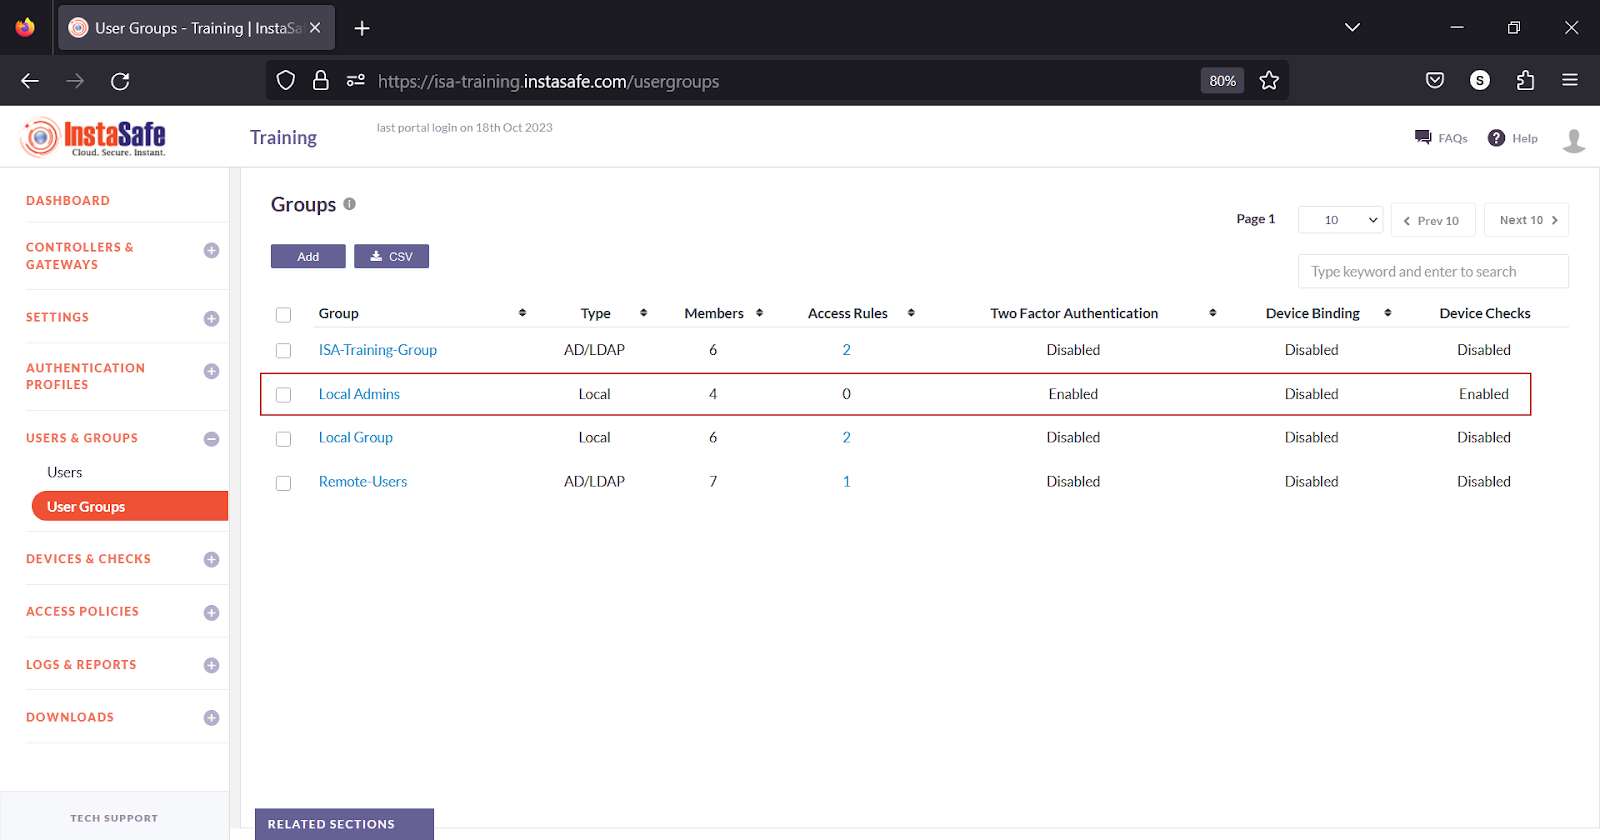
The User Groups page on the ISA web portal allows administrators to create user groups and add users to them. User groups can be created locally by adding the user groups manually or in bulk or imported from Active Directory (AD) and LDAP. Two Factor Authentication, Device Checks, Geo Location, and Device Updates can be enabled on the group, which will be inherited by the members of each group.
Local user groups can be created based on the functions of the users within it or based on their roles and responsibilities on the ISA web portal. A user can be a member of multiple groups. Only active users can be added to a user group. When a user is suspended after being added as a member of a group, the user is removed from the membership of the group.
User groups offer the advantage of granting access to corporate resources for all group members within an access rule, simplifying access management.
Add User Group
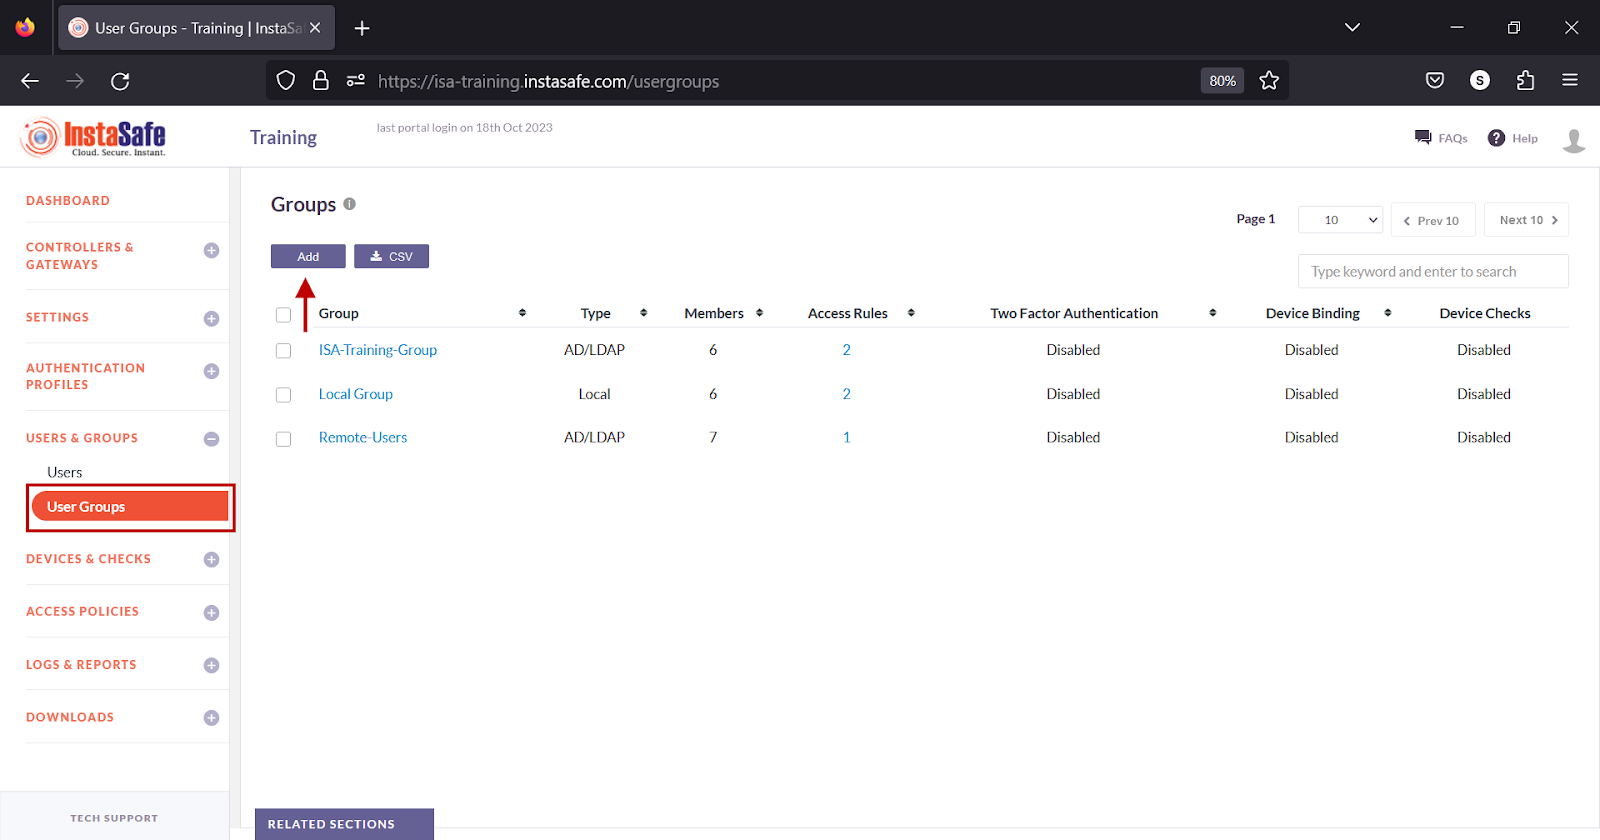
- Login to the ISA web console using administrator credentials.
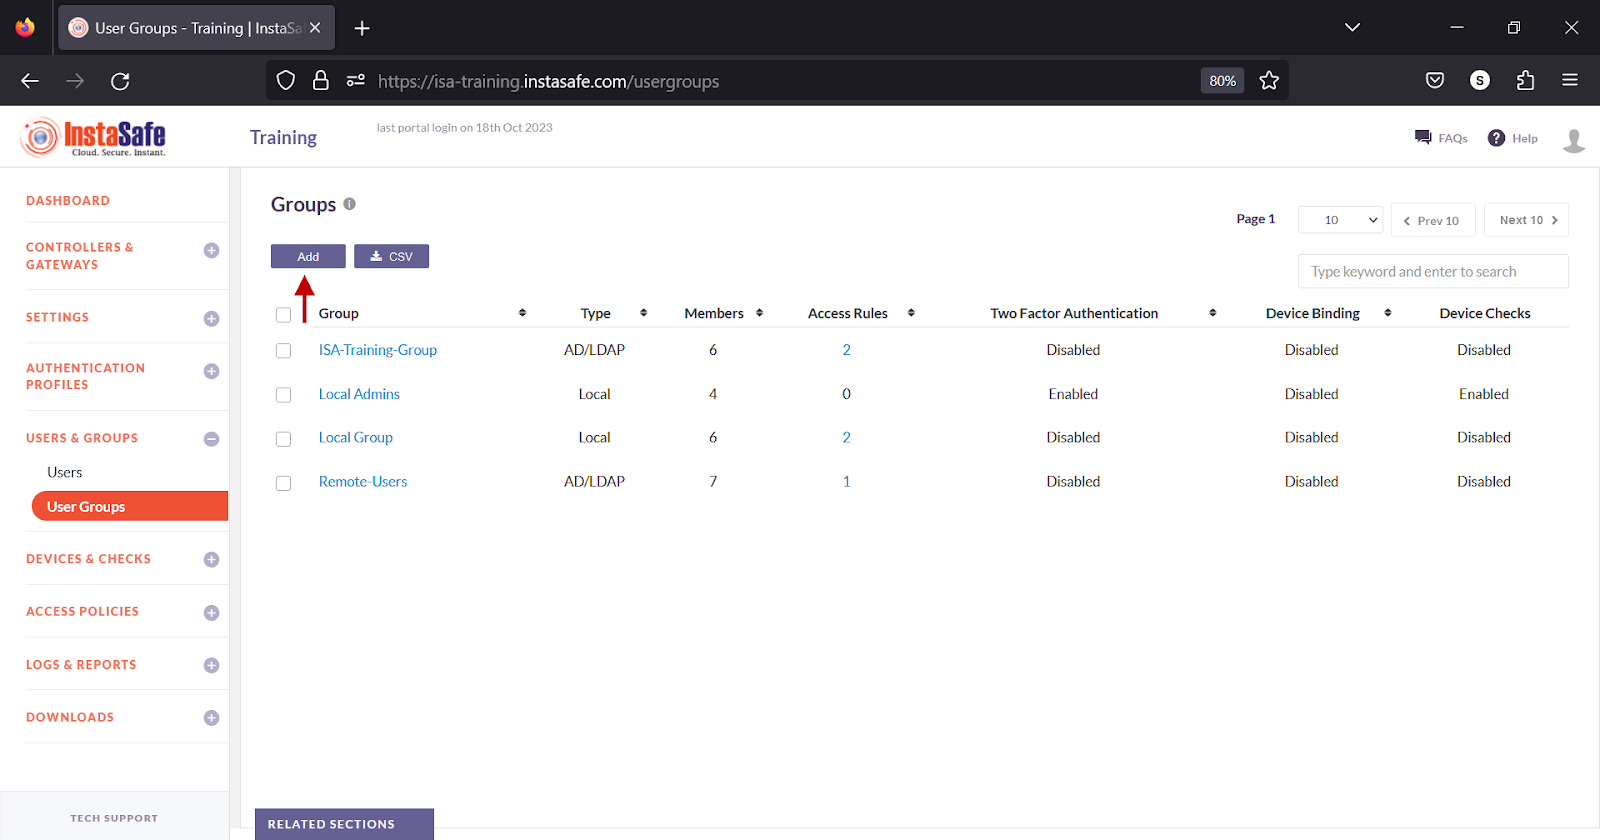
- Navigate to the User Groups page under the USERS & GROUPS menu.
- Click the Add button at the top.
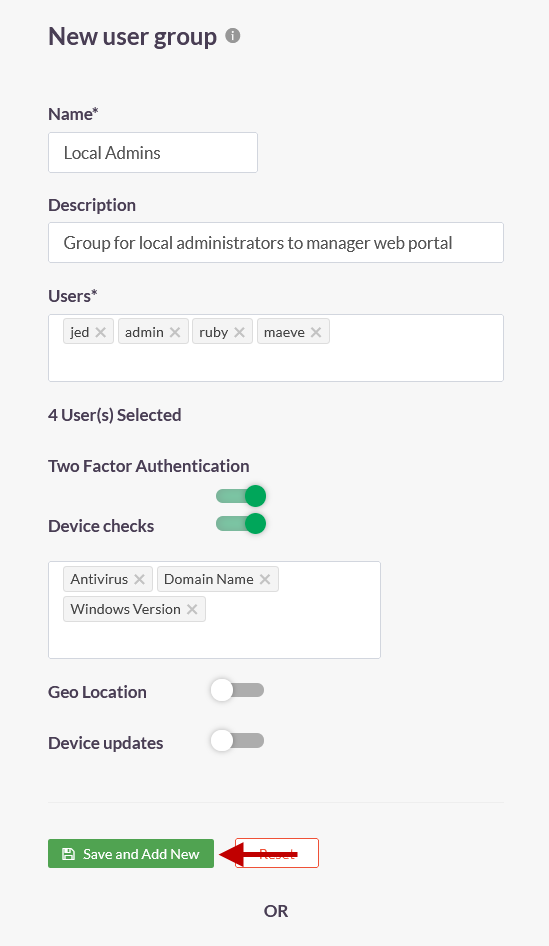
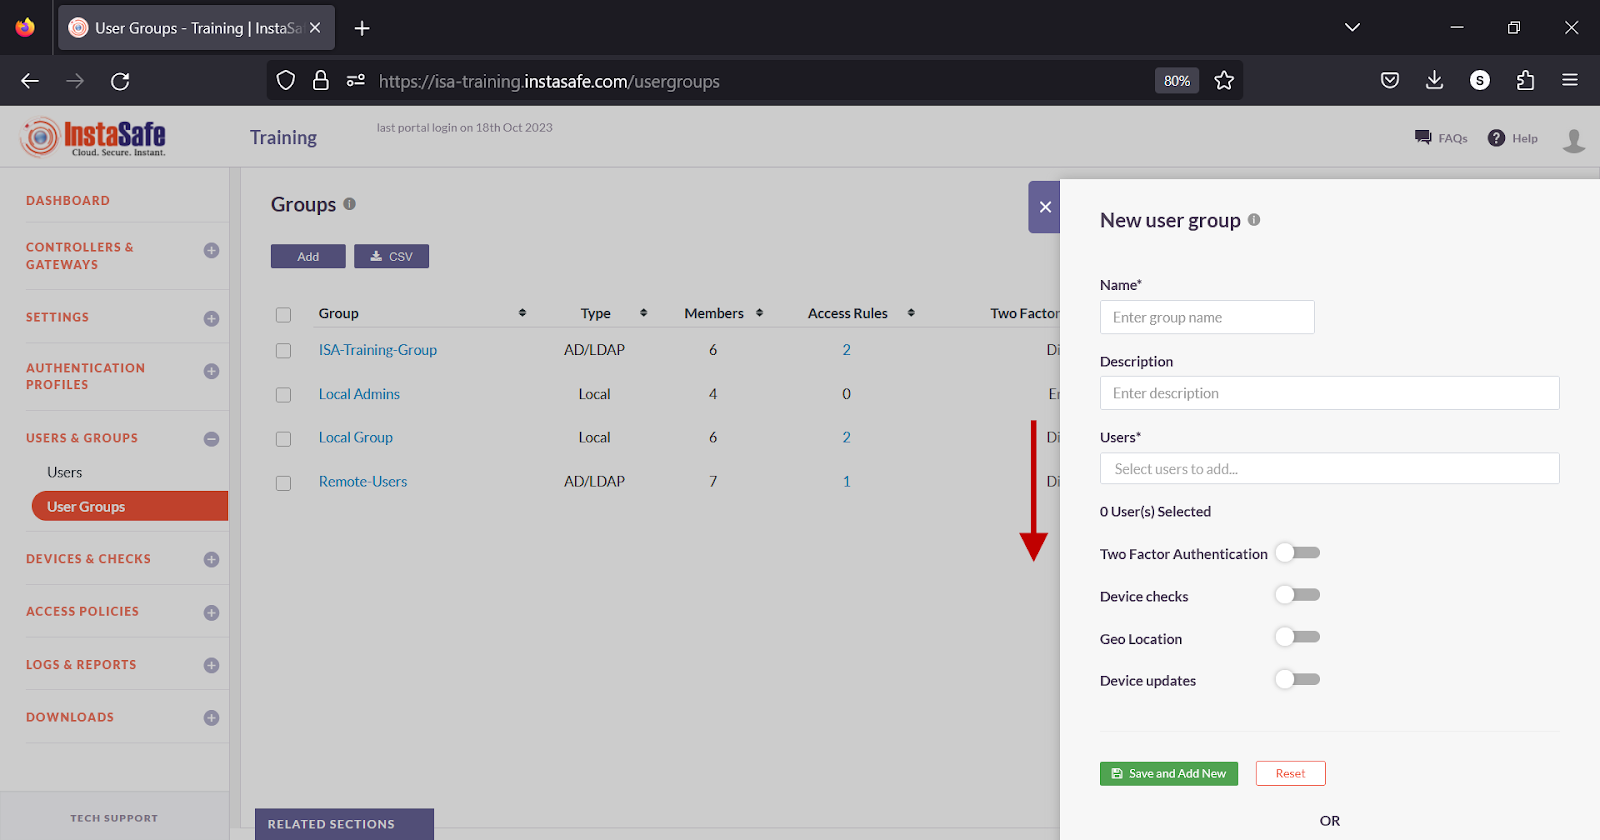
- On the New user group window, configure the following:
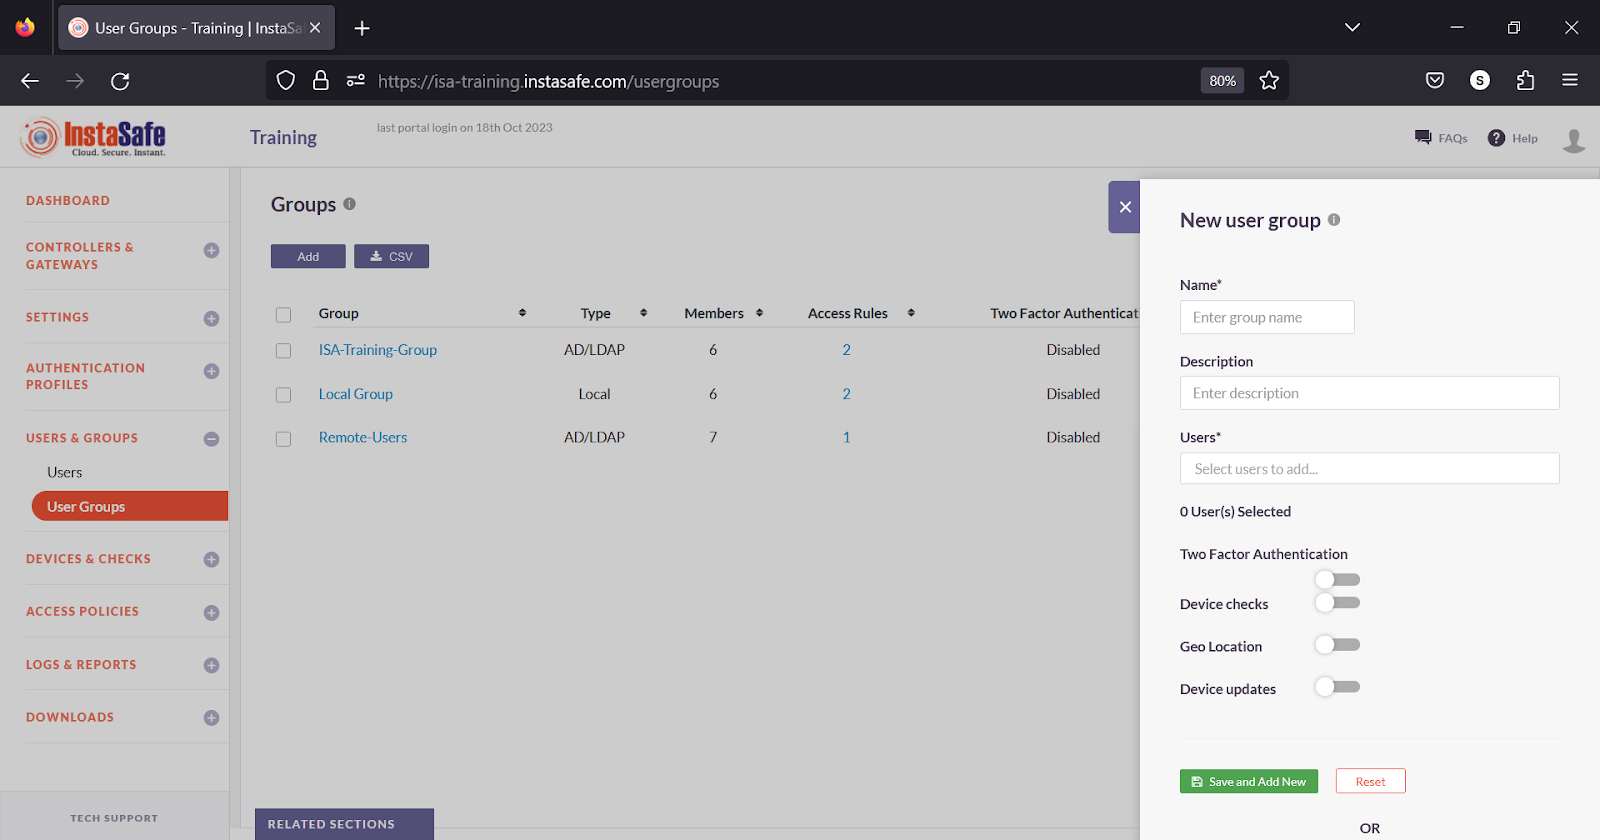
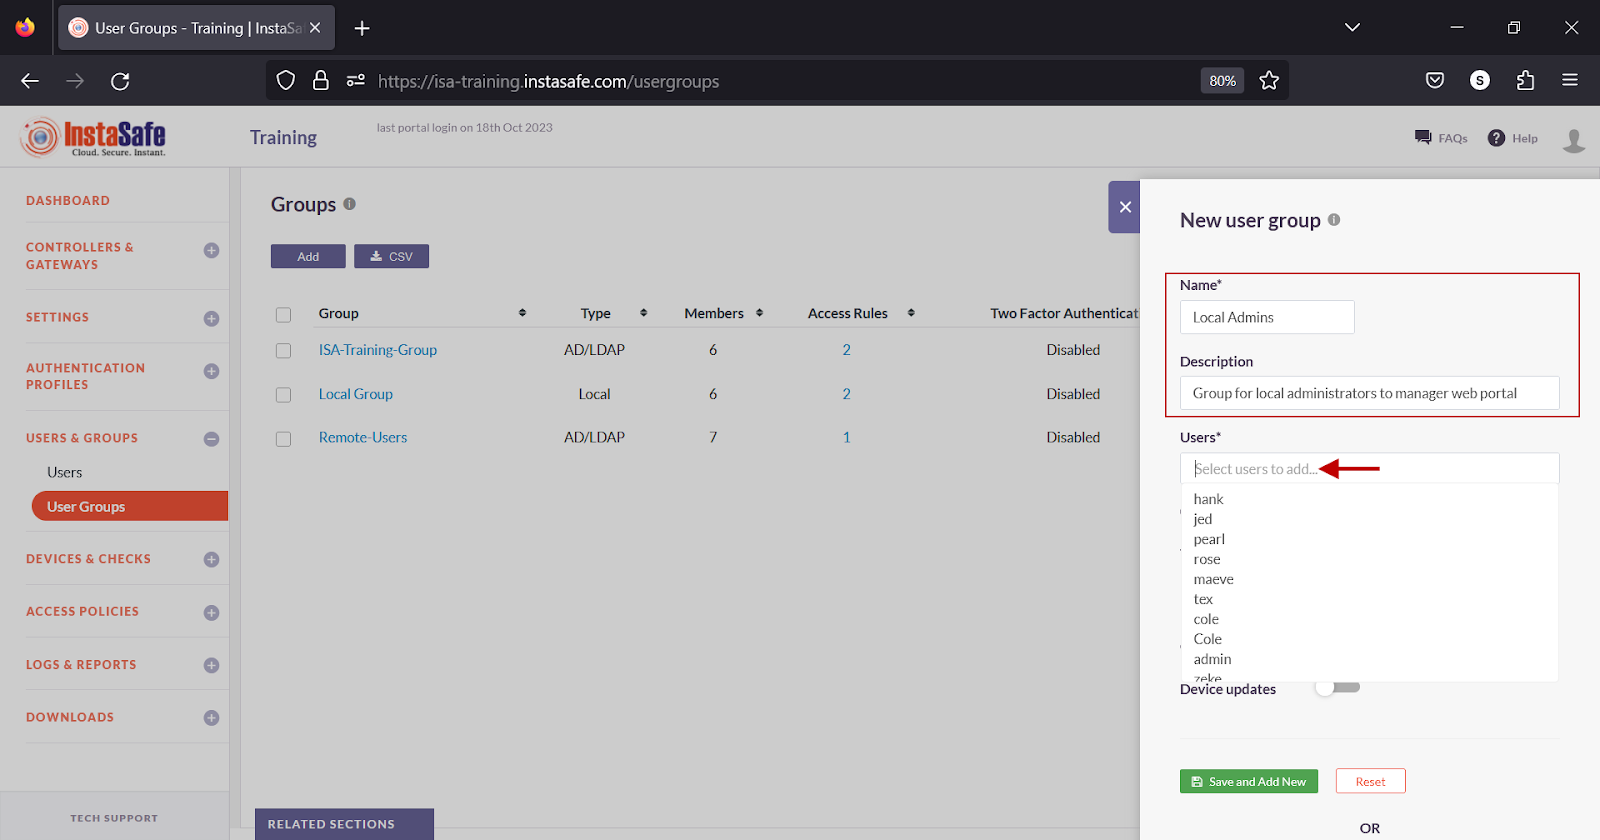
- Name – Enter a name for the group. The name may contain A-Z, a-z, 0-9, “-“, “_”. The maximum characters must not exceed 70 characters.
- Description – Enter a description.
- Users – Click the box to select the users from the drop-down list.
- Two Factor Authentication – Turn on the toggle button to enable Two Factor Authentication.
- Device checks – Turn on the toggle button to enable Device Checks.
- Geo Binding – Turn on the toggle button to enable Geo Binding.
- Device updates - Turn on the toggle button to enable Device updates. For more information on configuring Device Updates, refer to the KB article Configuring Device Updates.
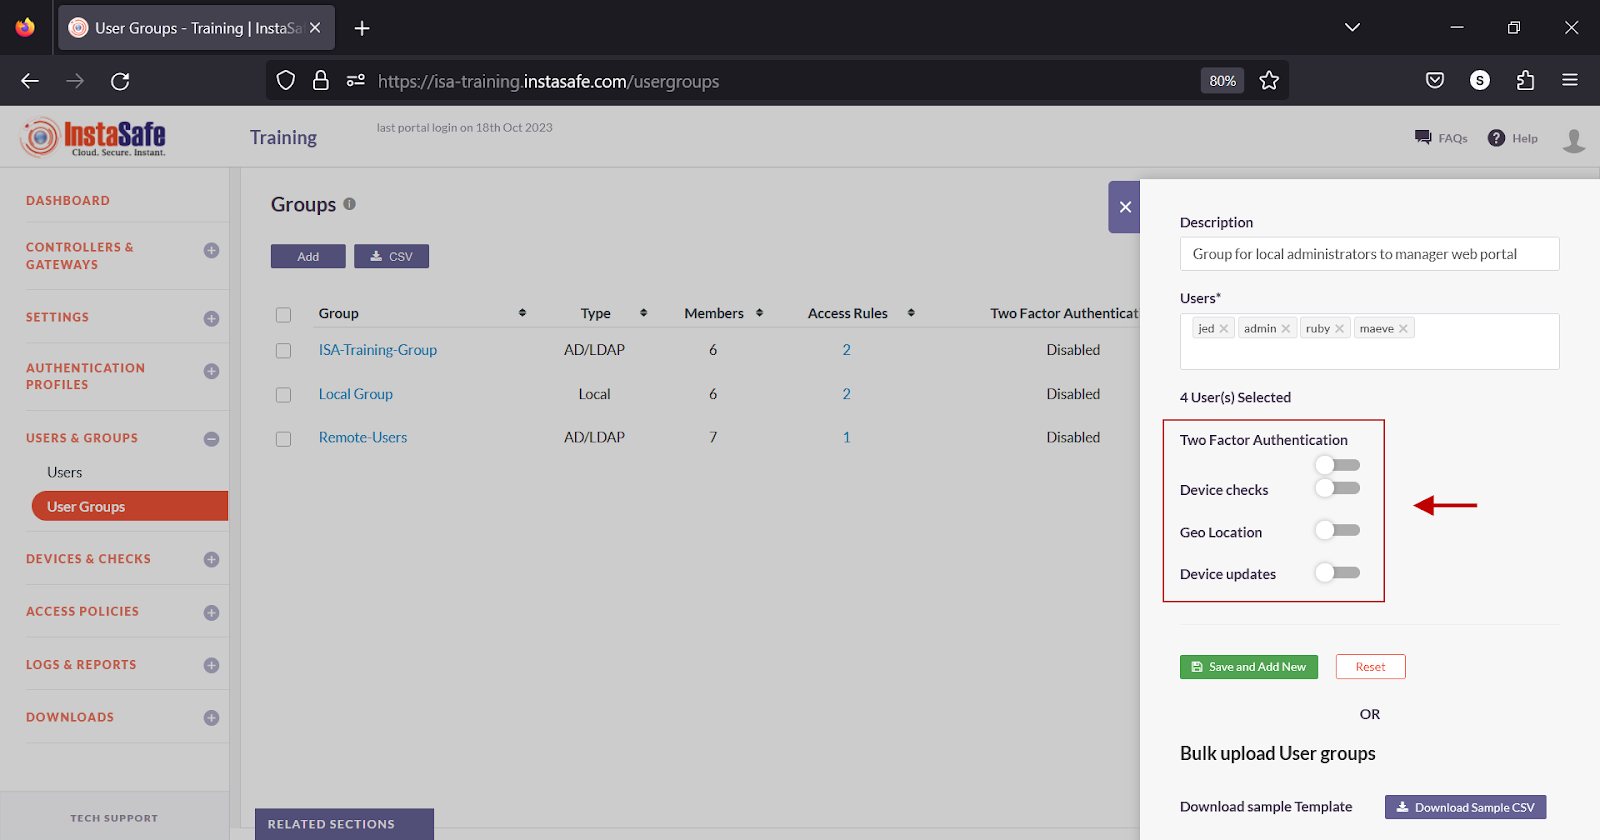
- Click Save and Add new to add the group.
- The newly created group is listed on the page.
Add User Groups in Bulk
This option allows the administrator to add large number of user groups at once. The status of users to be added in the group must be active. Supported fields in the file are:
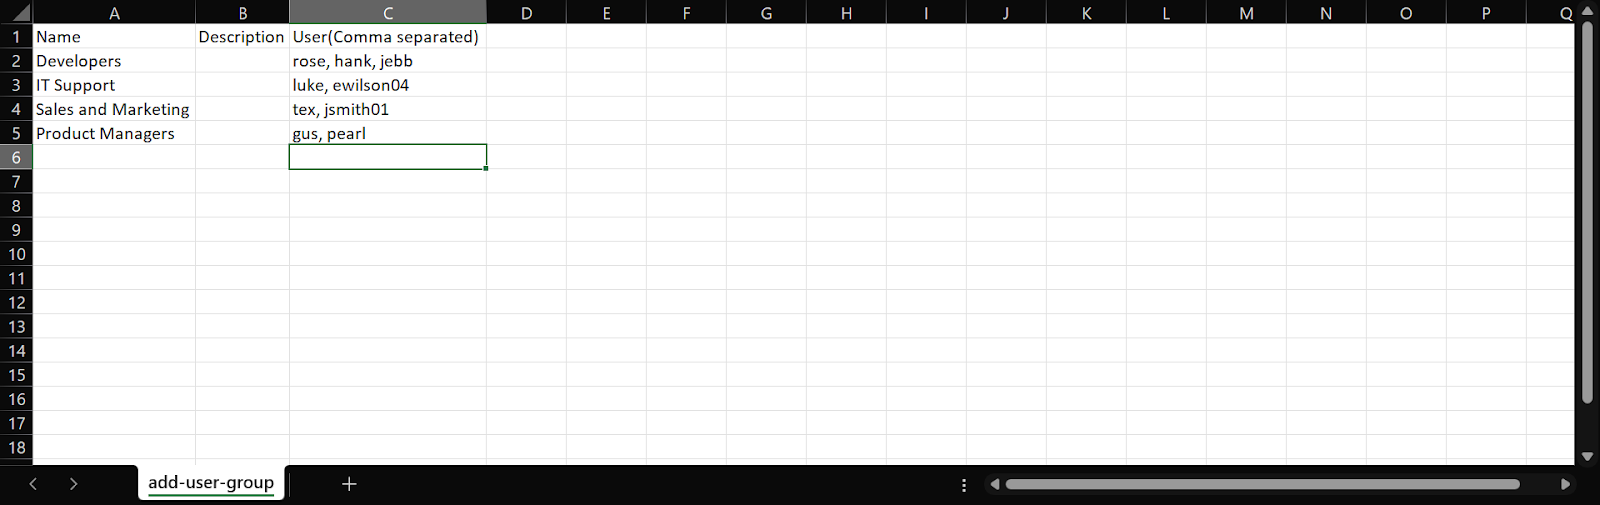
- Name: Name for the group. This field must not be blank.
- Description: A short description of the group.
-
User (comma separated): This field must not be blank.
-
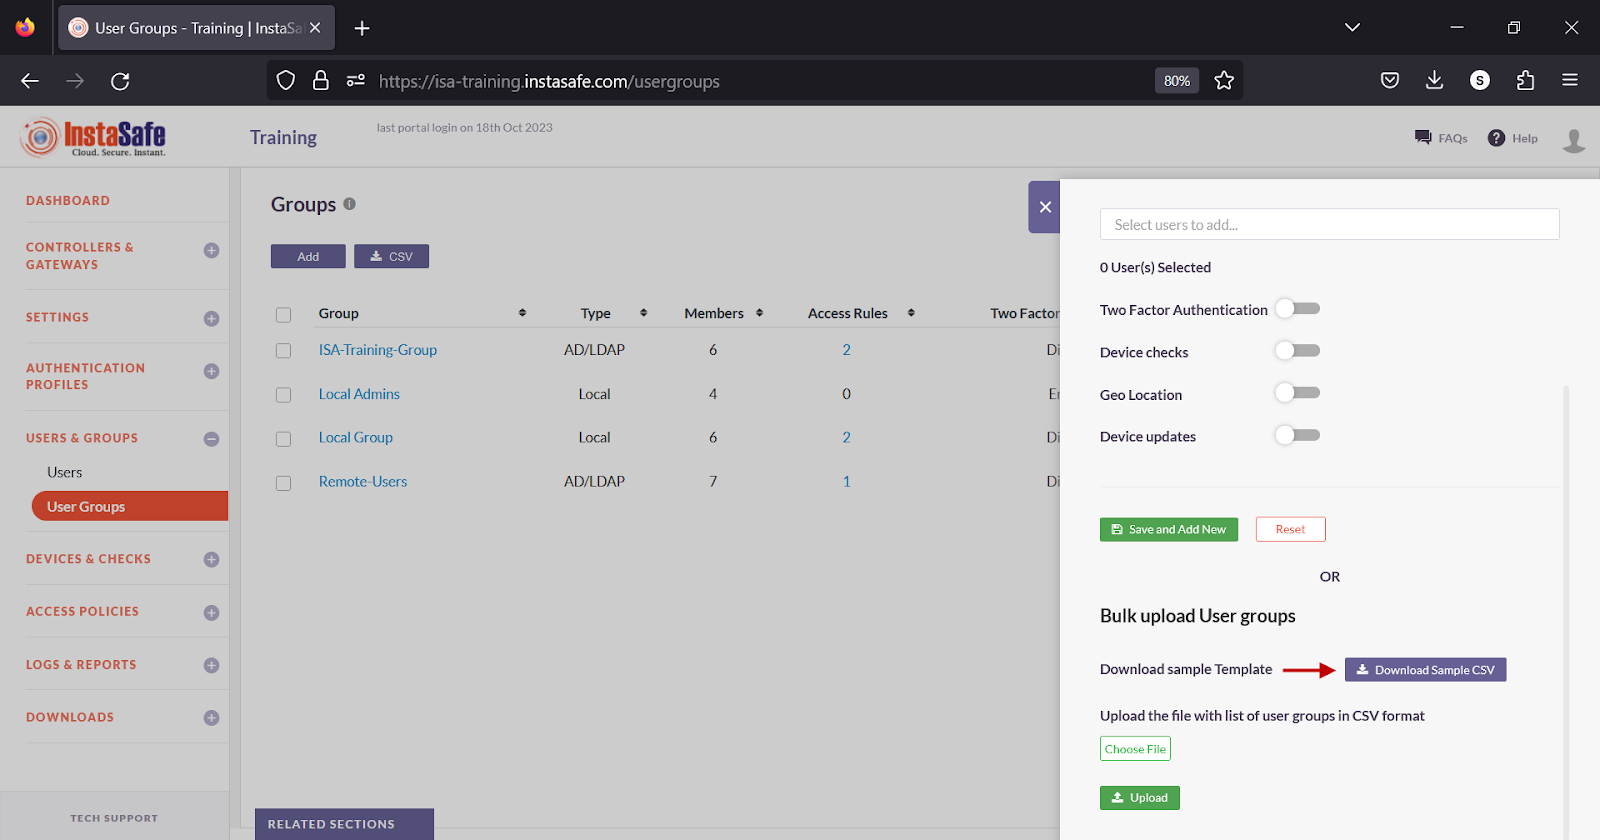
On the User Groups page, click the Add button.
- Scroll down the window.
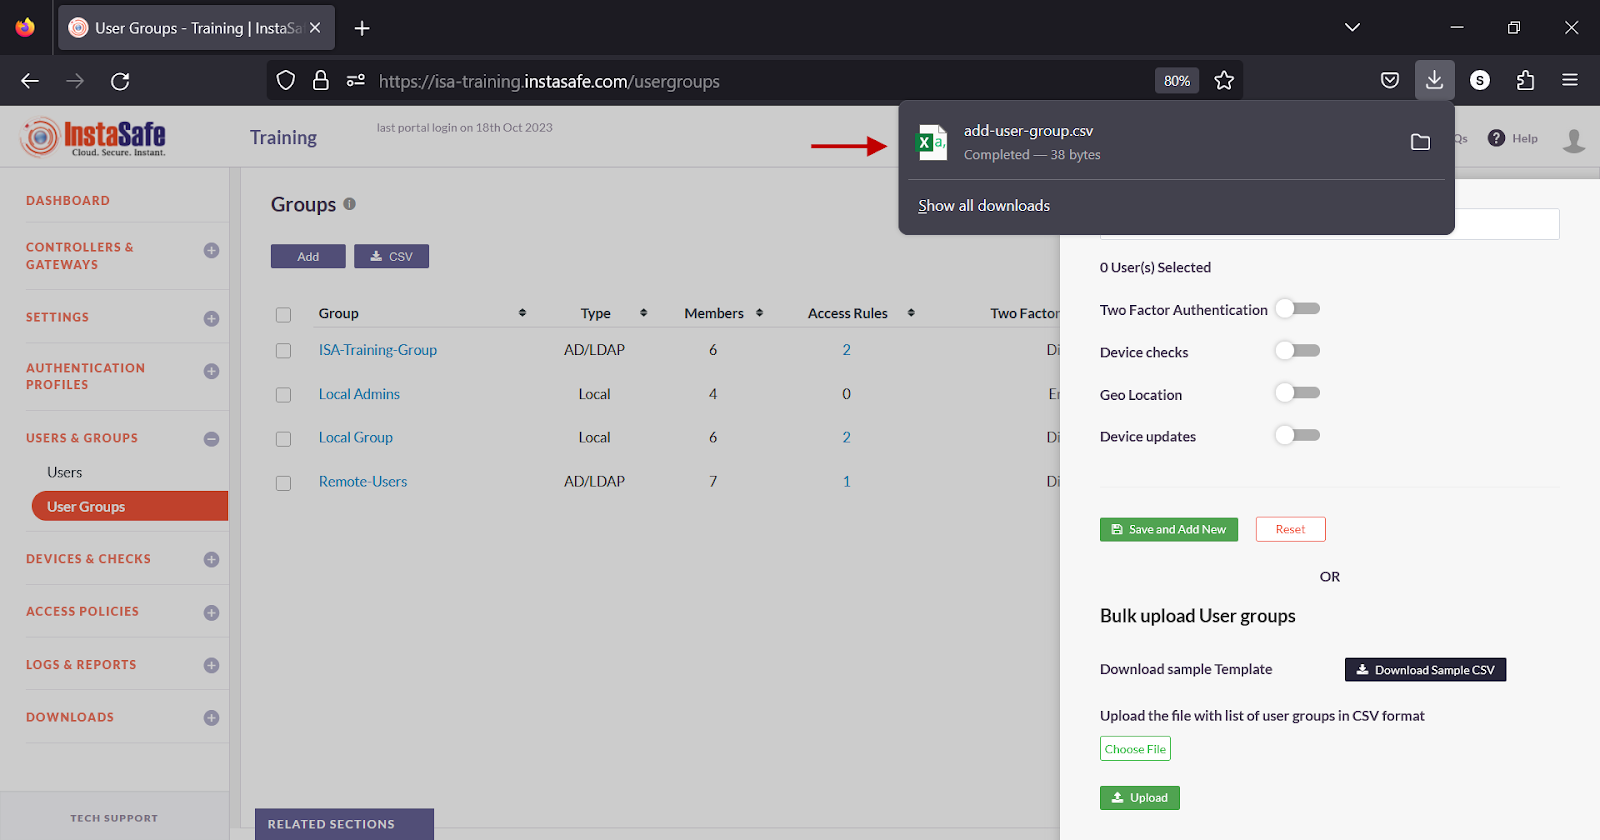
- Under Bulk Upload User groups, click Download Sample CSV.
- Open the file using a spreadsheet application.
- The template file has the following fields.
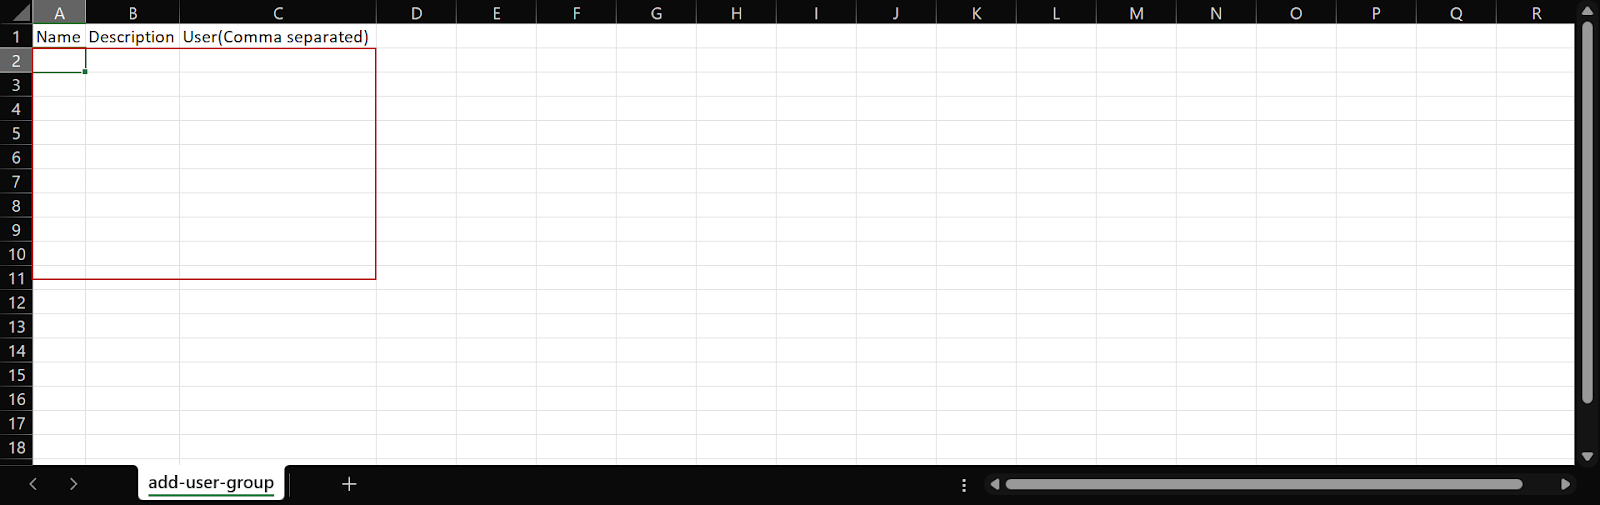
- Enter the group information in the respective fields and save it.
- In the Bulk upload User groups window, click Choose File and select the file from local drive.
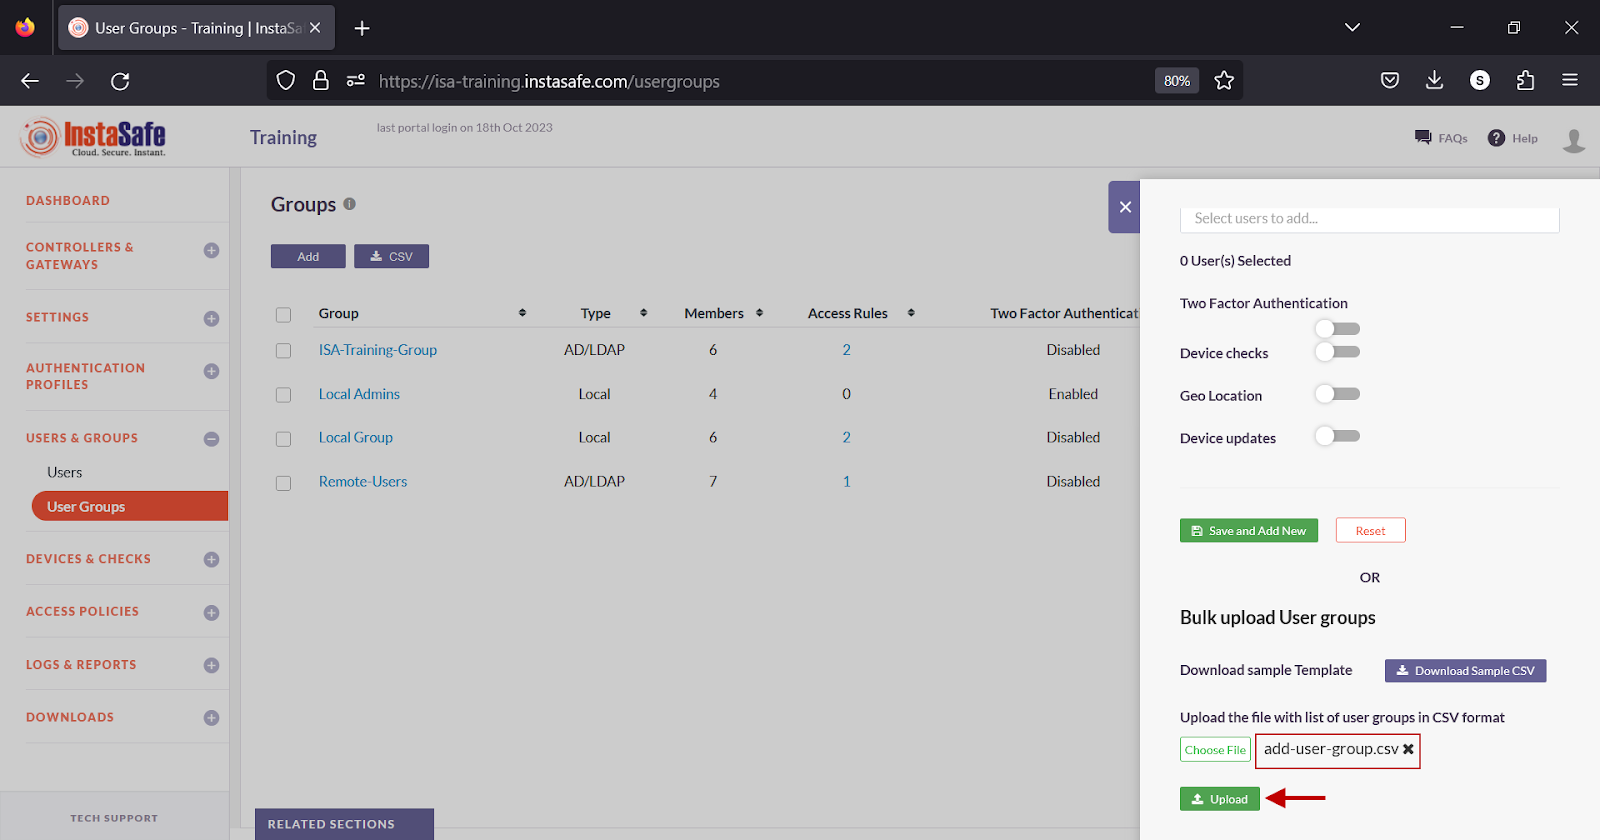
- Click Upload.

- In the Uploaded user groups window, review the information and click Save User Group.
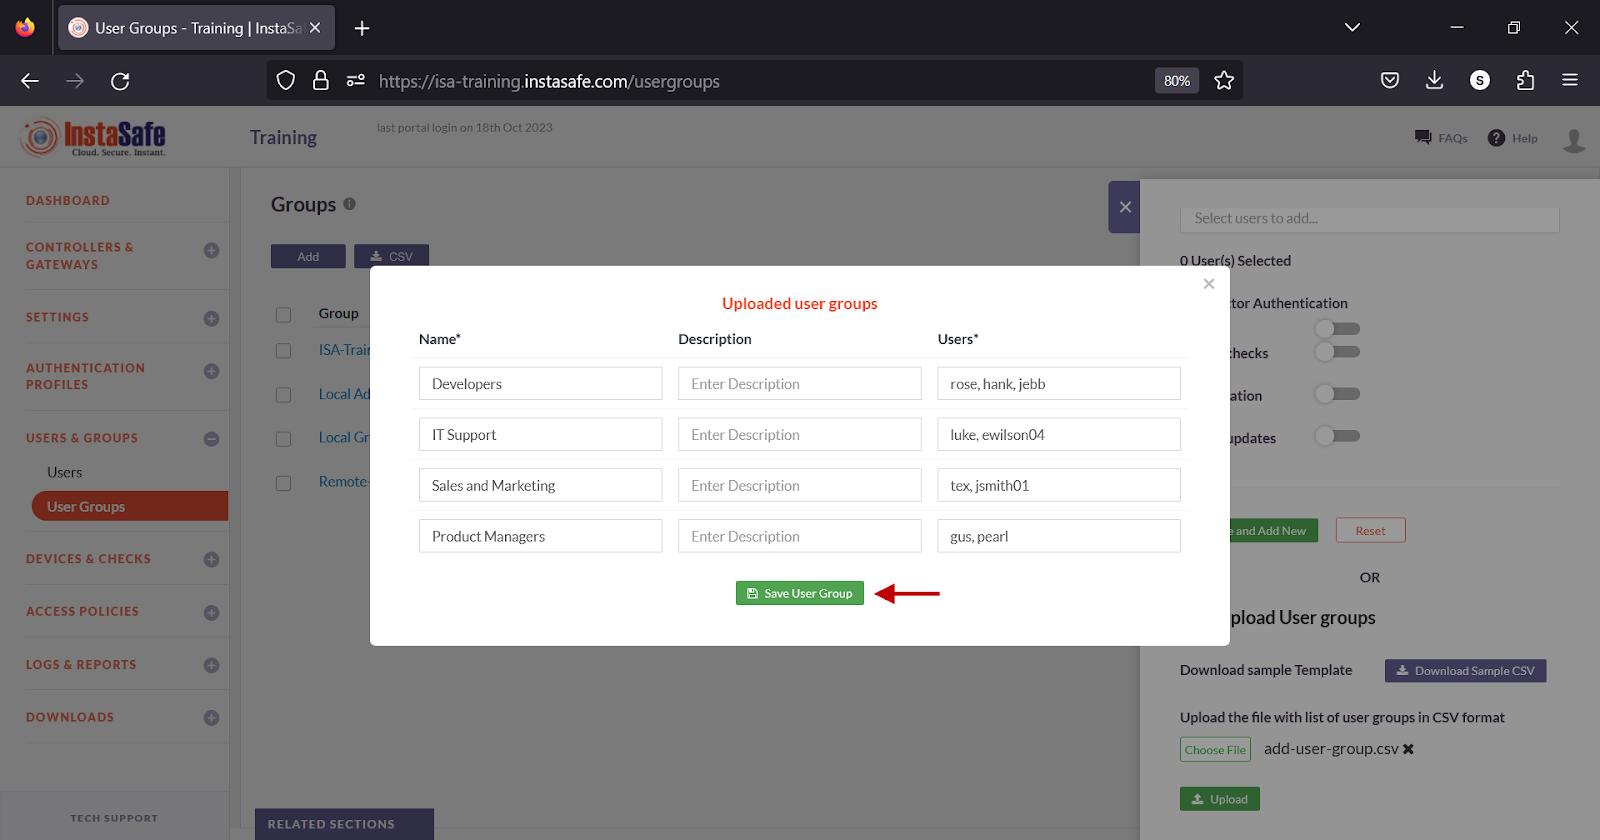
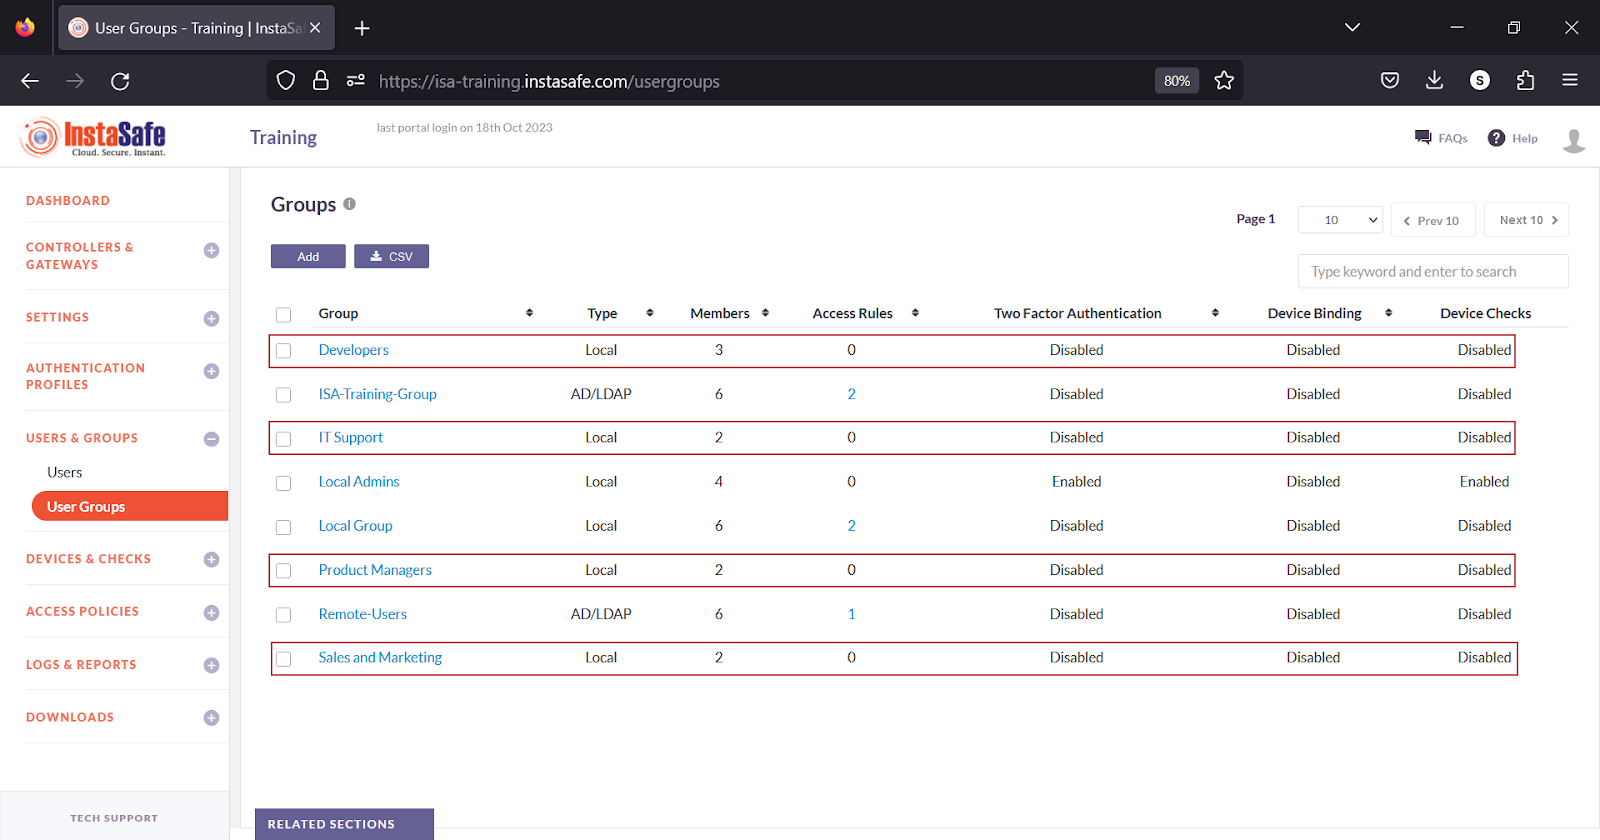
- The newly created groups are listed on the User Groups page.
Handling Group Assignments
- Avoid Adding Users to Groups During Creation:
Adding users to groups during the upload process increases processing time.
- Recommended Approach:
First, create all users in bulk without assigning them to any group.
Once all users are created, assign them to the necessary group in one action (batch processing).
Alternatively, create a new group, add the users to it, and later associate the group with the appropriate Access Control List (ACL).
Download User Groups List
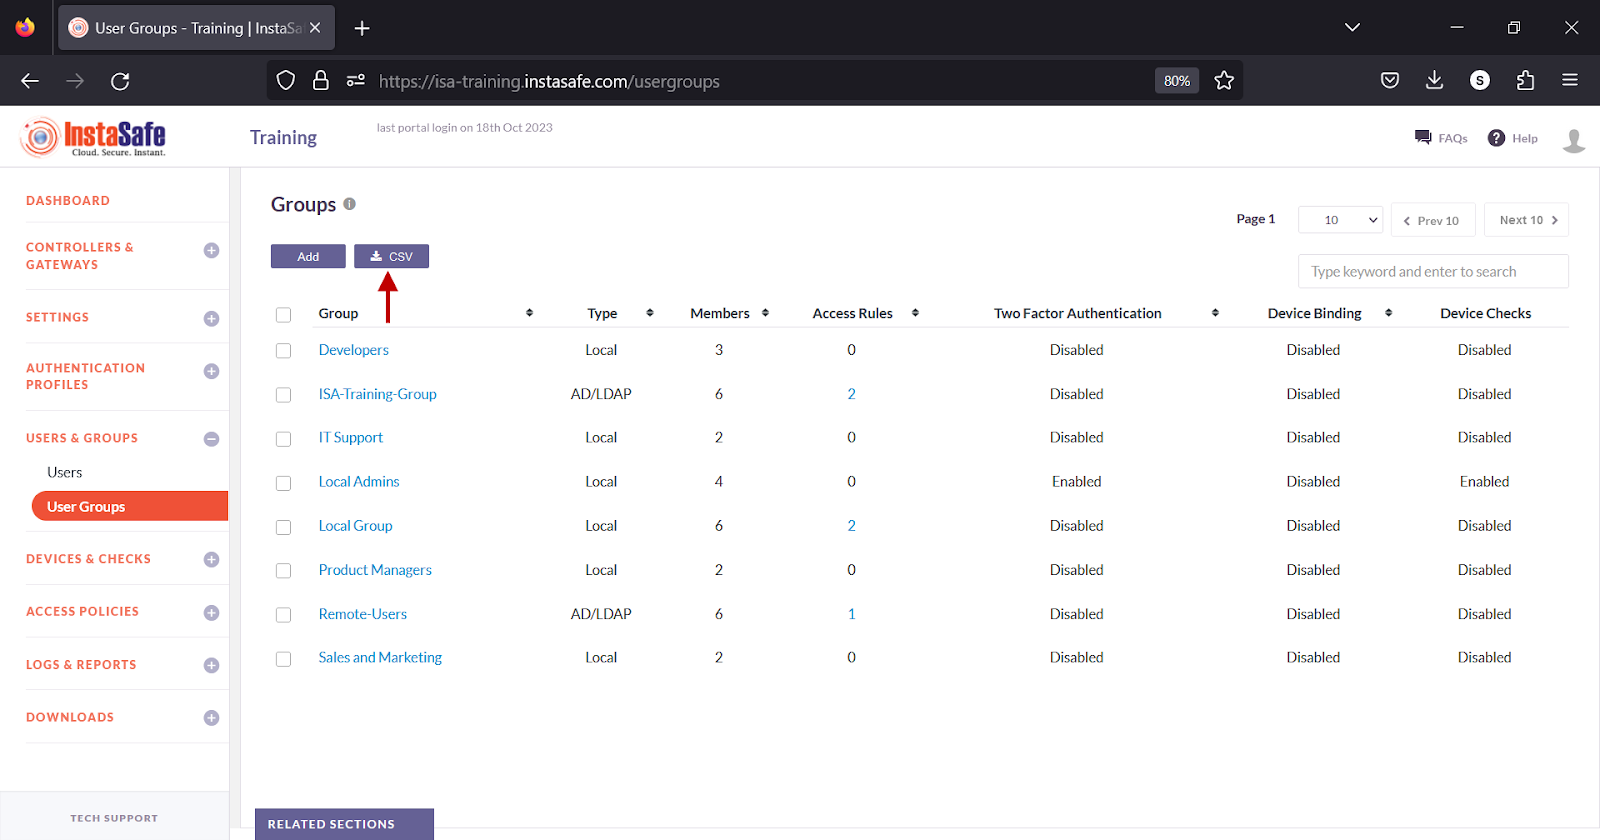
ISA web portal administrators can download the complete list of users by clicking on the CSV button on the User Group page. An email with the link to download the file in CSV format is sent to the logged-in administrator’s email address. The file has the following information:
- Group - Name of the user group.
- Type - Whether the group is local, AD, or LDAP
- Description – Description of the group.
- Member Count – Number of users within the group.
- Member Names –Usernames of the users within the group.
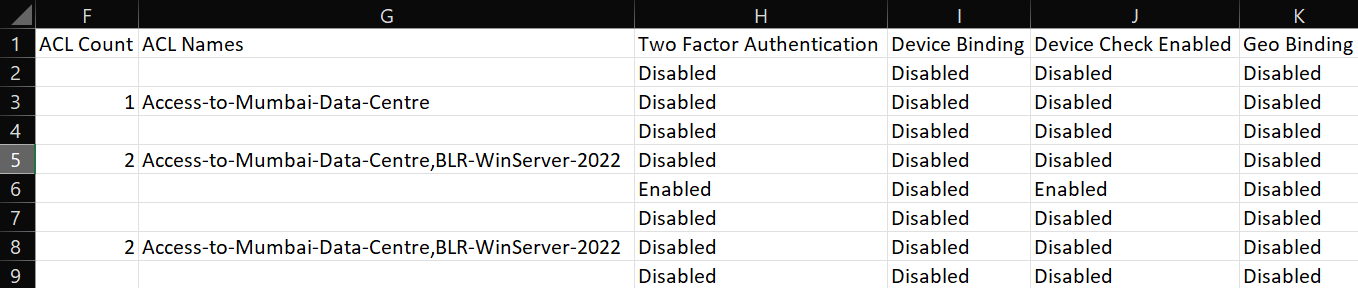
- ACL Count – The number of access rules with reference to this group.
- ACL Names – Name of the access rules.
- Two-Factor Authentication – Whether 2FA is enabled for the user.
- Device Check – Whether Device Check is enabled for the user.
-
Geo Binding – Whether Geo Binding is enabled for the user.
-
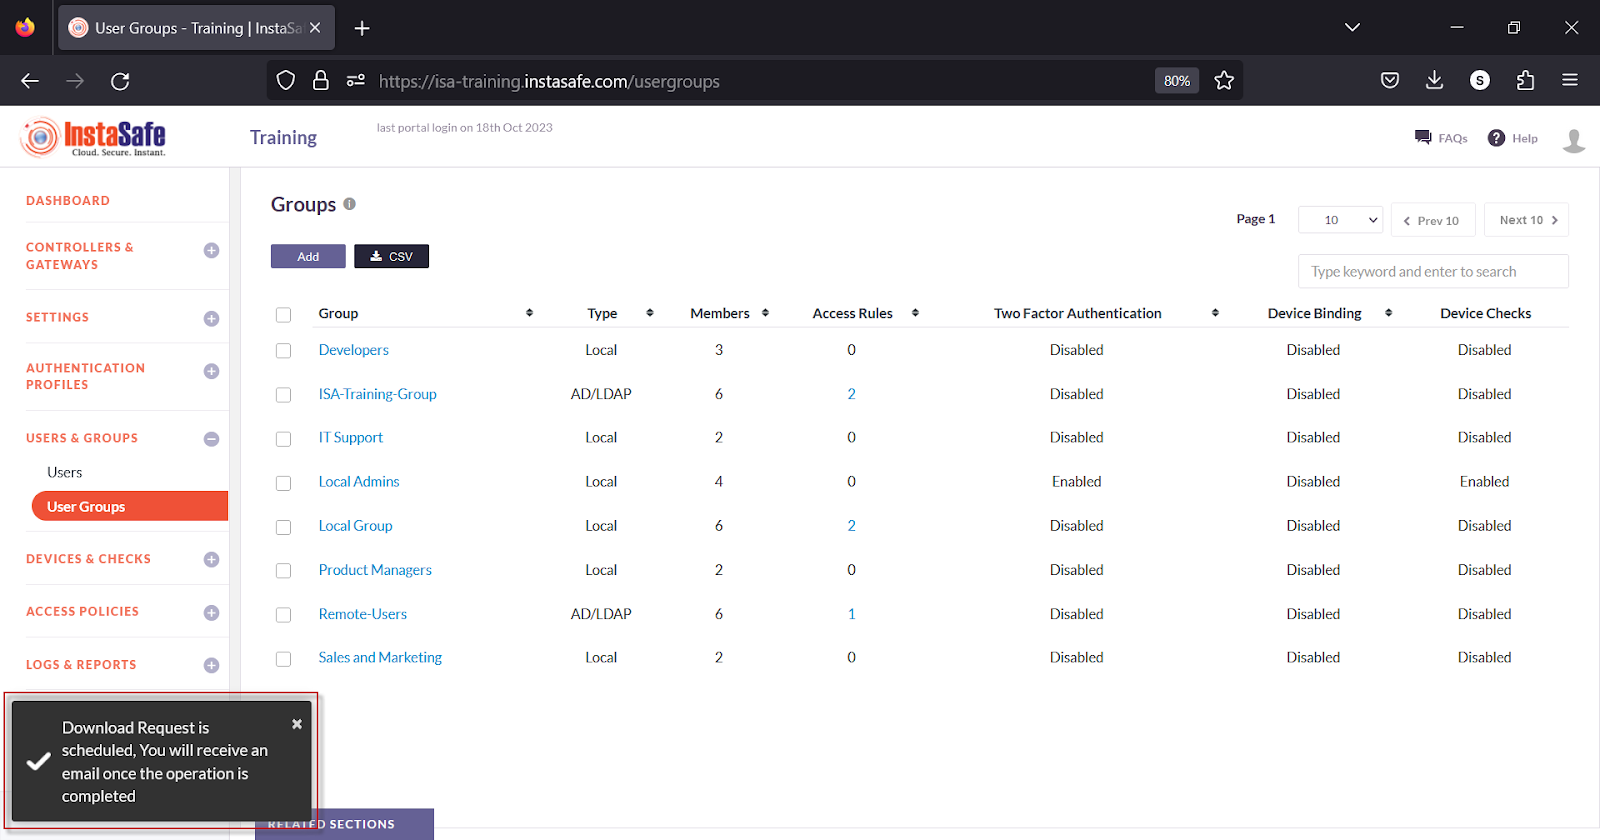
On the Users page, click the CSV button at the top.
-
A message that an email is scheduled to be sent to the administrator’s email address is displayed.
-
Click the download link within the email.
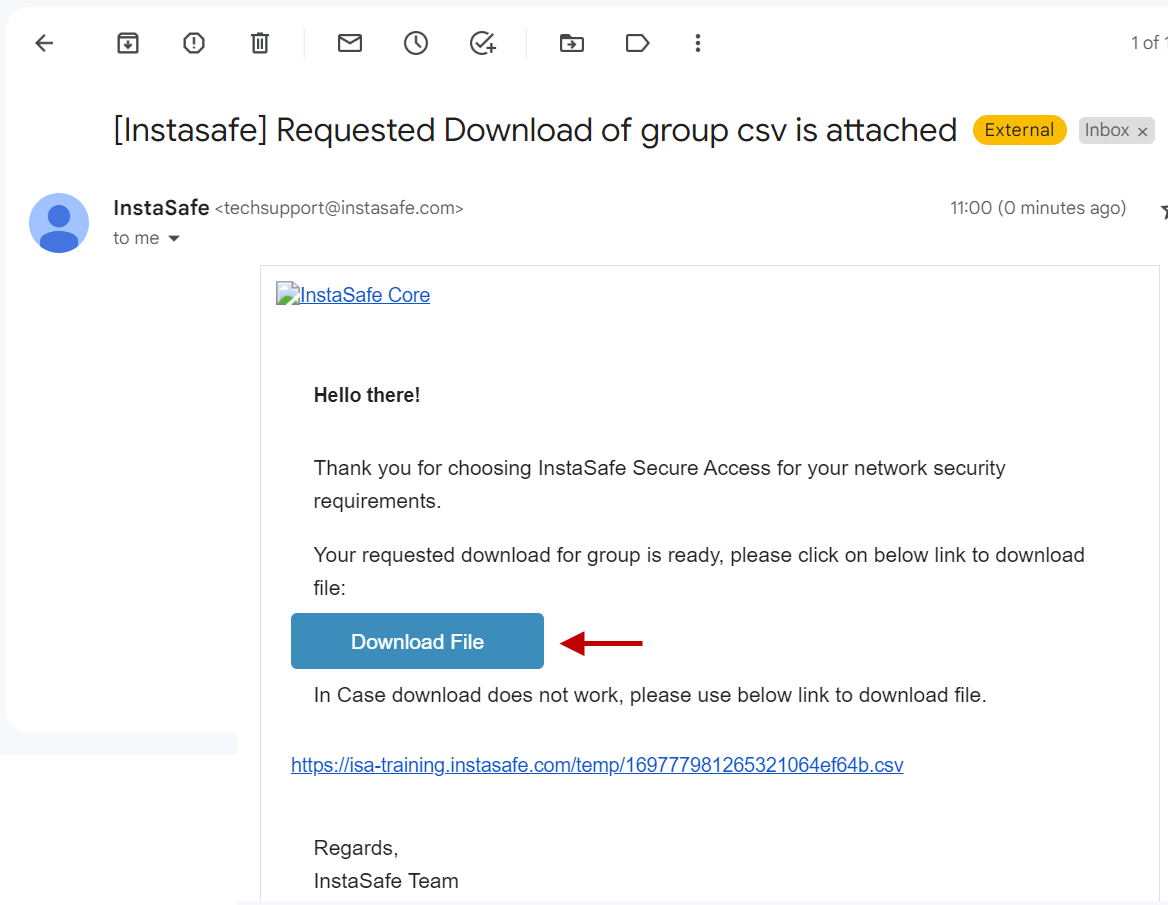
- View the file in a spreadsheet application.

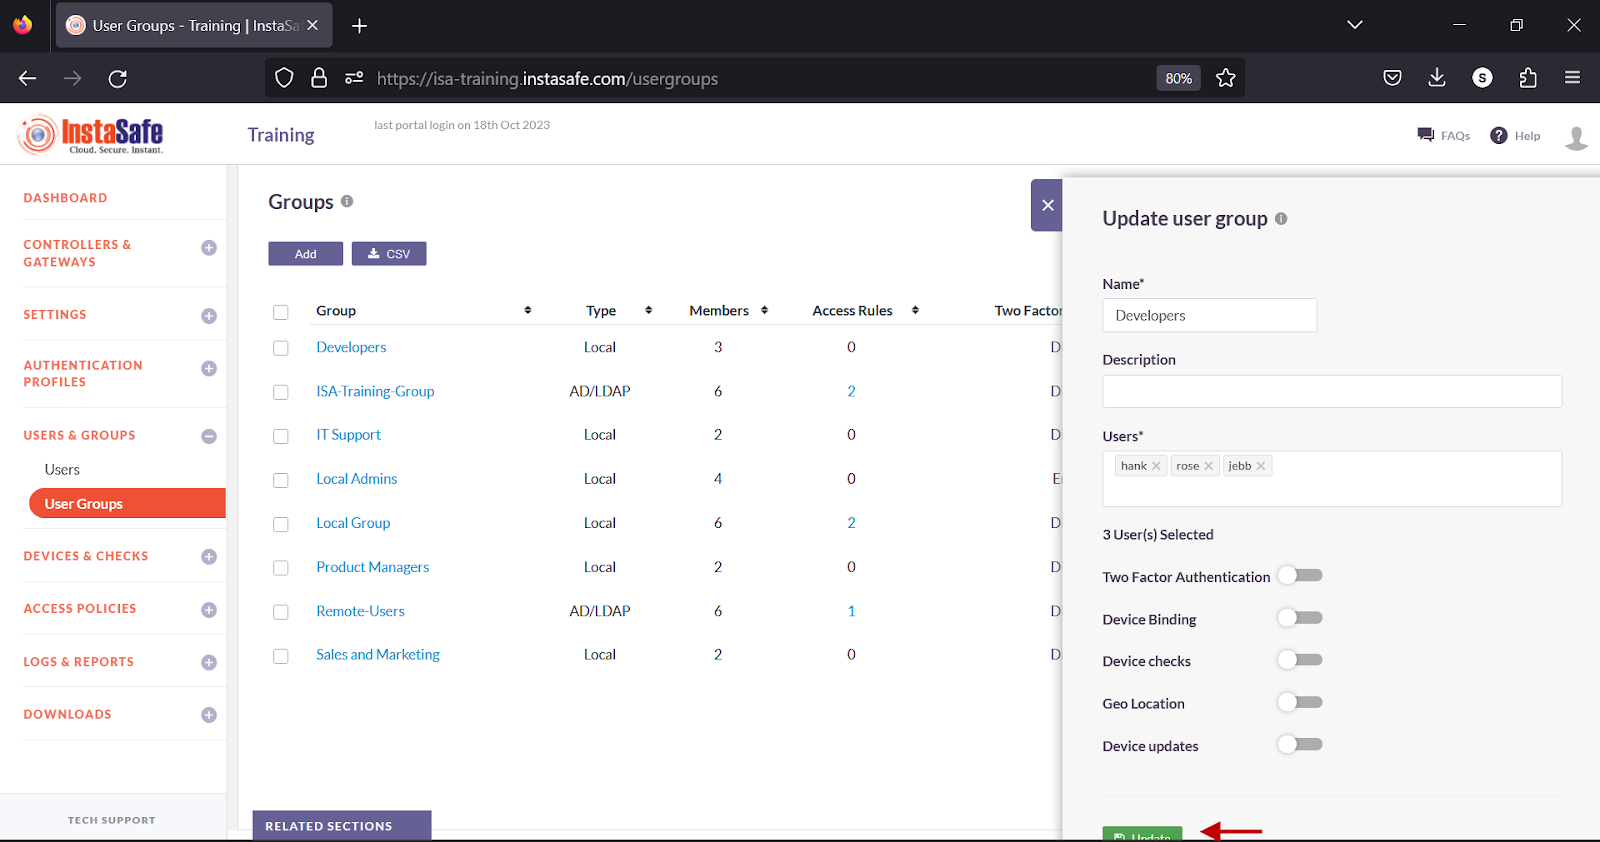
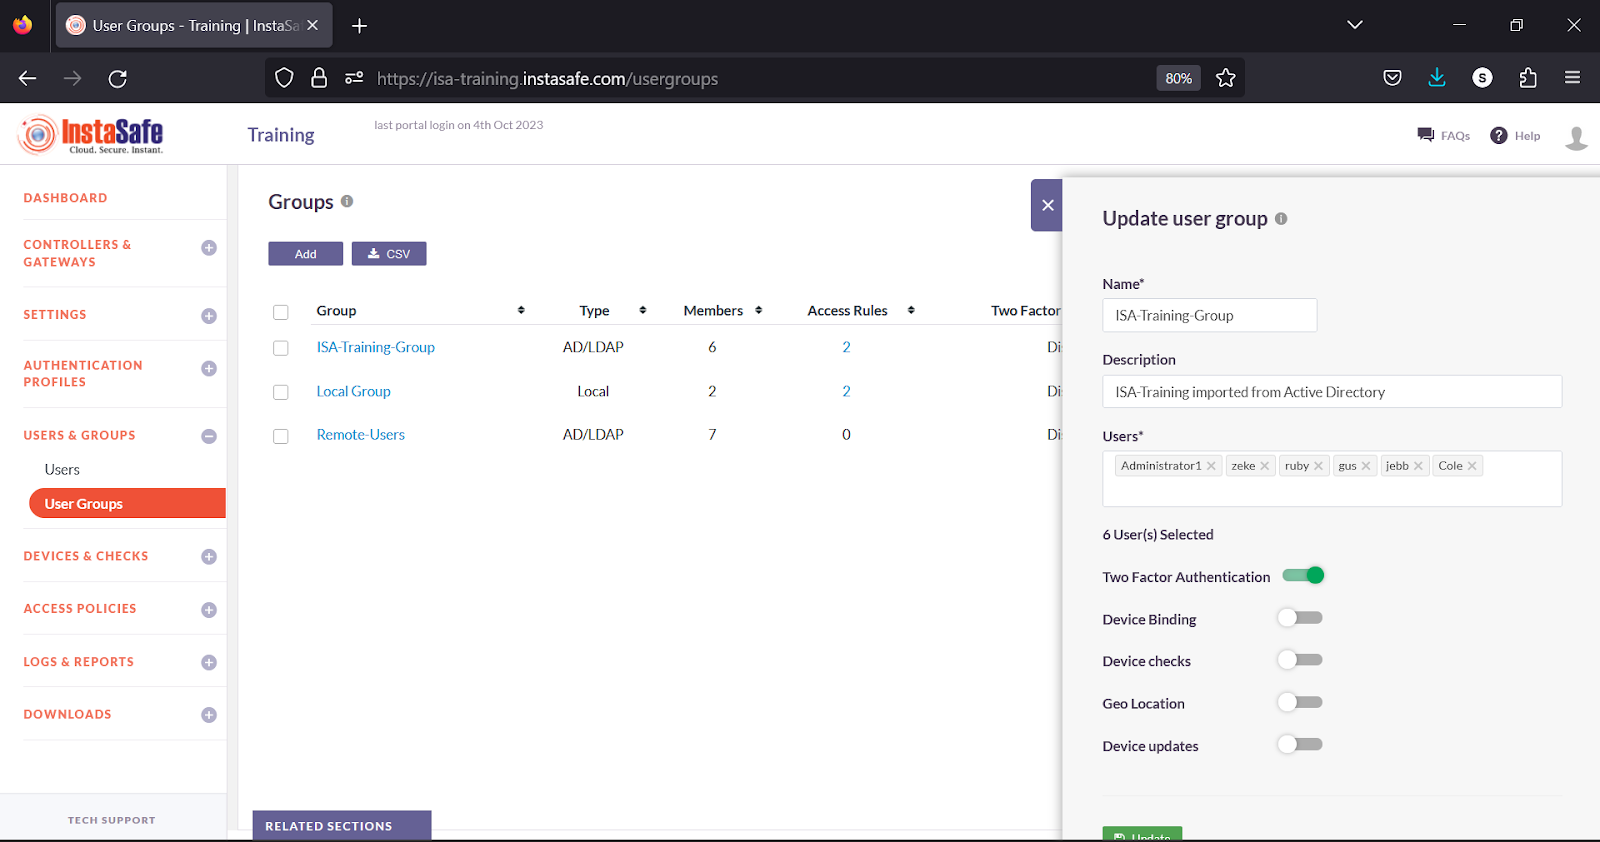
Edit User Group
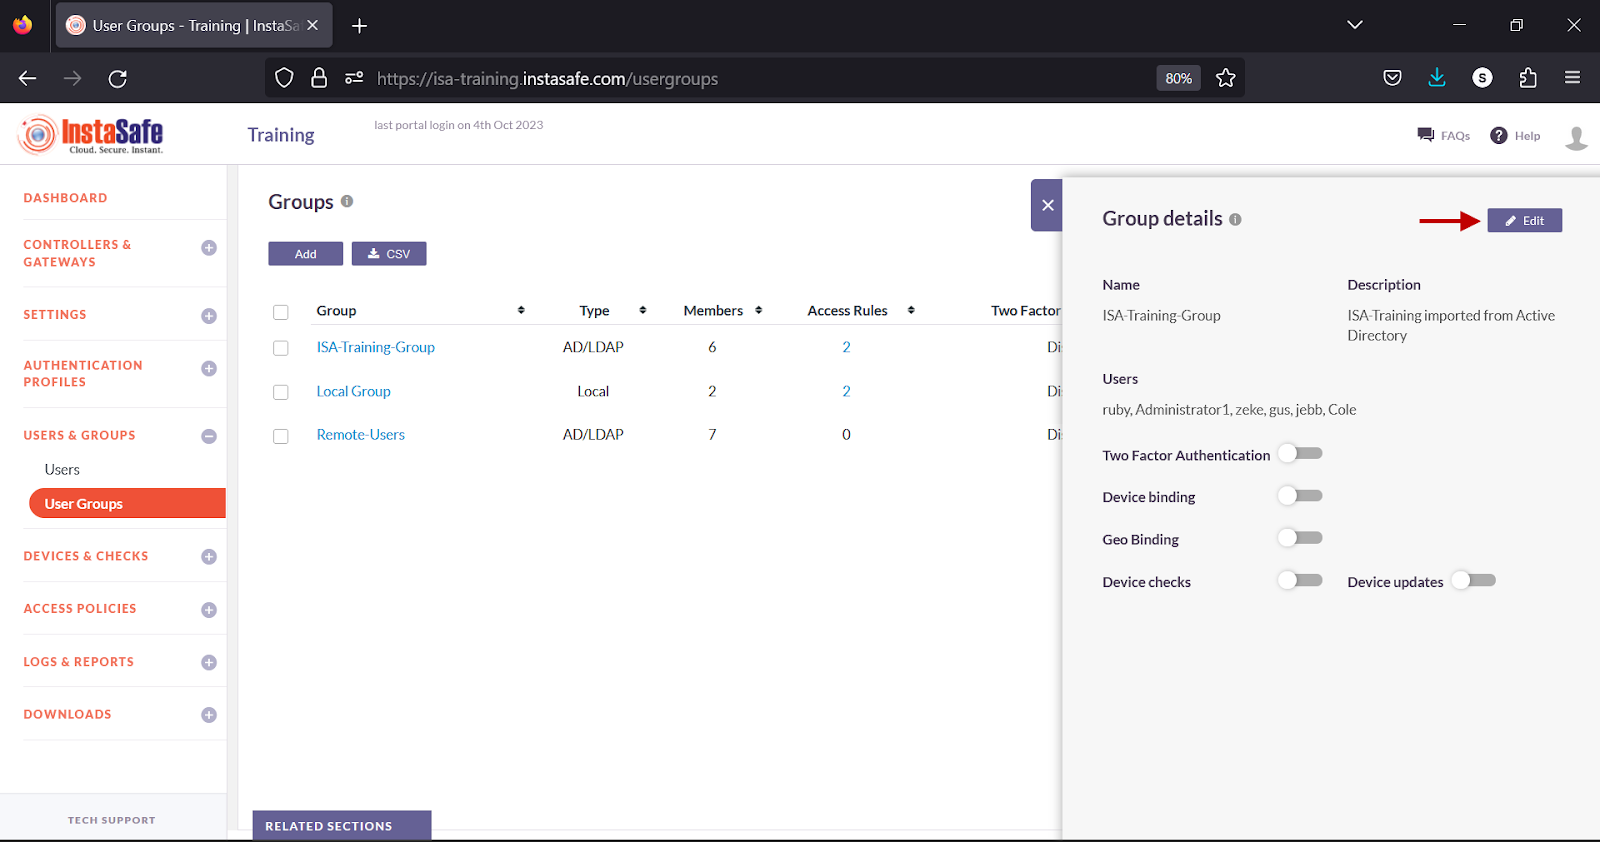
On the User Groups page, click the name of the user group.

- In the Group details window, click the Edit button.
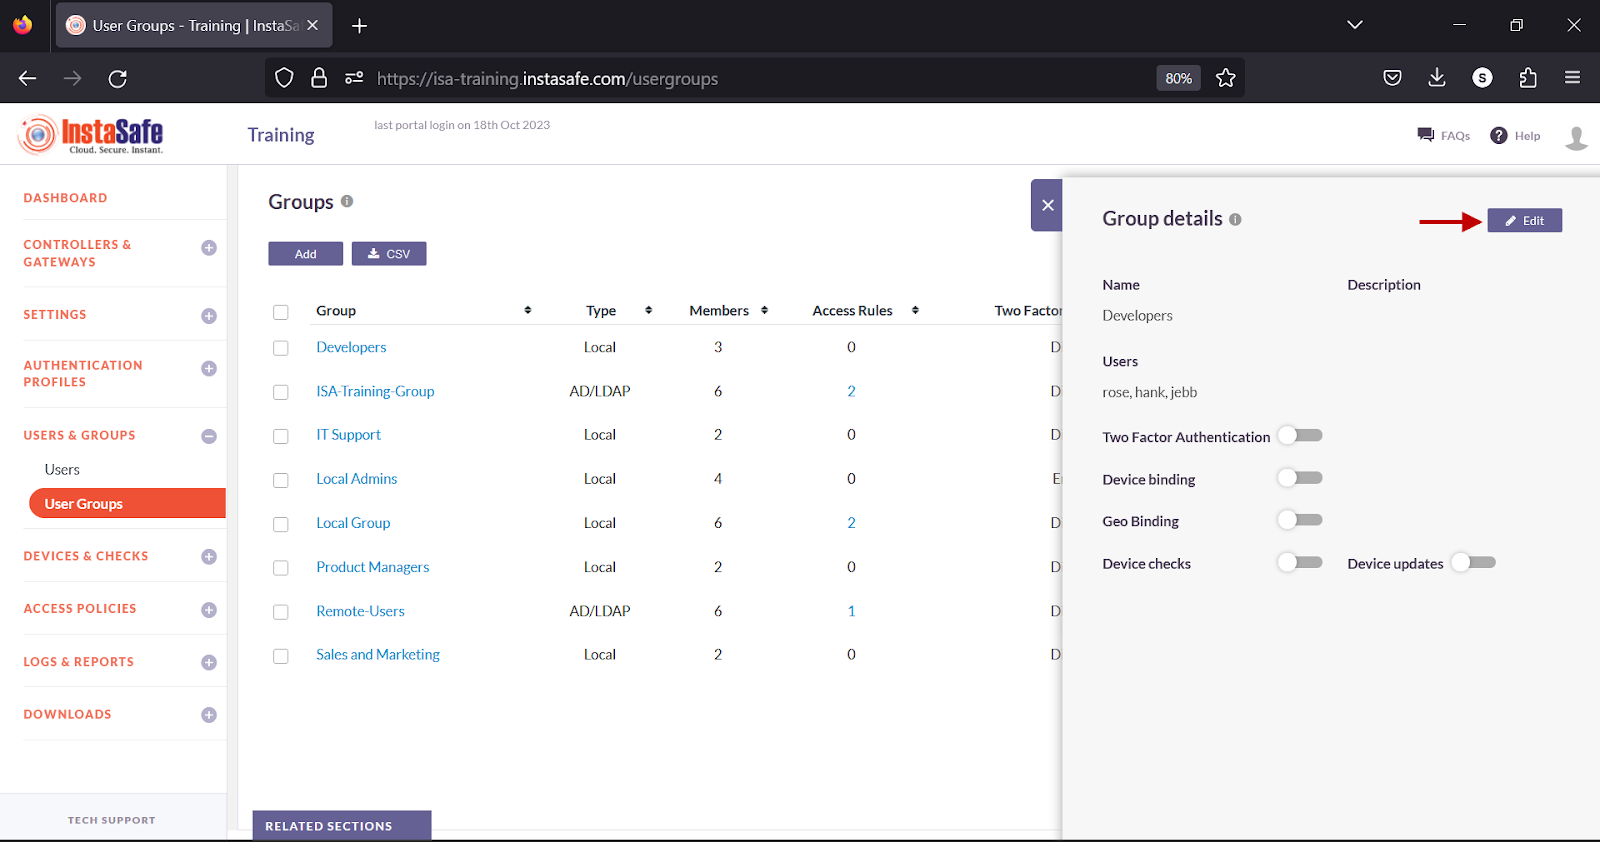
- You can add or remove users from within this window. You can also enable or disable the options available on this window. After making the changes, click Update at the bottom.
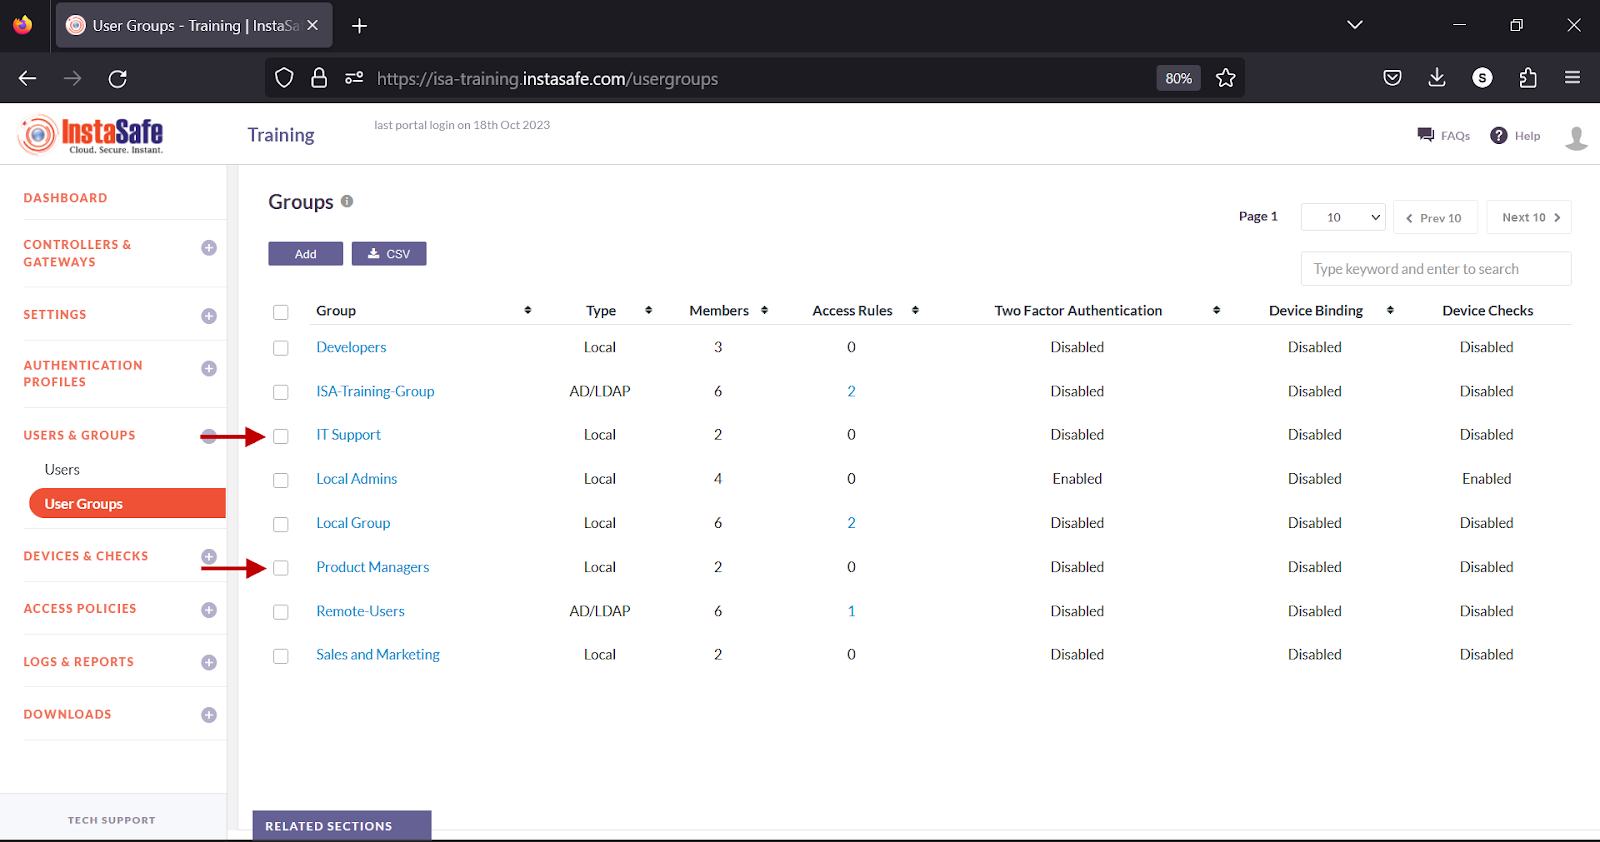
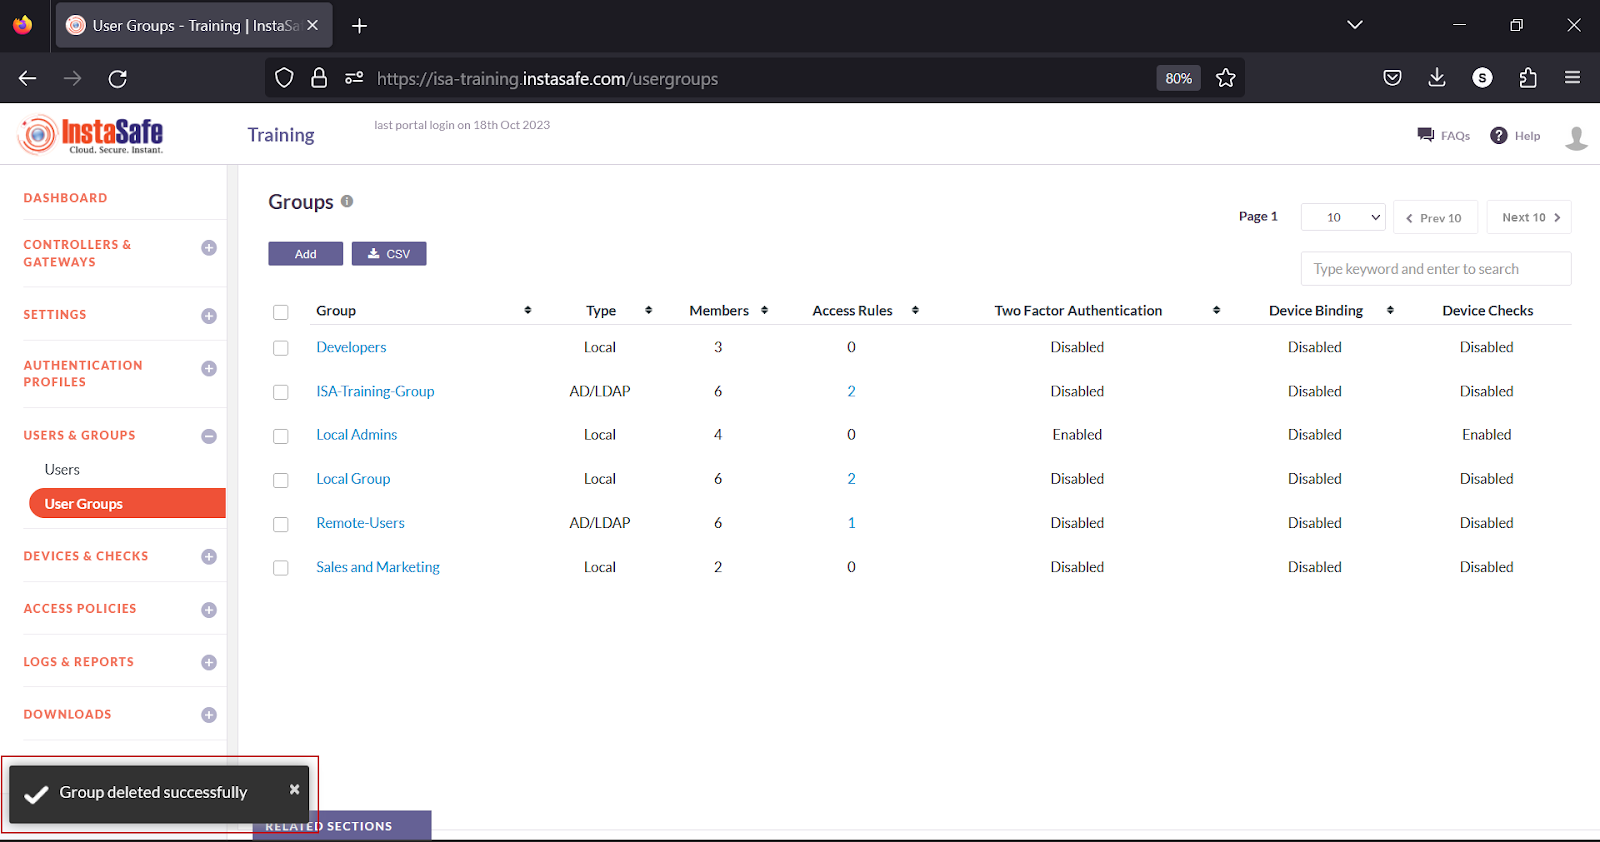
Delete User Groups
- Enable the check box alongside the group you wish to delete.
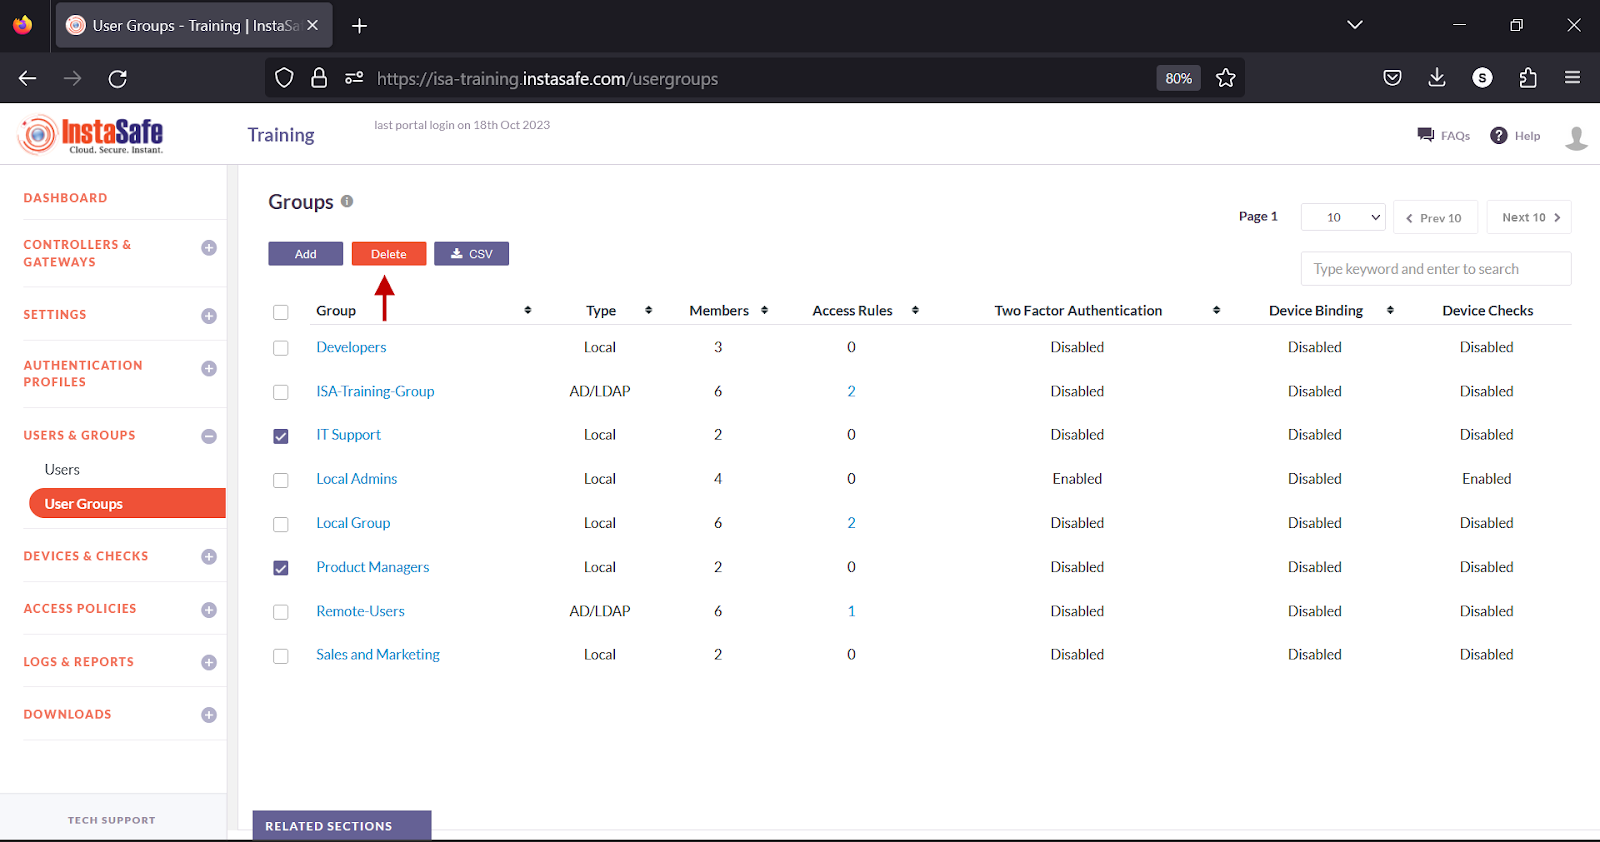
- Click the Delete button at the top.
- On the pop-up window, click Yes, Delete it!.
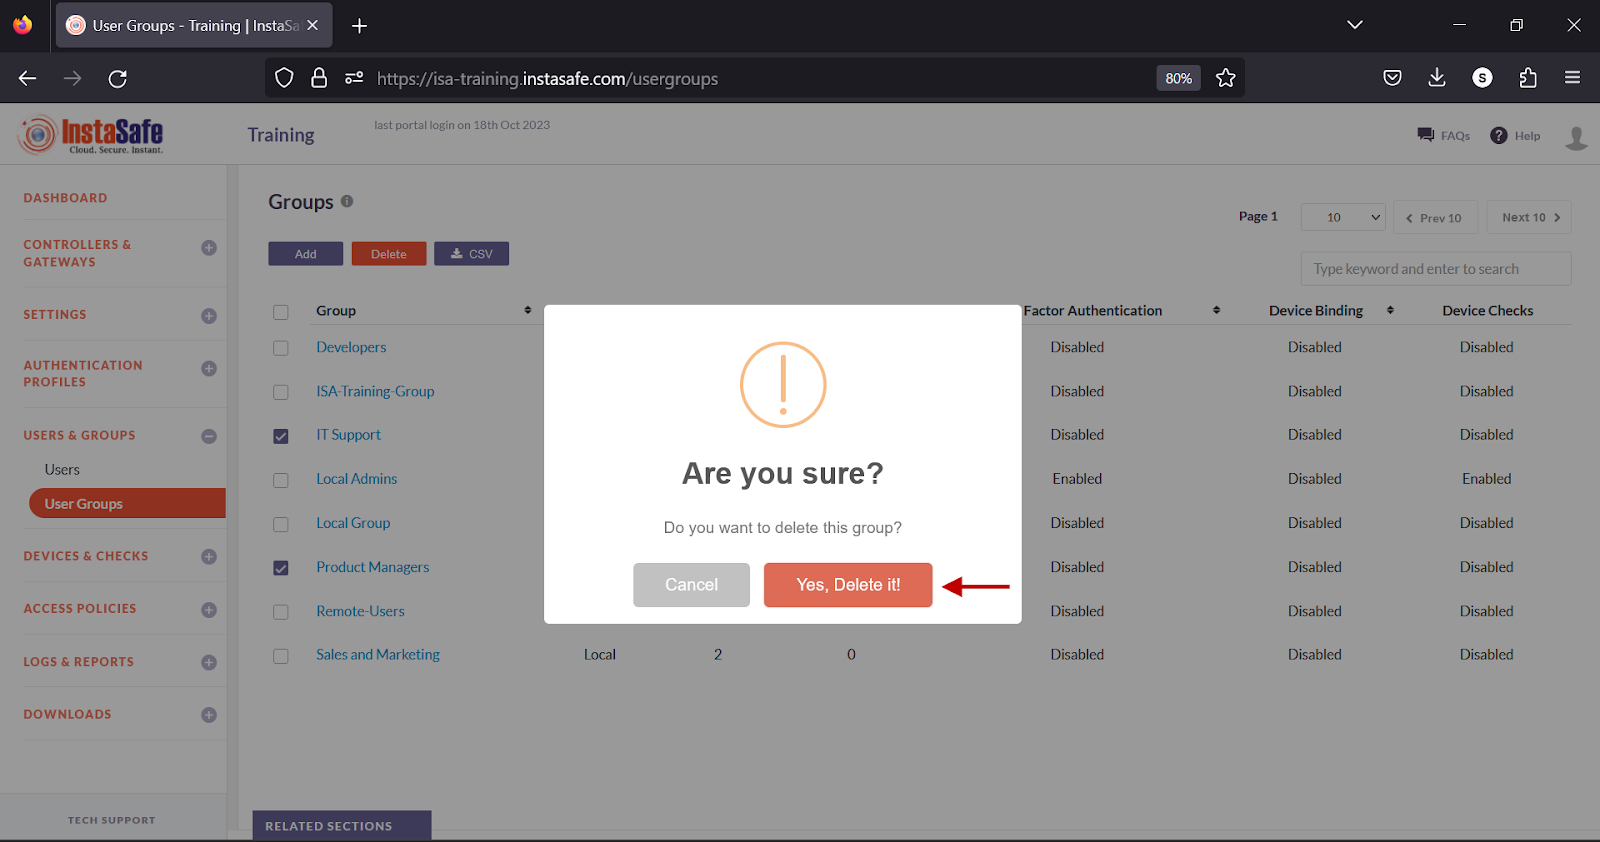
- On the bottom left, a Group deleted successfully message is displayed.
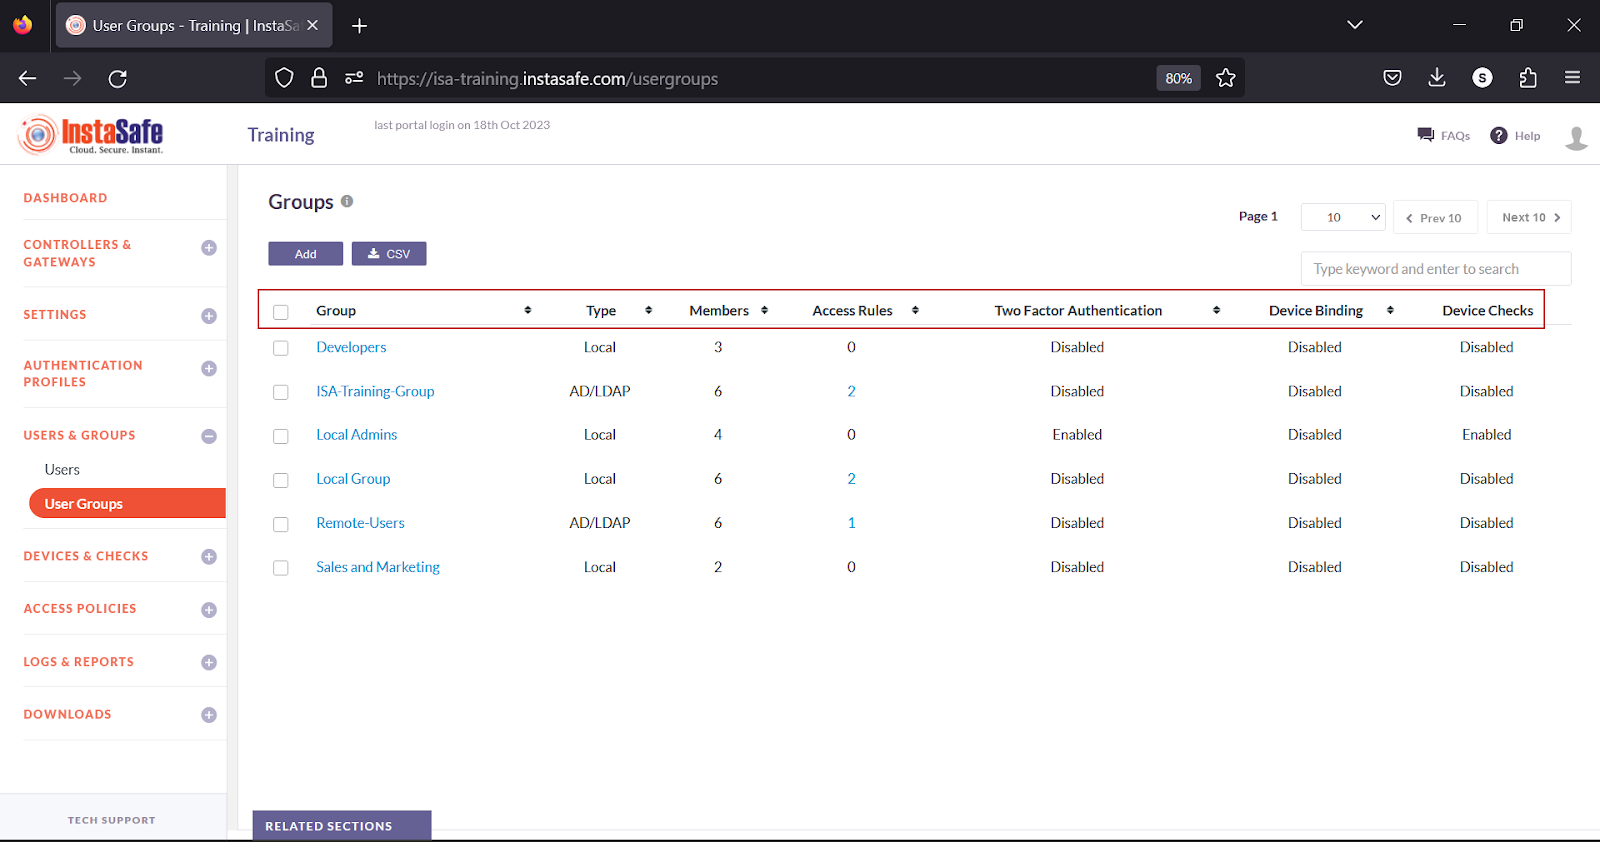
Navigating and Sorting the User Group list
The User Groups page allows easy pagination for viewing a large number of user groups. You can view user groups by using the navigation control bar at the top right of the page. Click the drop-down box to select the number of groups to be displayed on the User and Groups page. By default, it is set to display 10 groups. You can change it to display either 30 or 50 groups.
Click the Next button to view the next page of groups. Click the Prev button to view the previous page.
You can search a group by name by entering it in the search box.

To sort the users by Group, Type, Members, Access Rules, Two Factor Authentication or, Device Checks, click the respective header fields.
Conclusion
The User Groups page of the ISA web portal is the repository of user groups that can be configured for Two Factor Authentication, Device Checks, Geo Binding, and Device Updates of the users within the groups. Further, users within the groups can be allowed access to corporate resources by adding the groups within access rules.
Configure Geo Binding
Geo Binding helps ISA administrators to restrict the ISA User Agent connection to specific countries, thus further securing remote access to corporate resources. Geo Binding can be configured per user and per user group. More than one country can be selected as the source of the User Agent connection.
For the purpose of this article, the end-user device shown is a Windows PC.
- Log into the ISA web console using administrator credentials
- Navigate to the USERS & GROUPS > Users page.
- Click on the name of a user
-
Alternatively, click on the name of a user group on the User Groups page.
-
In the user window, click Edit
- Alternatively, in the Group details window, click Edit.
- Scroll Down
- Turn on the Geo Binding toggle.
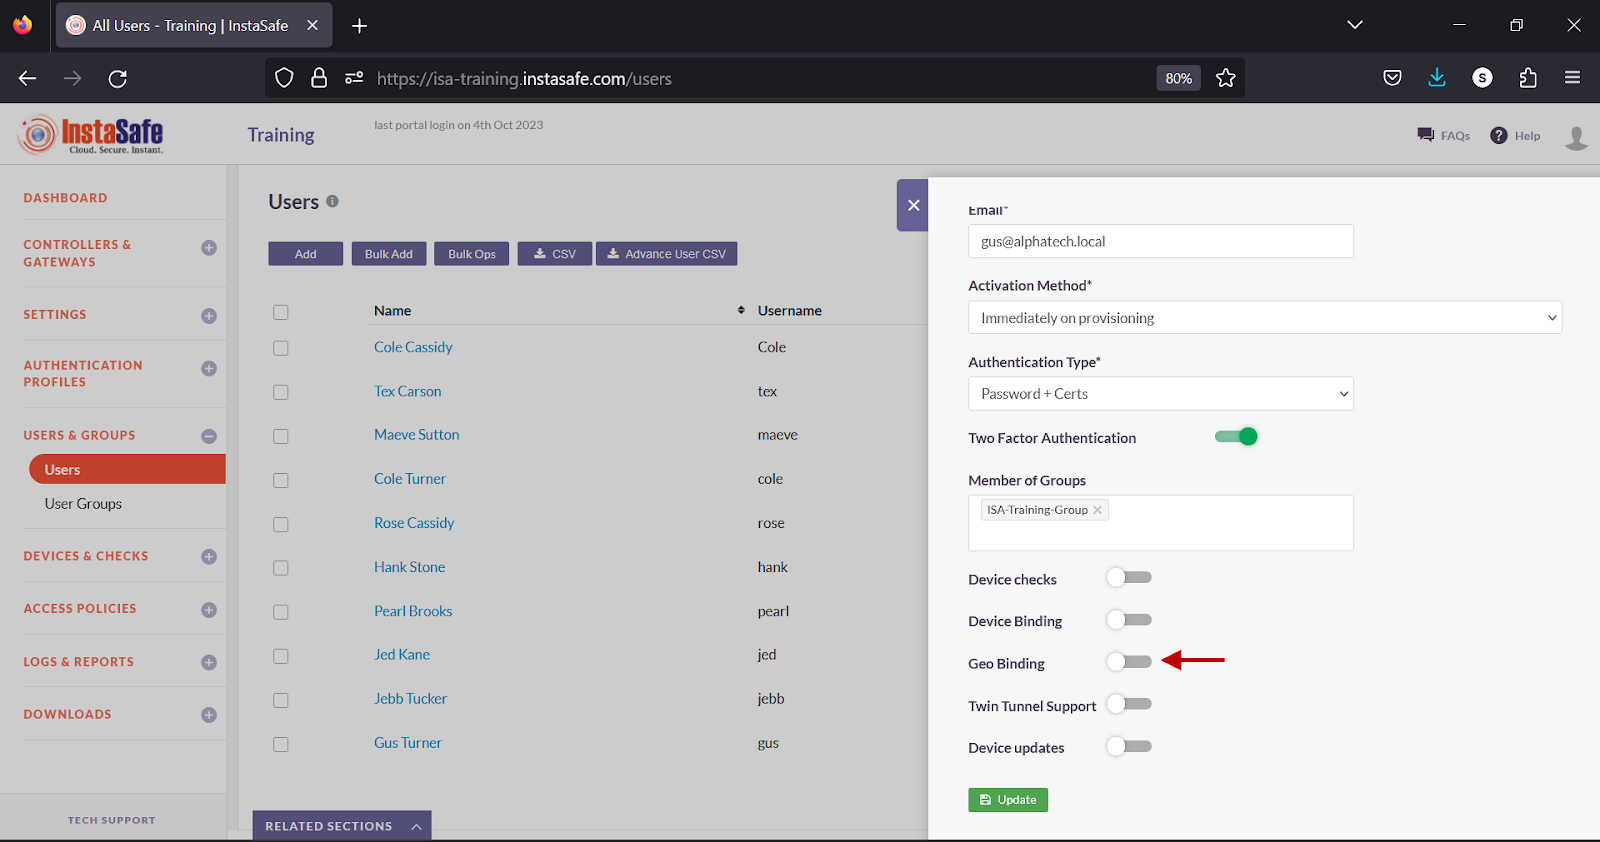
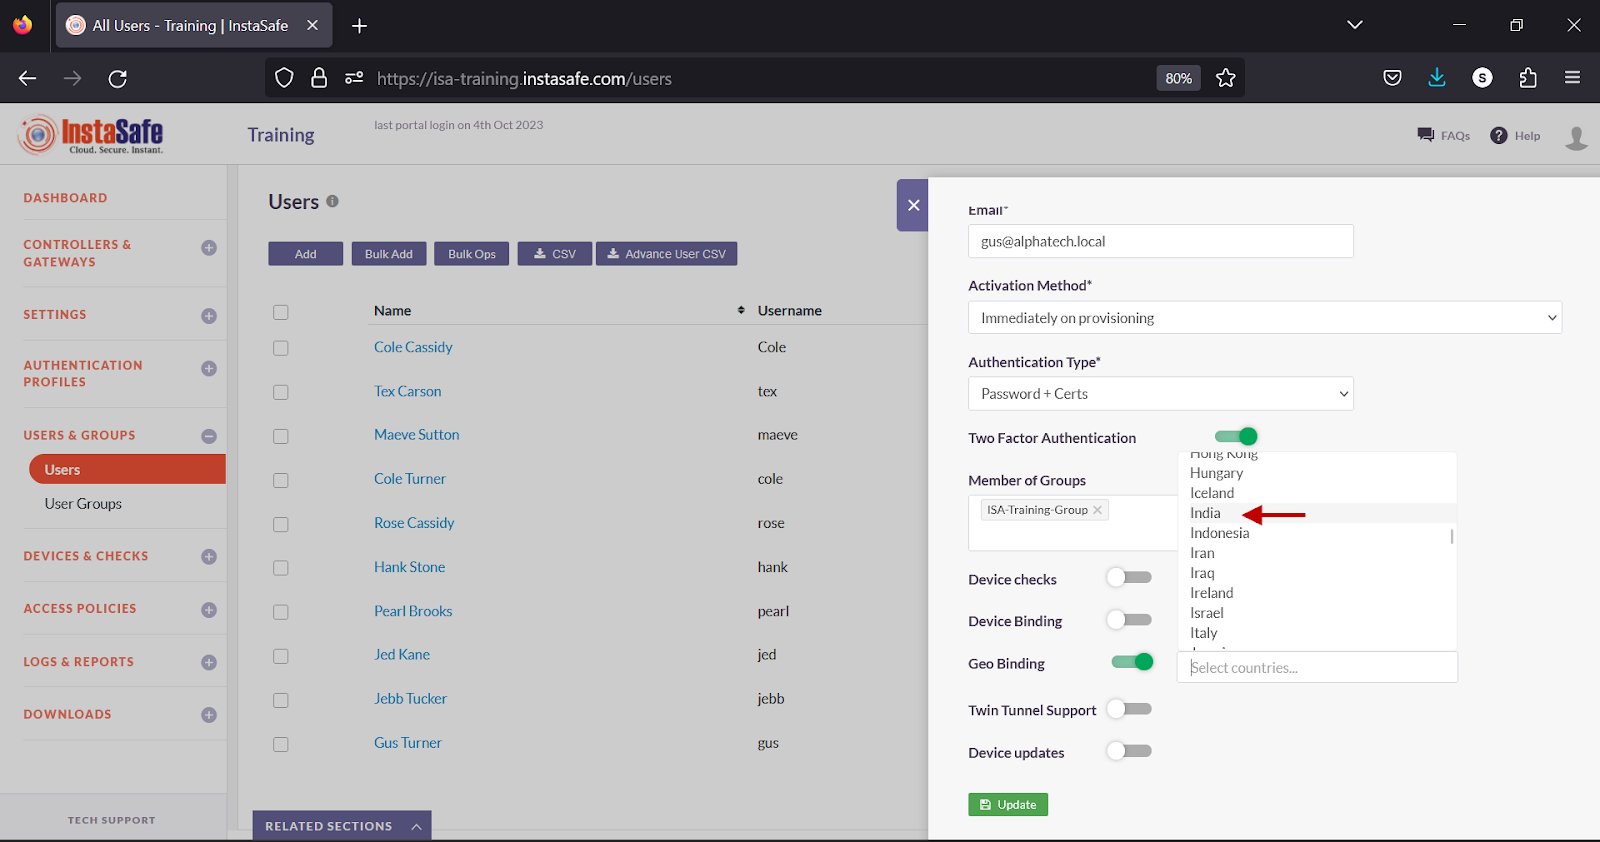
- Click inside the Select countries box.
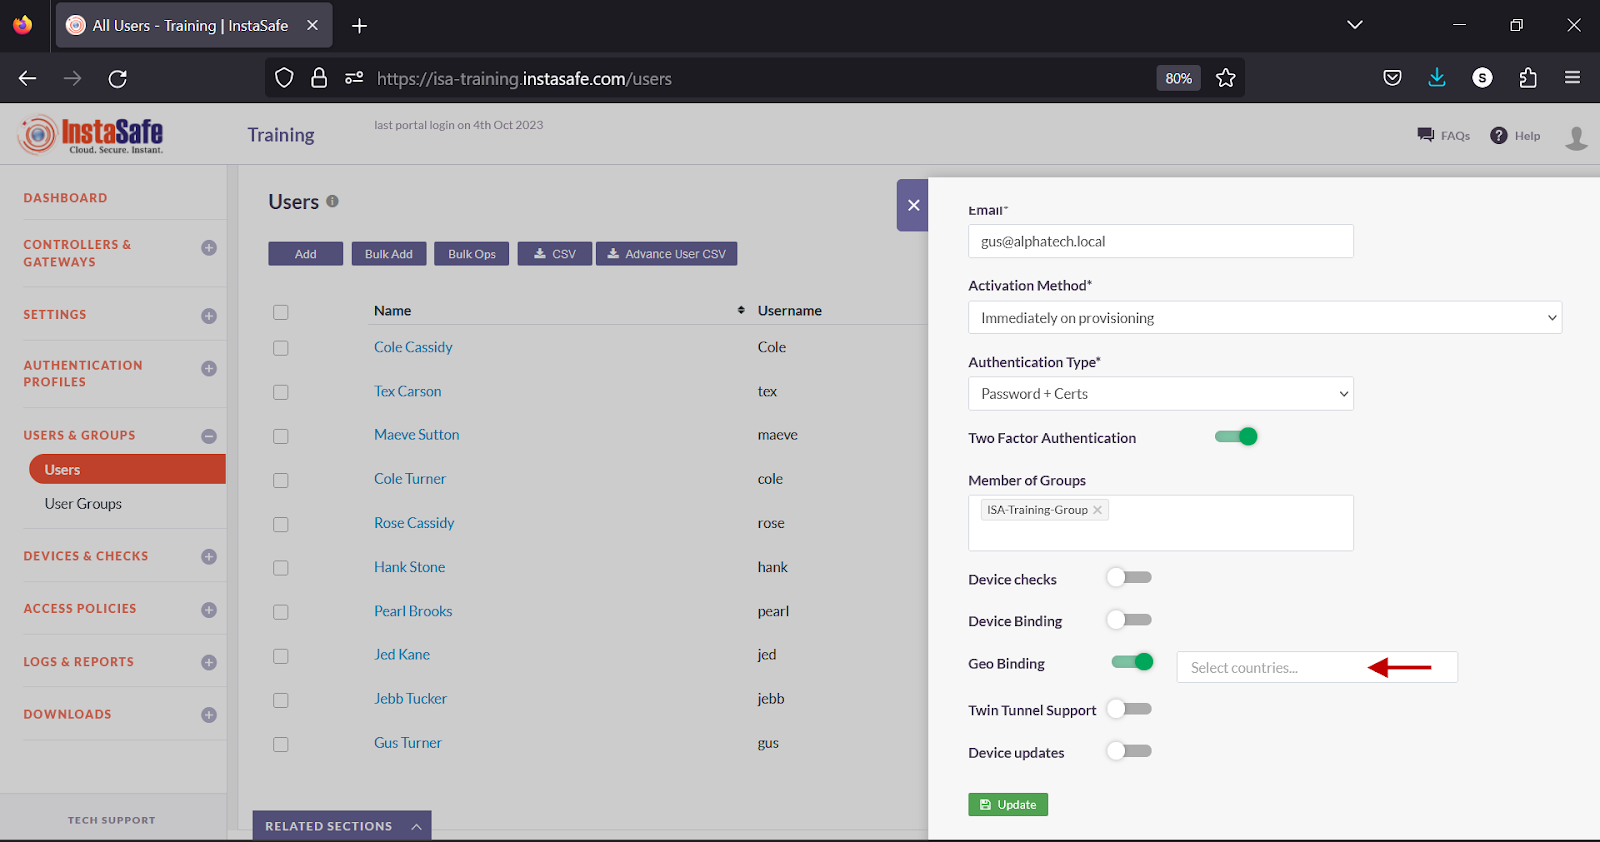
- Select the countries you want to allow the user or the user group to connect from.
- Click Update to save the change.
Conclusion
Geo Binding adds one more layer of security to the ISA User Agent connection process by restricting users to connect from certain allowed countries. If a user attempts to connect from a country not configured under Geo Binding, the connection is refused.
Configure 2FA
Two-Factor Authentication (TFA) adds one more layer of security to the ISA User Agent connection process, in addition to the username-password and certificate method of authentication. When TFA is enabled for a user or user group, the User Agent is presented with a menu to select the method to receive a One-Time Password (OTP). Once the user selects the method, the user is prompted to enter the OTP. On successful verification of the OTP, the Agent proceeds to complete the connection and establishes a tunnel.
The MFA push notification menu is not displayed for MacOS and Linux users. Instead, the OTP field is displayed without giving the option to the user to choose the method to receive the OTP.
- Here is the workflow of the User Agent connection when TFA is enabled:
- The ISA User Agent connects to the ISA authentication server over TLS port 443. The server prompts for the username and password (if configured). If Always-On mode is enabled, it would prompt for username and password only once, at the time of installation.
- Once the username and password authentication is successful, the server makes API calls for validating Device Binding, Geo Binding, and Device Checks, if configured.
- If authentication and compliance is successful, the server sends push notification to select the method to receive OTP.
- User selects the method and the Agent forwards it to the server
- The server prompts for OTP
- User enters the OTP and the Agent forwards the OTP to the server
- Server verifies the OTP and, if verified, it proceeds to complete the connection.
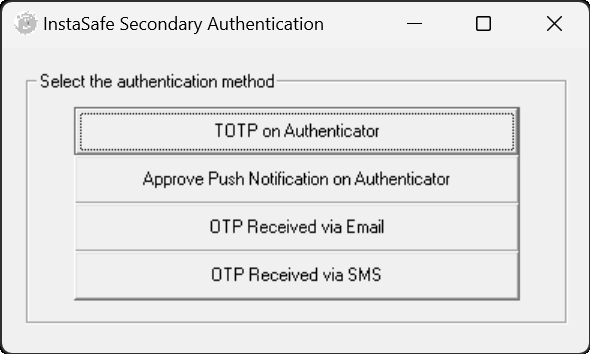
The menu to select the method to receive the OTP has the following options:
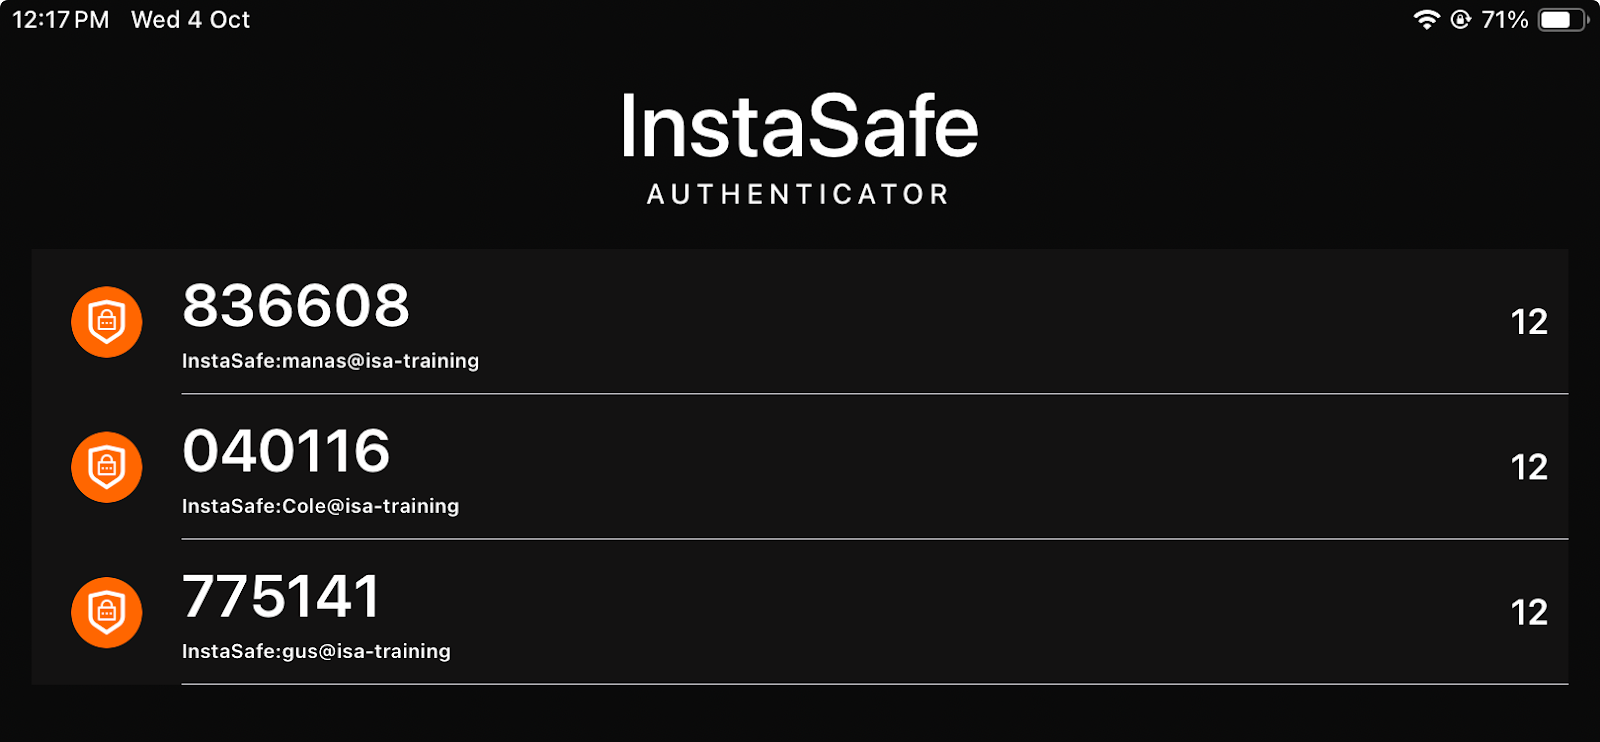
- TOTP on Authenticator - Time-based OTP generated on the InstaSafe Authenticator app installed on a mobile device.
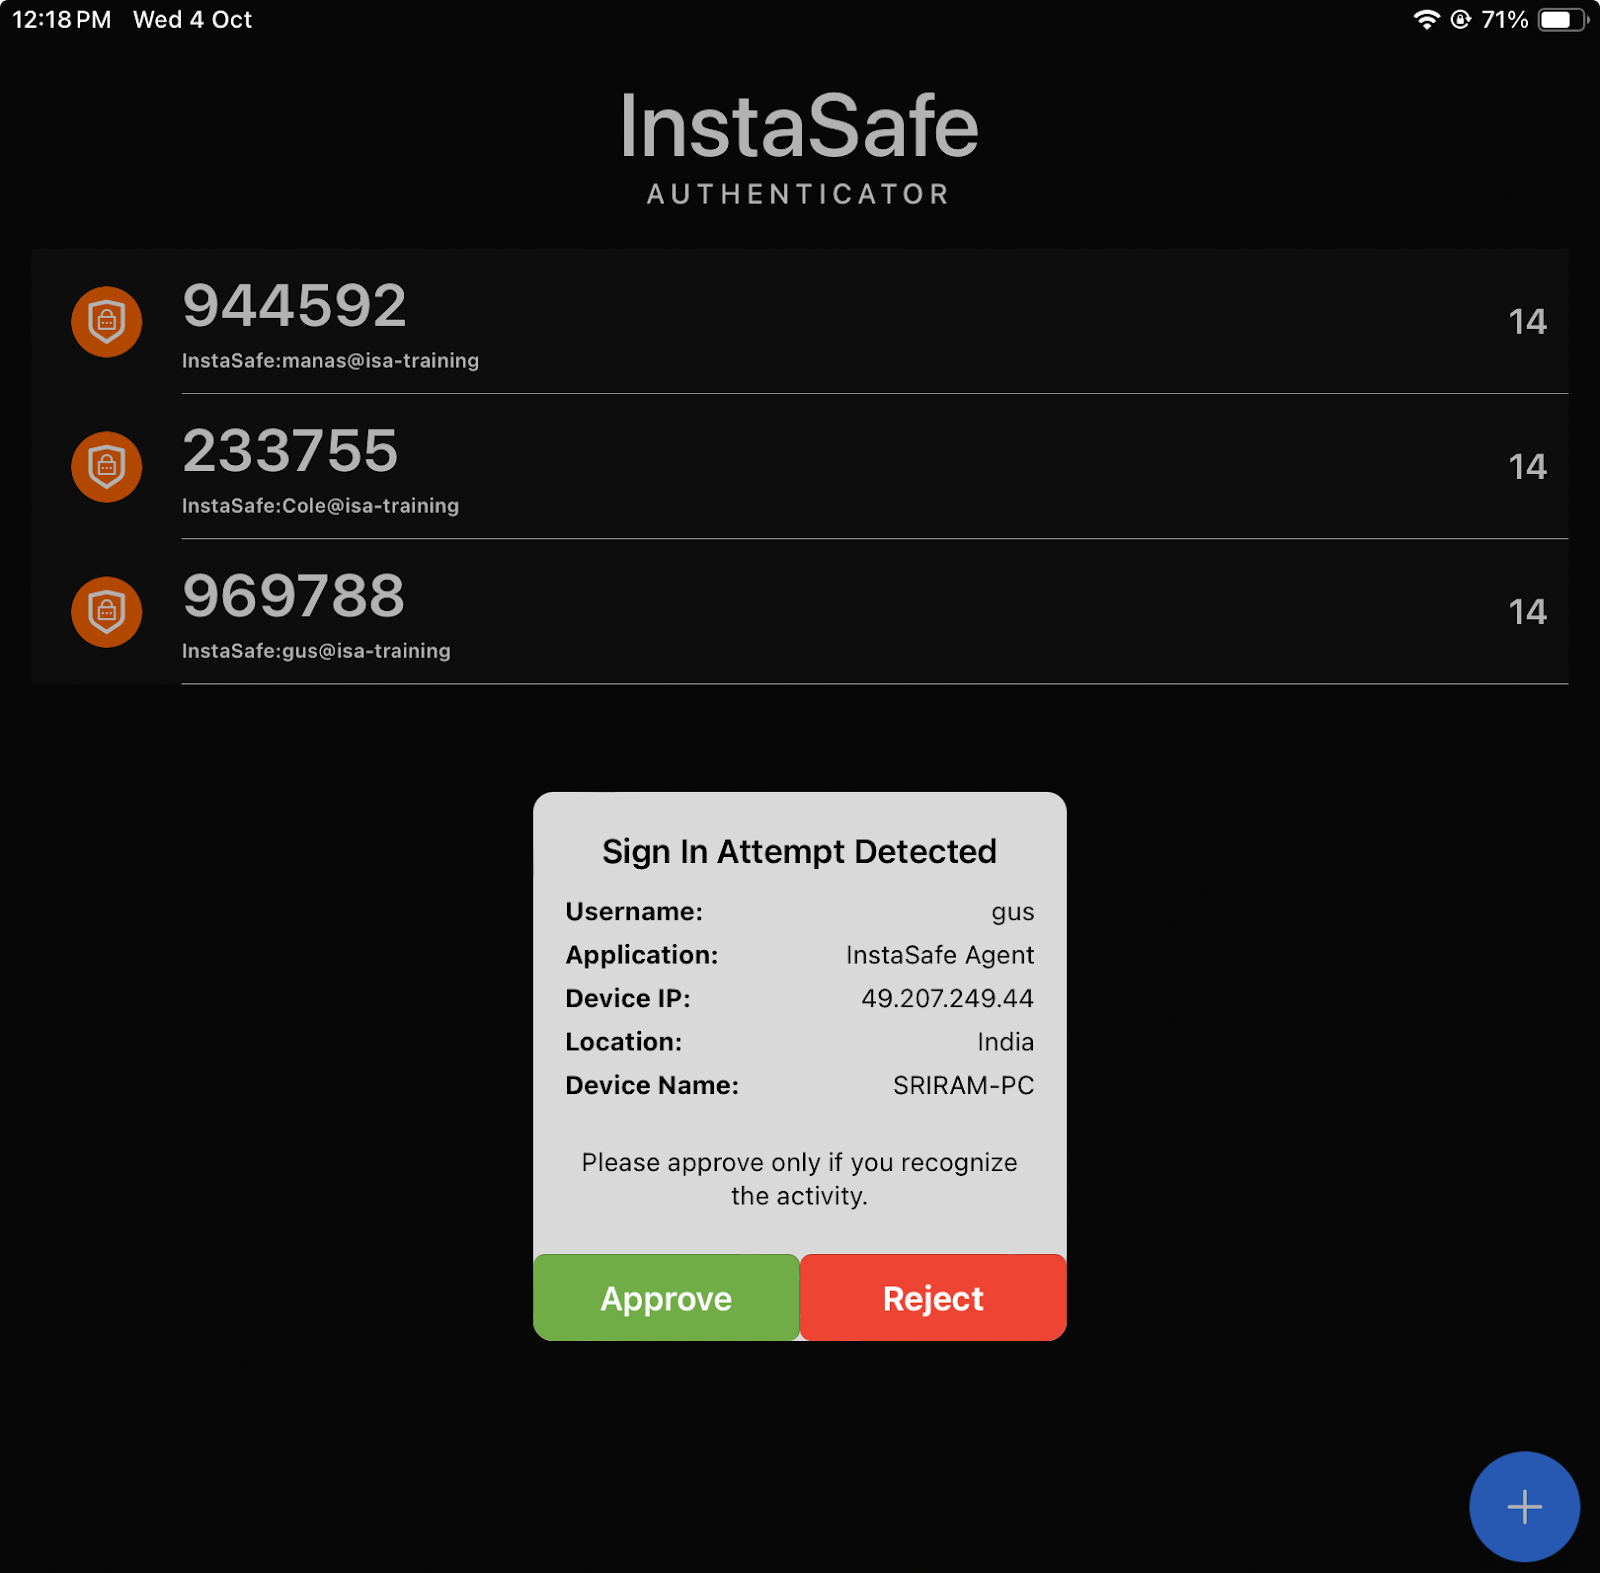
- Approve Push Notification on Authenticator – Approval by clicking Approve on the push notification received on the InstaSafe Authenticator app.
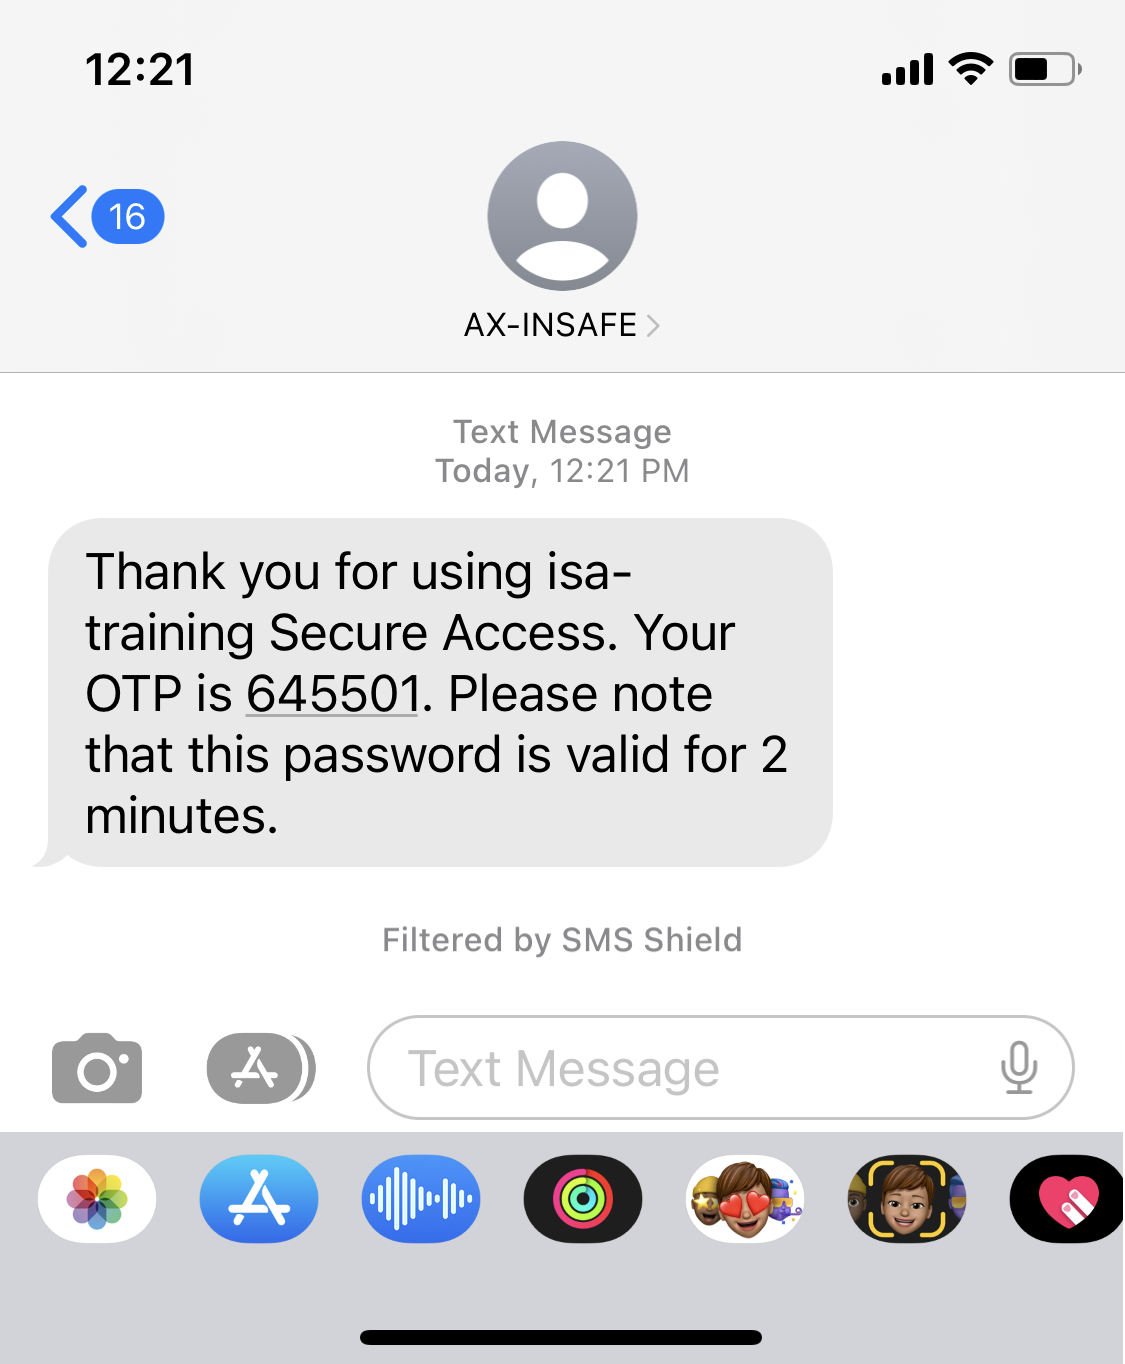
- OTP via SMS – OTP received via SMS on the user’s phone. A valid phone number must be entered in the user profile to receive OTP.
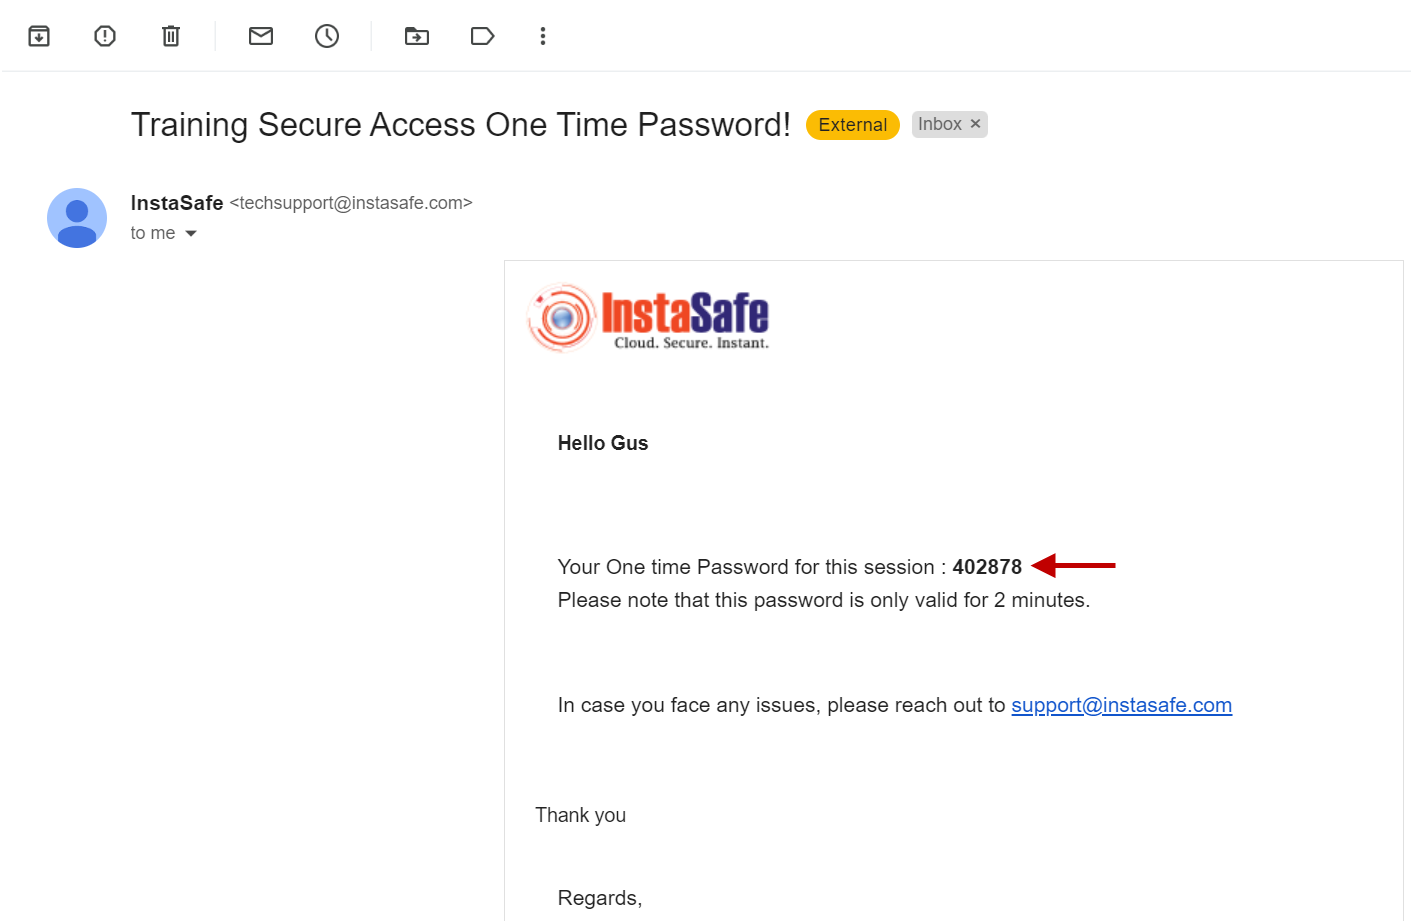
- OTP via Email – OTP received via email. A valid email address must be entered in the user profile to receive OTP.
This article describes the step-by-step method to configure TFA on the ISA web console. For the purpose of this article, the end-user device shown is a Windows PC.
- Log into the ISA web console using administrator credentials
- Navigate to the USERS & GROUPS > Users page.

- Click on the name of a user
- Alternatively, click on the name of a user group on the User Groups page.

- In the user window, click Edit

- Alternatively, in the Group details window, click Edit.
- Turn on the Two Factor Authentication toggle.

- Scroll down.
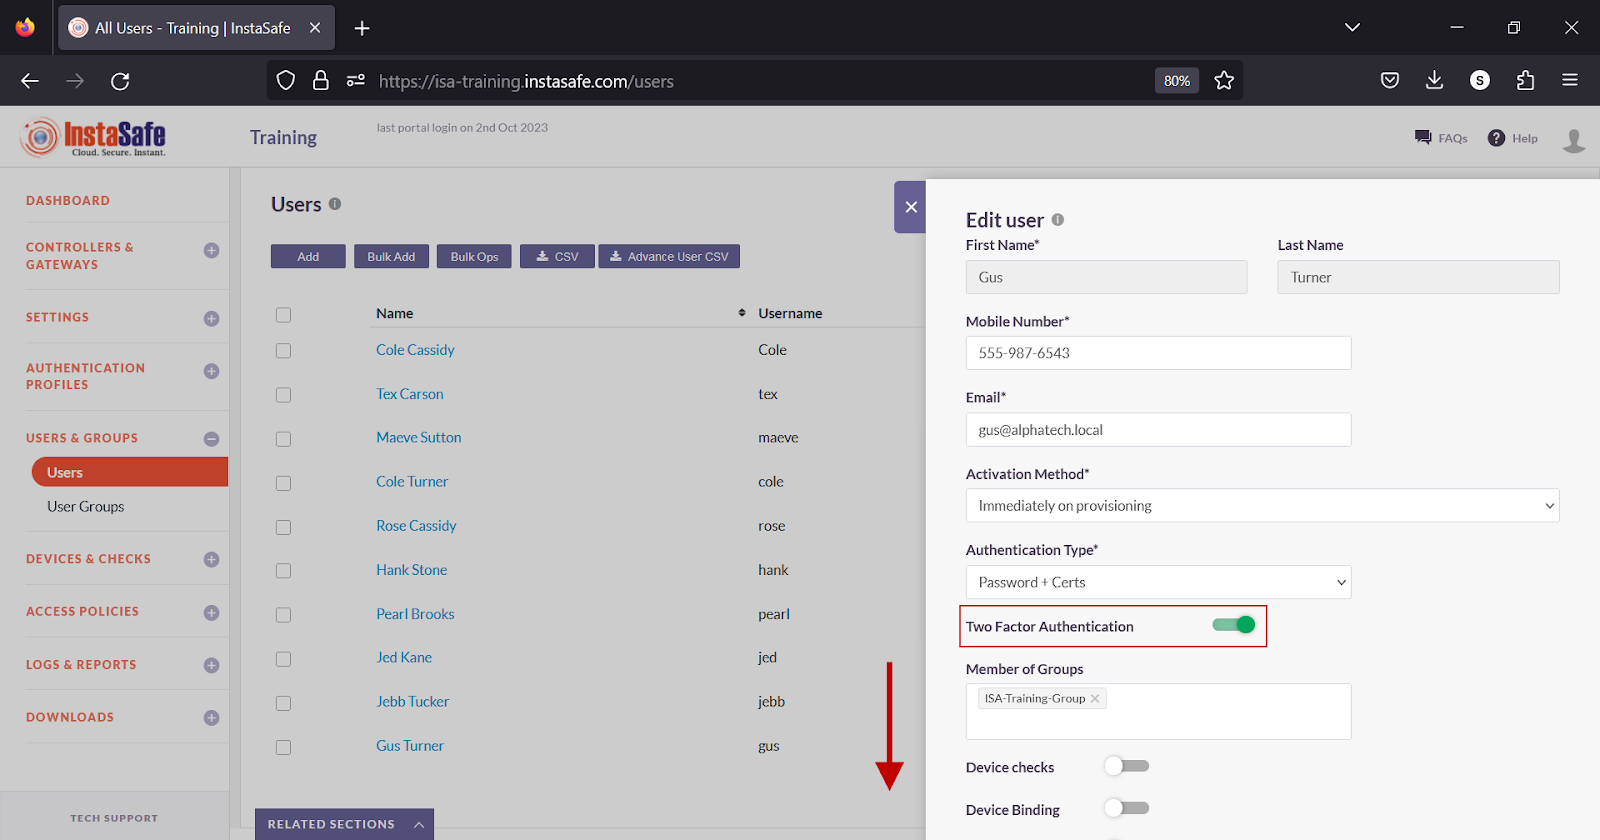
- Click Update to save the change.
Testing
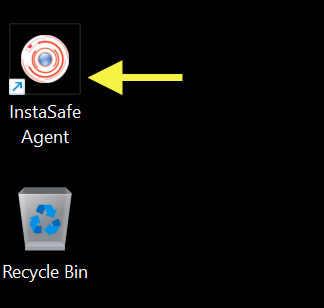
- On the end-user device, start the ISA User Agent.
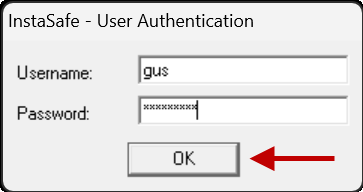
- Enter the username and password of the user (if Authentication Type is set to Password+Certs).
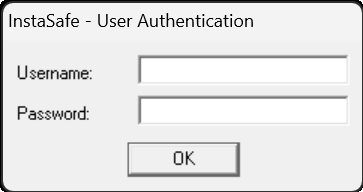
- Click OK to submit the credentials.
- When the user is prompted to select a method to receive the OTP, select the method.
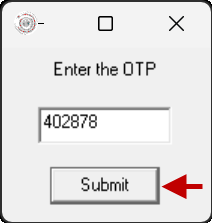
- On the OTP prompt, enter the OTP received via the InstaSafe Authenticator app, Email or SMS.
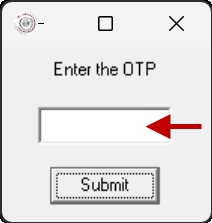
Click Submit to the submit the OTP.
- Alternatively, click Approve on the push notification received on the InstaSafe Authenticator app.
Methods of receiving OTP
- TOTP on InstaSafe Authenticator
- OTP Received via Email
- OTP Received via SMS
Conclusion
Two-Factor Authentication (TFA) adds one more layer of security to the ISA User Agent connection to access corporate resources. The objective of TFA is to create a layered defence that makes it more difficult for an unauthorized person to access a target, such as a physical location, computing device, network or database.
If one factor is compromised or broken, the attacker still has at least one or more barriers to breach before successfully breaking into the target.